Excel(xlsx) / Edit data

Home > User guide > BOT > How to use the BOT editor > Extention> Excel(xlsx) > Excel(xlsx) / Edit data
App overview
Edit data in an Excel file with a .xlsx extension.
| Extended Feature URL | cbot-extension://cloud-bot:xlsx:edit-data:2 |
| Provider | Cloud BOT official |
| External communication | None |
| Version | 2 |
Screen description
Input screen
Step 1

Excel file
Select the target Excel file.
Step 2
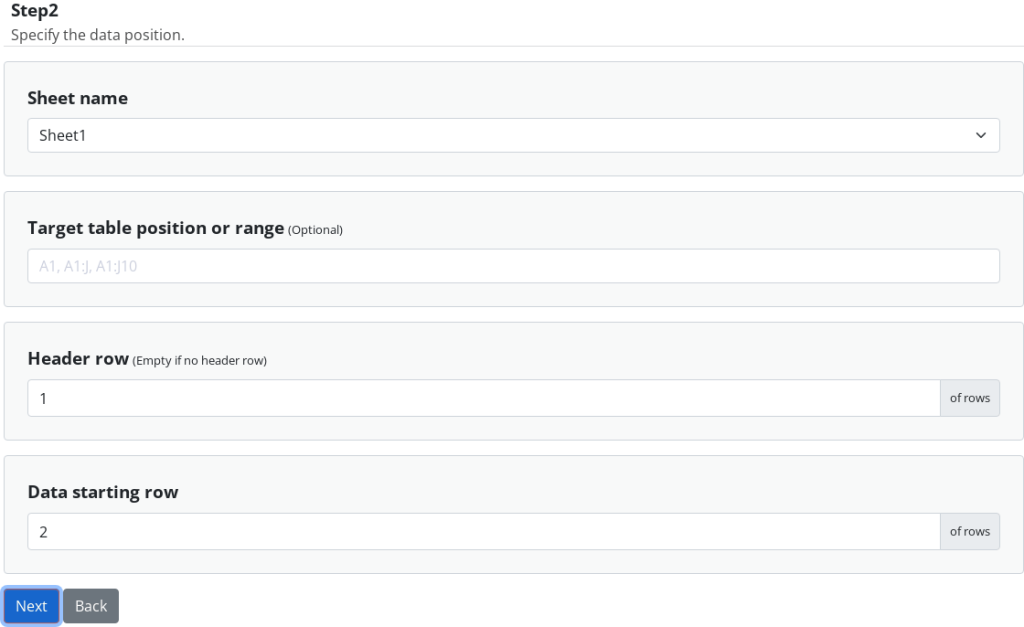
Sheet name
Select the sheet to edit.
Targeted table position or range (optional)
This option allows you to specify a range of cells to target. If not specified, the target is the entire sheet of choice. Refer to this page about a targeted table position or range.
* If the same header exists, they are displayed in order from left column to right.
Header row
Specify the header row. Refer to this page about a header row.
* Leave blank if the header row is not necessary. An alphabet is assigned automatically for a column name.
Data starting row
Specify the data starting row. Refer to this page about a data starting row.
Step 3
Target table range
The target table range is displayed.
Number of data rows
The number of data rows in the target table range is displayed.
Data row to start editing
Specify the starting row of the data range to be edited.
*The specified "Data starting row" will be the first row.
*If a negative value is specified, it indicates the number of rows from the last line of the existing data rows. (e.g., if "-2" is specified, the second row from the last row is the starting line to be edited.
Number of data rows to editing
Specify the number of rows to be edited from the number of rows specified in "Data Rows to Start Editing.
*If you specify a range that exceeds the range in which data exists, rows with no data are excluded from the data range to be edited.
Specify column order (Optional)
If you want to limit the column to display, specify the column name. Columns are displayed in the order in which the names are specified, from left column to right. You can increase or decrease columns to be displayed by pressing the Add / Delete buttons.
* If multiple columns have the same name, they are displayed in order from left column to right.
* If not specified, all columns are displayed.
Display format
Specify the display format of numbers and formulas from "formatted value" or "raw value". Refer to this page about raw value.
Date format
Specify the date format.
Time format
Specify the time format.
Step 4
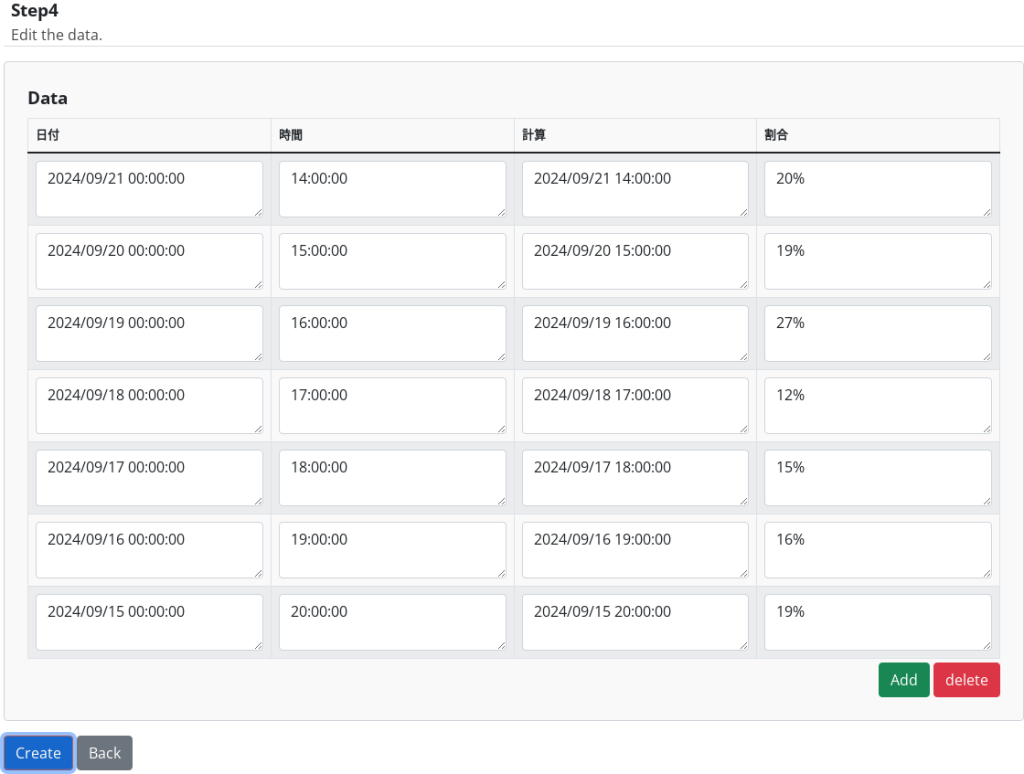
Data
Input data to add. You can increase or decrease data rows by pressing the Add / Delete buttons.
[Link elements and rows] function is useful to paste group data.
[ Display Processing]
For a file with a large amount of data, an error may occur due to timeout (*) of display processing.
The following methods will reduce the load on the display process.
- Specify "raw value" as a display format.
- Specify column order and range of number of rows of data to be displayed
* Display processing will result in a timeout error in 29 seconds.
Result Screen

Press the Download button to download the file.