BOT

Home > User guide > BOT
Japanese may be displayed on some pages.
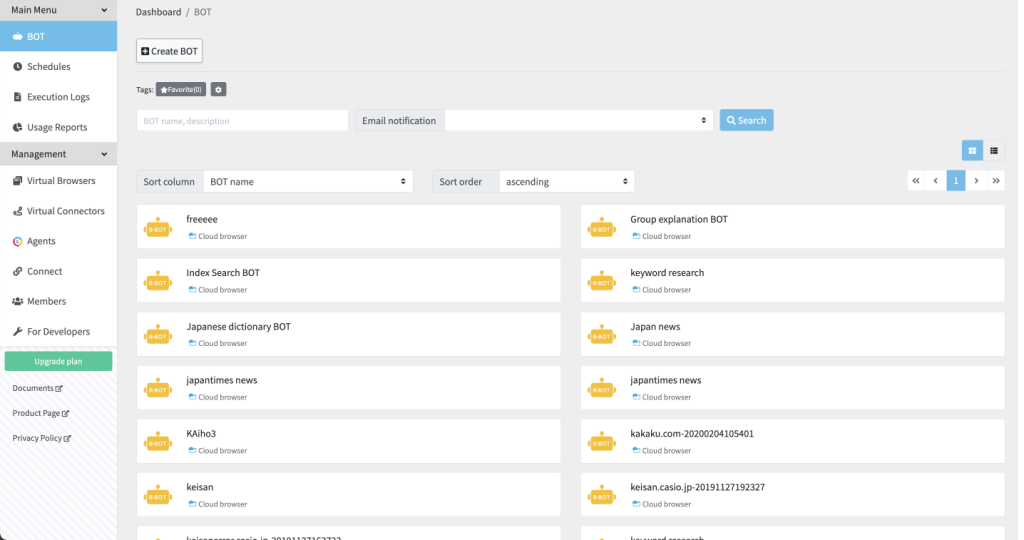
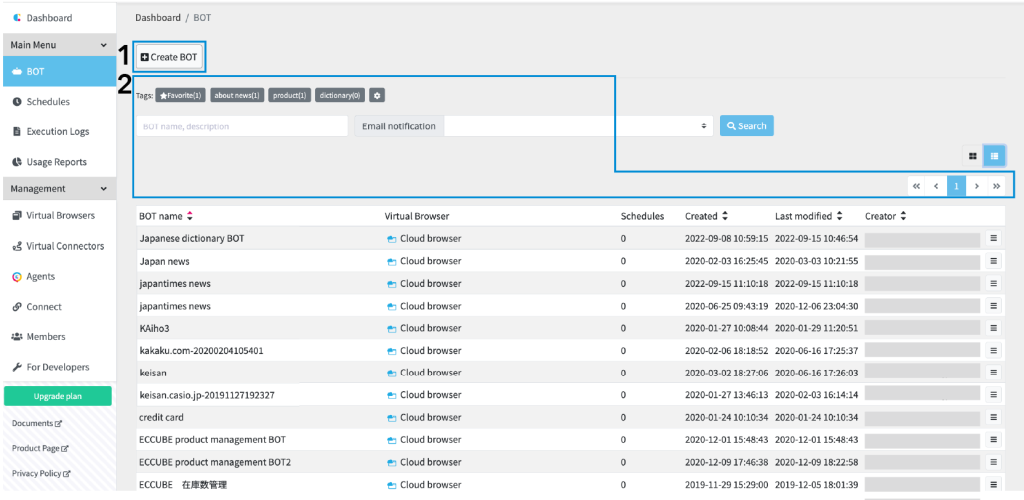
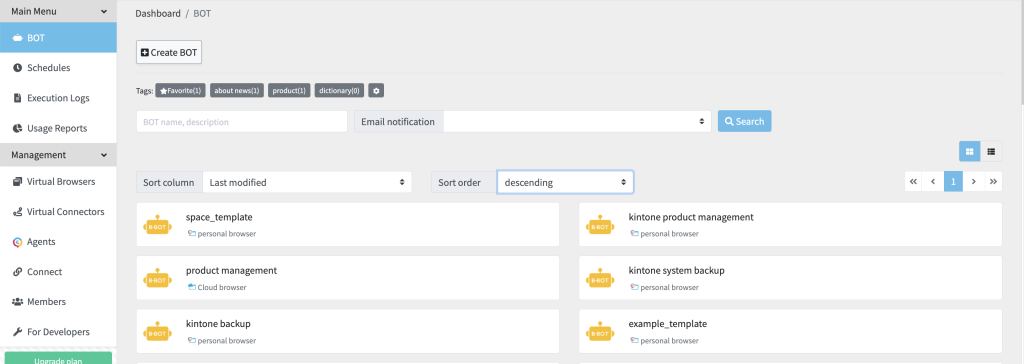
BOT list
Transition from "BOT" in the global menu. The created BOTs are displayed in the list.
Displays 100 BOTs per page.
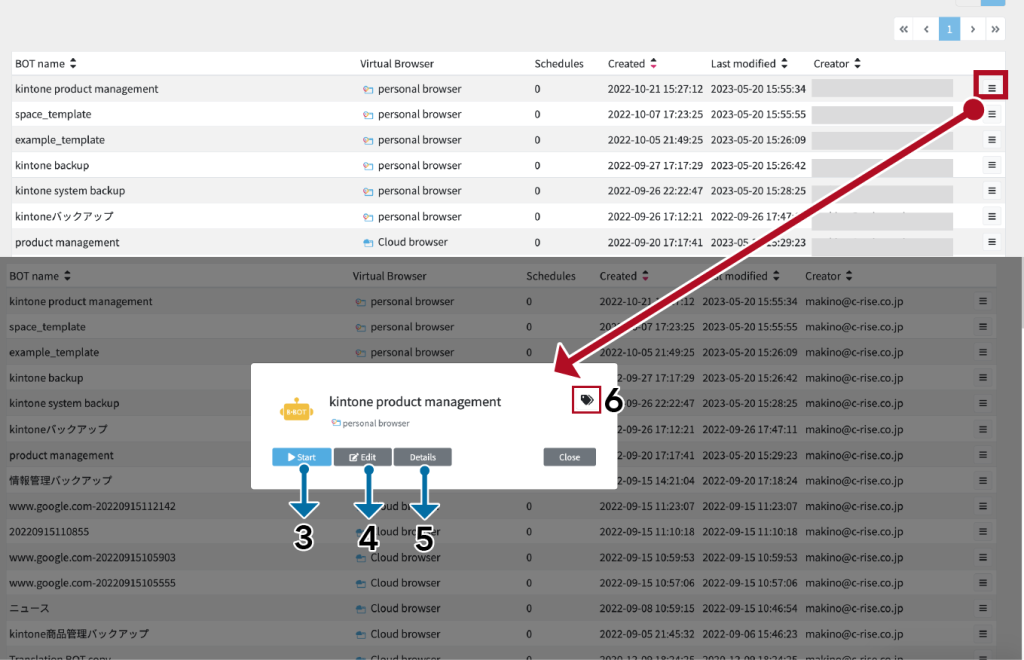
Card view and list view
The list can be displayed with a card view or a list view and you can switch the view between them. Switch the view with icons indicated in the red frame in the image below.
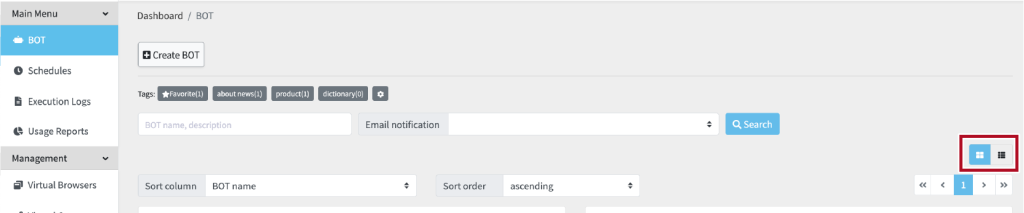
[Card view]
[List view]
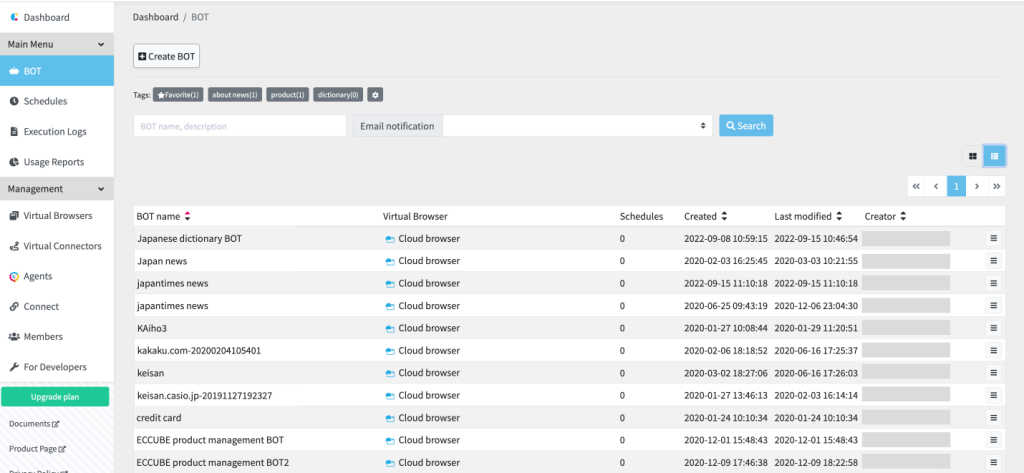
About the screen and operation
[Card view]
[List view]
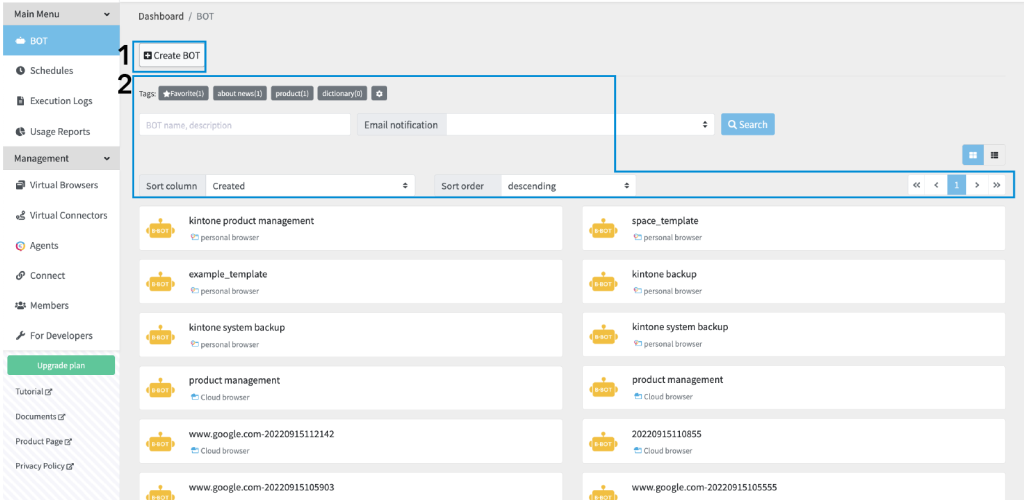
The following operations are available from this screen.
Create a BOT
Create BOT
Click the 'Create BOT' button to open the BOT editor and create a BOT.
The screen for creating a BOT will be displayed in a separate window. Refer to "How to use the BOT Editor" for details.

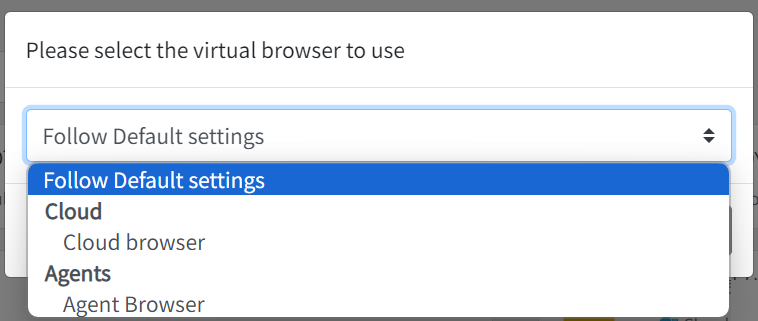
If you have created multiple virtual browsers, click the [Create BOT] button to display a modal window that prompts to select the virtual browser to use. Select the virtual browser and click [OK].
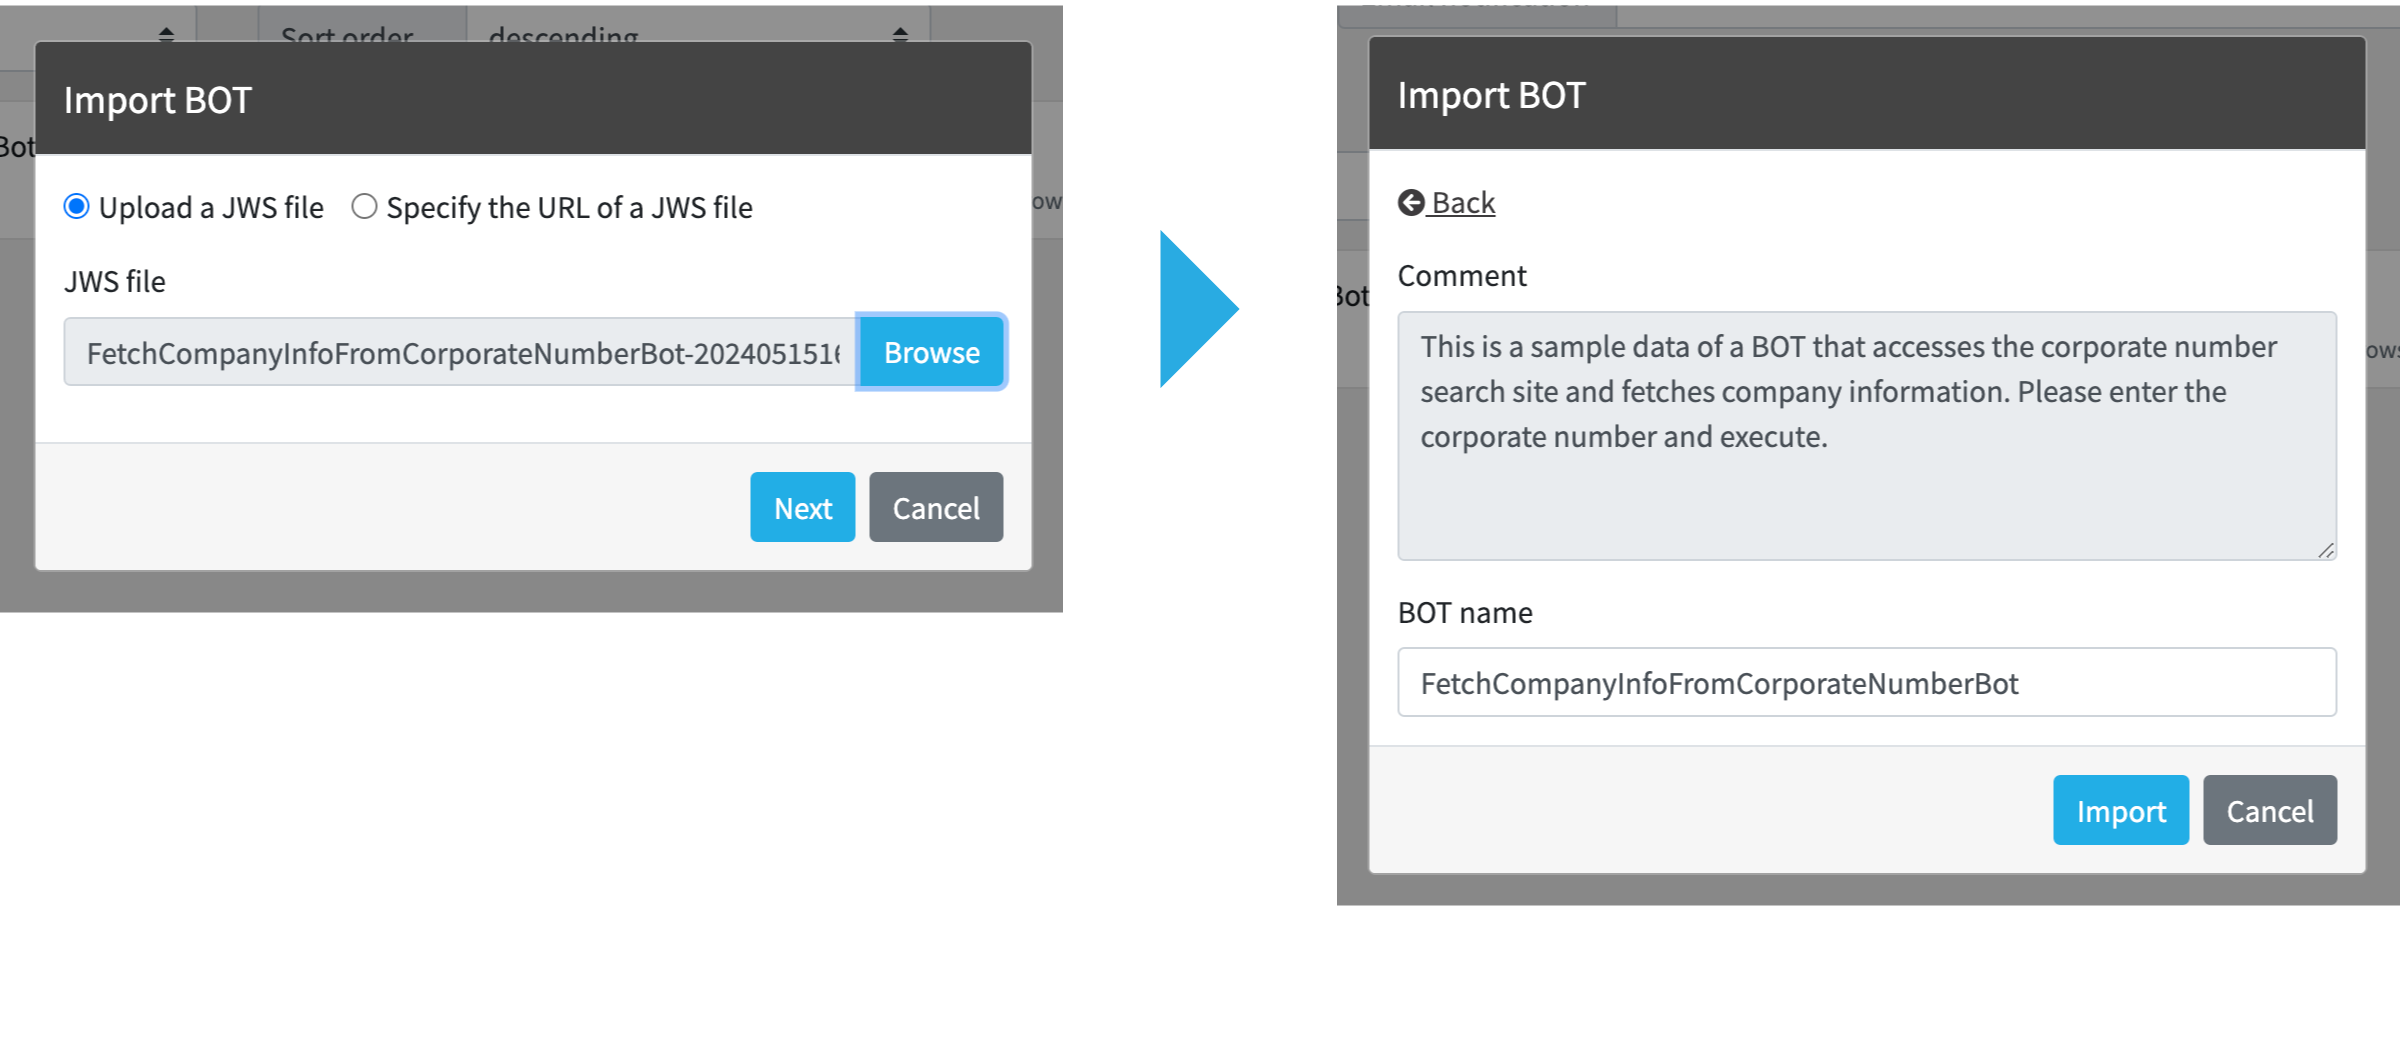
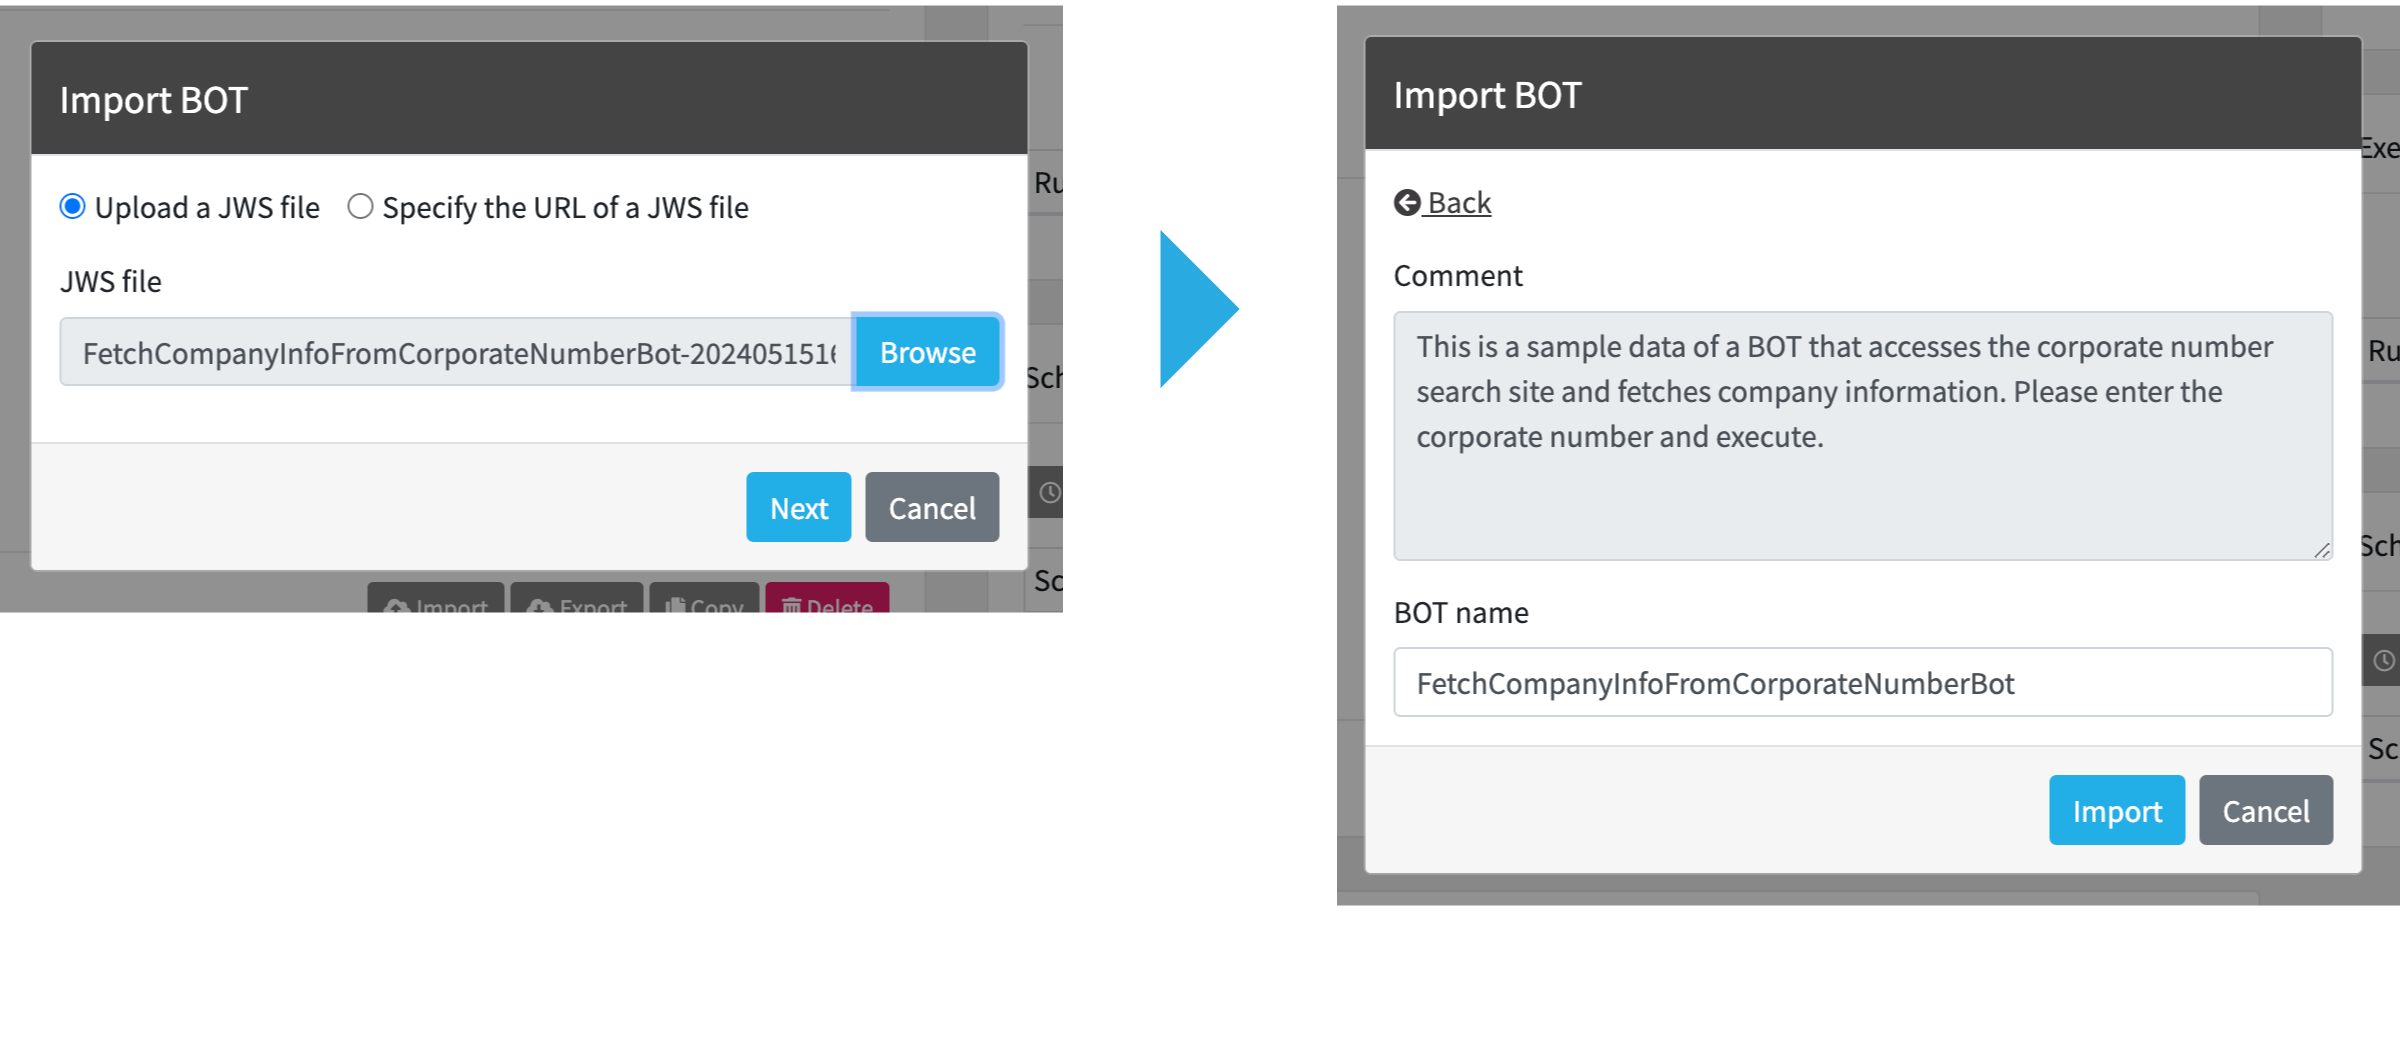
Import BOT
You can import a pre-existing BOT from 'Import BOT' Load a file with the extension '.jws' to create a new BOT.
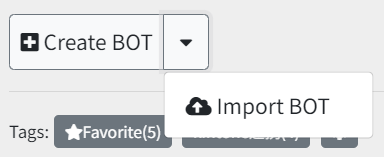
Upload a JWS file: Upload a file with the '.jws' extension and import it.
Specify the URL of a JWS file: Specify the URL of a file with the '.jws' extension and import it.
* Files exported without checking 'Allow import to other contracts' cannot be imported into a different contract.
Search a BOT
In the BOT list, you can narrow down the selection of BOTS based on BOT name, description, email notification settings, and more.
You can select tags and filter BOTS that have specific tags assigned to them.
* You can freely add or remove tags in Tags management.

[Card view]
You can sort BOTs by selecting [Sort column] and [Sort order] pulldown menus.

[List view]
Click the carets next to the BOT name, Created, Last modified, Creator columns to sort BOTs.

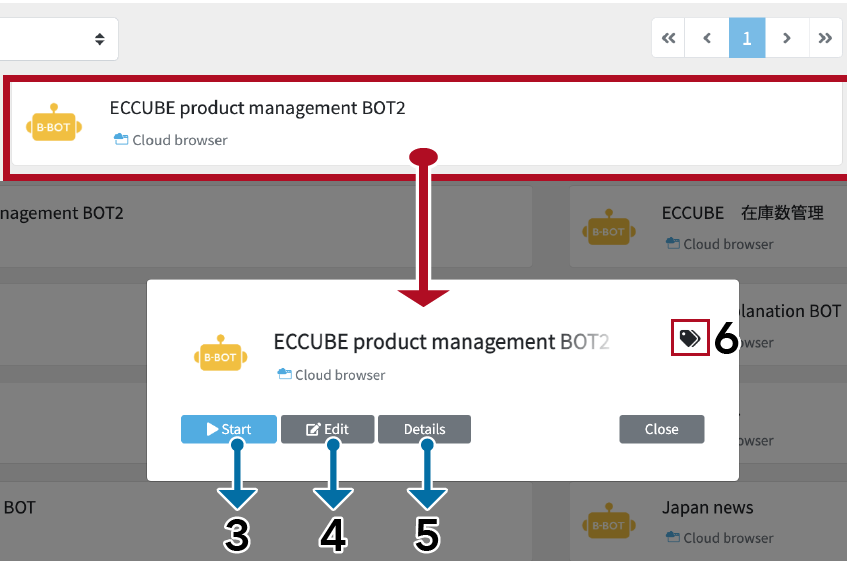
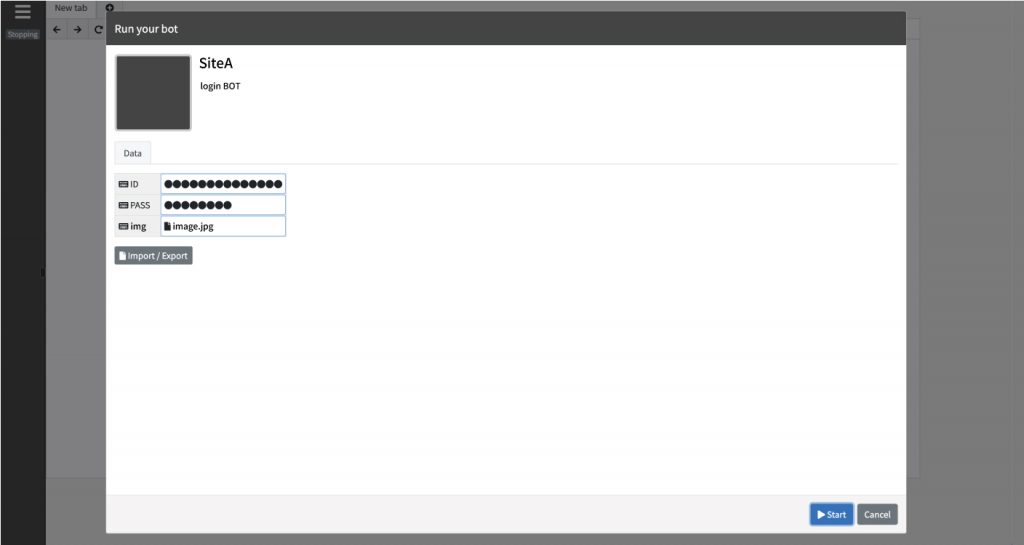
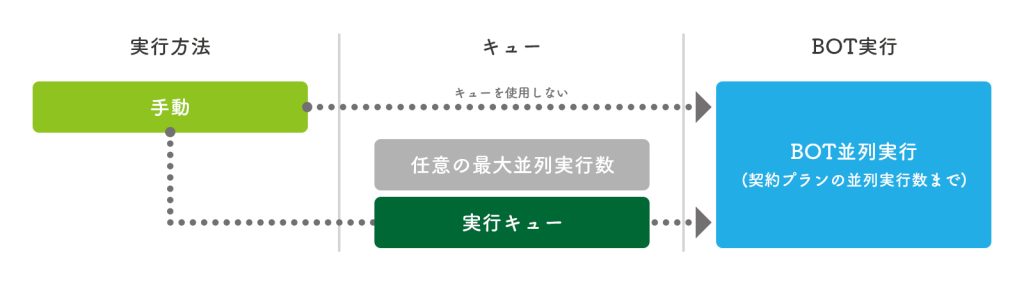
Execute a BOT
When you press the "Start" button, the BOT execution screen will appear, allowing you to run the BOT.
実行キュー
実行キューを選択します。
※実行キューについては、「実行キュー」をご覧ください。
手動実行によるBOT実行
Edit a BOT
You can open the BOT editor and edit the BOT by clicking the "Edit" button.
* Please refer to the "How to use the BOT Editor" for instructions on how to use the editor.
BOT Details
Detailed information about the BOT and its operational status will be displayed. Additionally, some settings can be modified.
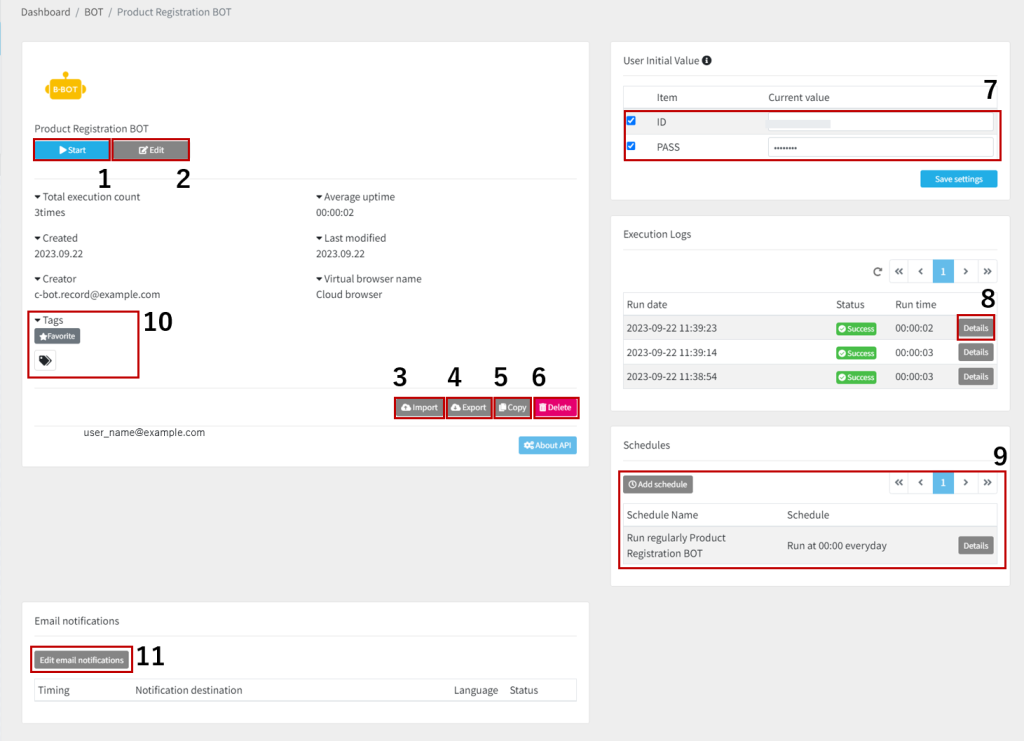
This screen has following features.
- Start
- Edit
- Import
- Export
- Copy
- Delete
- User Initial Value
- Execution Logs
- Schedules
- BOT Tags
- Email notifications
Start
When you click the "Start" button, the BOT execution screen will open, allowing you to run the BOT.
Edit
You can open the BOT editor and edit the BOT by clicking the "Edit" button.
* Please refer to the "How to use the BOT Editor" for instructions on how to use the editor.
Import
You can import a BOT using the "Import" button. (Overwrite Import)
* The existing BOT will be overwritten during import, and the previous version cannot be restored. Please proceed with caution.
Upload a JWS file: Upload a file with the '.jws' extension and import it.
Specify the URL of a JWS file: Specify the URL of a file with the '.jws' extension and import it.
* Files exported without checking 'Allow import to other contracts' cannot be imported into a different contract.
Export
You can export a BOT using the "Export" button.
Optionally, you can input a comment and press "Export" to export the BOT as a file with the extension ".jws."
* The comment you enter here will be displayed on the screen during import.
* All data, including initial input data (Except for the file) and internal BOT data, will be exported
(screenshots shown during task selection are not included).
Files exported with the "Allow import to other contract" option checked can be imported into other contracts.
* This checkbox can only be modified by users with administrator privileges.
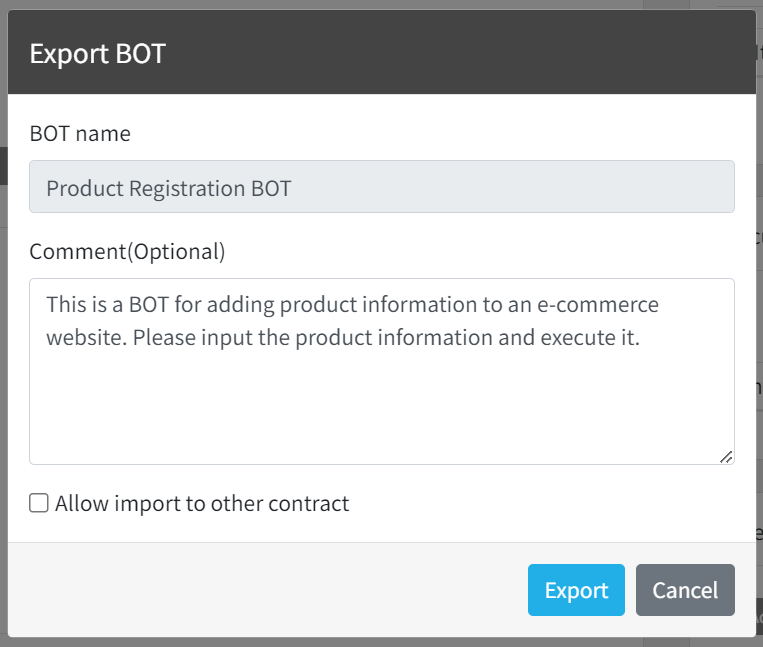
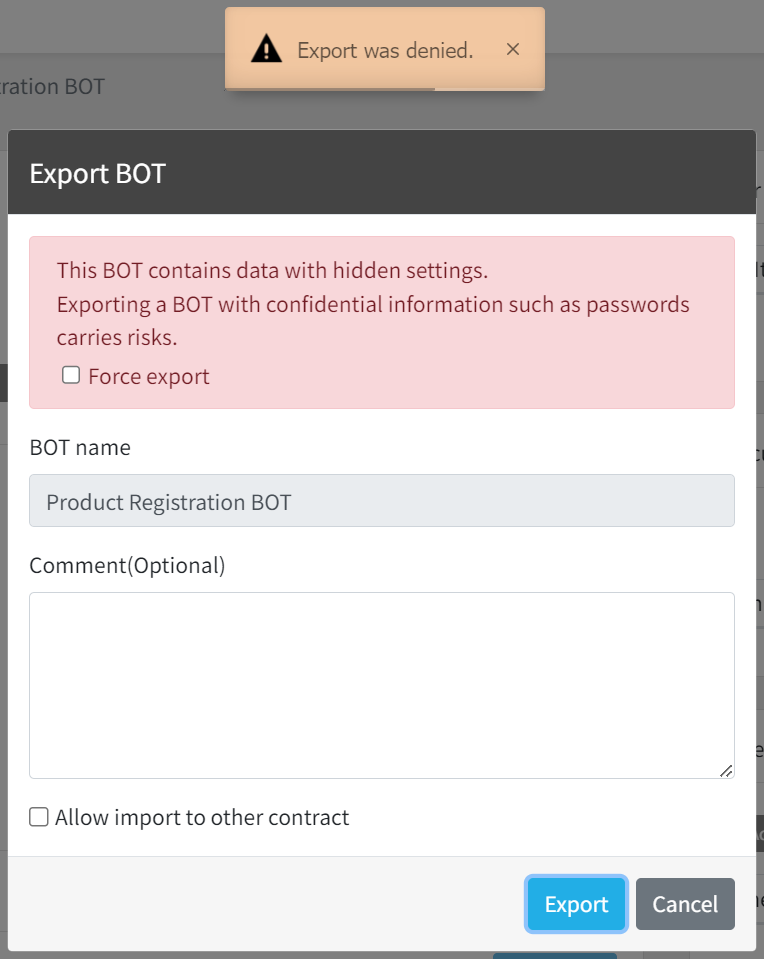
Regarding the export of BOTs containing values set as hidden:
BOTs with enabled "Hide the value" for certain data (such as passwords) will be denied export.
* Checking "Force export," you can export the BOT, but this will include all data, including initial values defined in the input data and internal BOT data. Please proceed with caution.
Copy
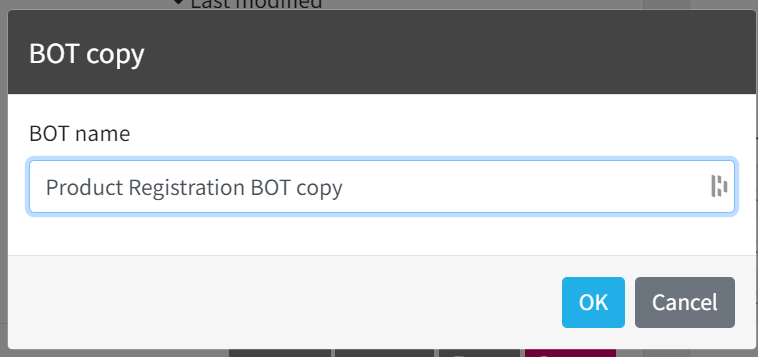
You can duplicate a BOT (including tasks, data, and settings) using the "Duplicate" button.
Specify the BOT name and press "OK" to create a duplicate BOT with the specified name.
By checking "Copy to another contract," you can copy the BOT to a different contract.
* Please note that the option "Copy to another contract" is available only when you belong to multiple contracts and have a role with administrator privileges or higher.
Delete
You can delete a BOT using the "Delete" button.
An alert will appear, and when you press "OK," the BOT will be deleted.
* Please note that deleted BOTs cannot be restored, so exercise caution when deleting them.

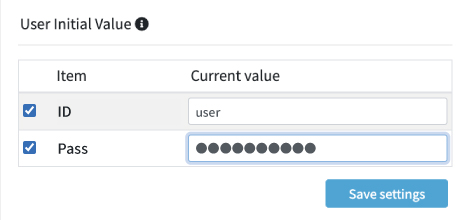
User Initial Value
You can change and save the initial values for BOT execution.
* The user default value is a preset for input values at the time of BOT execution that can be configured on a per-user basis.
* I will not be viewed by other users within the same contract.
To make changes, check the checkboxes to modify input values.
Then, click "Save Settings" to save the changes.
Execution Logs
The latest 5 execution logs will be displayed.
Click the "Details" button to navigate to the execution log details page.
Schedules
The schedule settings registered for the BOT will be displayed.
Click the "Details" button to navigate to the schedule details page.
Click the "Register Schedule" button to navigate to the add schedules page.
BOT Tags
gs which are attached to the BOT is displayed. You can also set the BOT tag here.
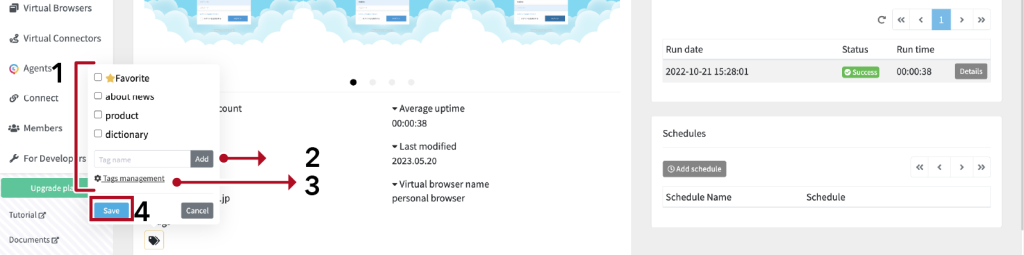
Add a tag to BOT
You can add a tag to the BOT by selecting any check boxes.
Add another tag to BOT
You can add multiple tags to the BOT. To add a new tag, input any name then click the [Add] button.
Tags management
The tags management screen (the tag list) is displayed.
Save
You can save
Email notifications
You can edit email notifications.
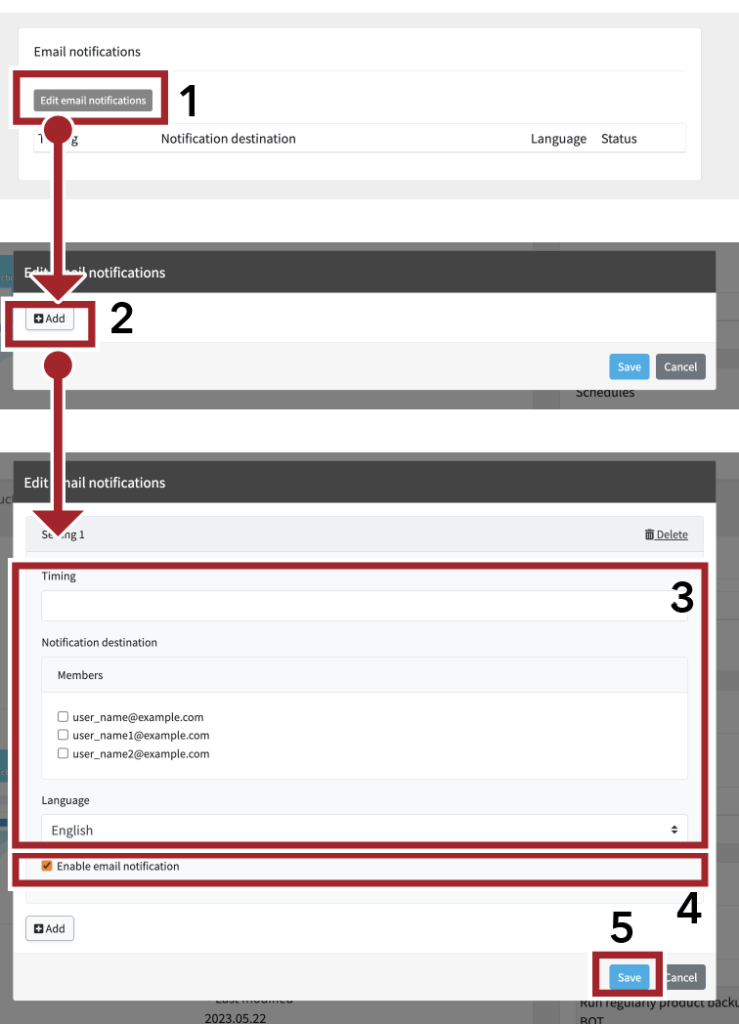
- Press the "Edit email notifications" button. A modal window will open.
- Click the "Add" button.
- Configure the timing of email notifications, select the recipients (multiple selections possible), and set the language.
- Check the "Enable email notification" box to activate email notifications (it's enabled by default).
- Click the Save button.
* Only email addresses registered in member management will be displayed as notification recipients.
* You can delete settings from the "Delete" option.
* You can add email notification settings from the "Add" option.
Tags management
The tags management screen is displayed. You can sort, edit, delete, and add tags in the page.
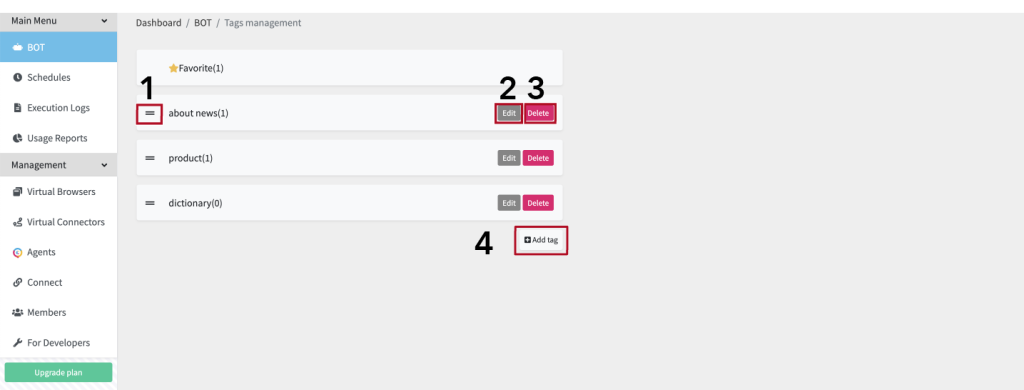
Sort tags
Click and drag the icon to sort tags. The tags displayed in the BOT list are also sorted.
Edit a tag
Click the [Edit] button to rename a tag.
Delete a tag
Click the [Delete] button to delete a tag.
Add another tag to BOT
Click the [Add tag] button to add another tag.