Virtual browsers

Home > User guide > Virtual browsers
Refer to this page about Virtual browser.
- 1. Virtual browsers List
- 2. Create a Virtual browser
- 3. Search a Virtual browser
- 4. Virtual browser Details
- 5. Open a Virtual browser
- 6. Confirm Startup Log
- 7. Change a Default Virtual browser
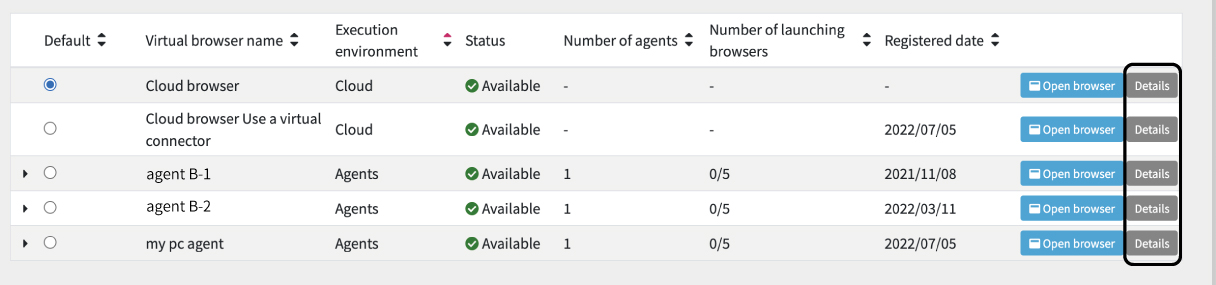
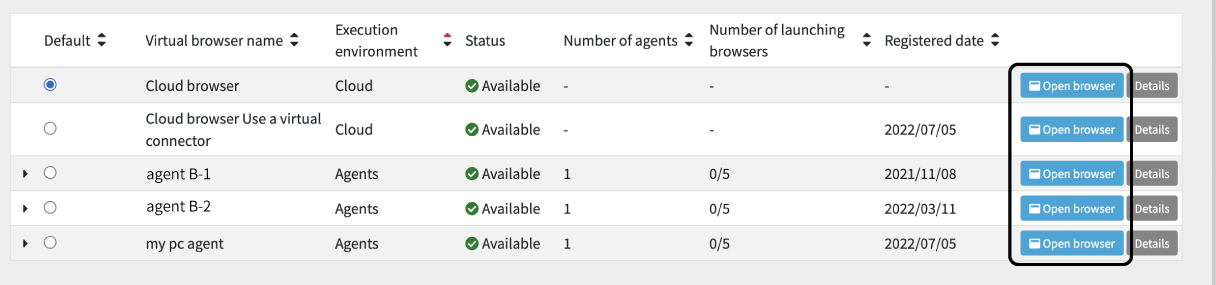
Virtual browsers List
Transition from "Virtual browser" in the global menu. The created Virtual browsers are displayed in the list.
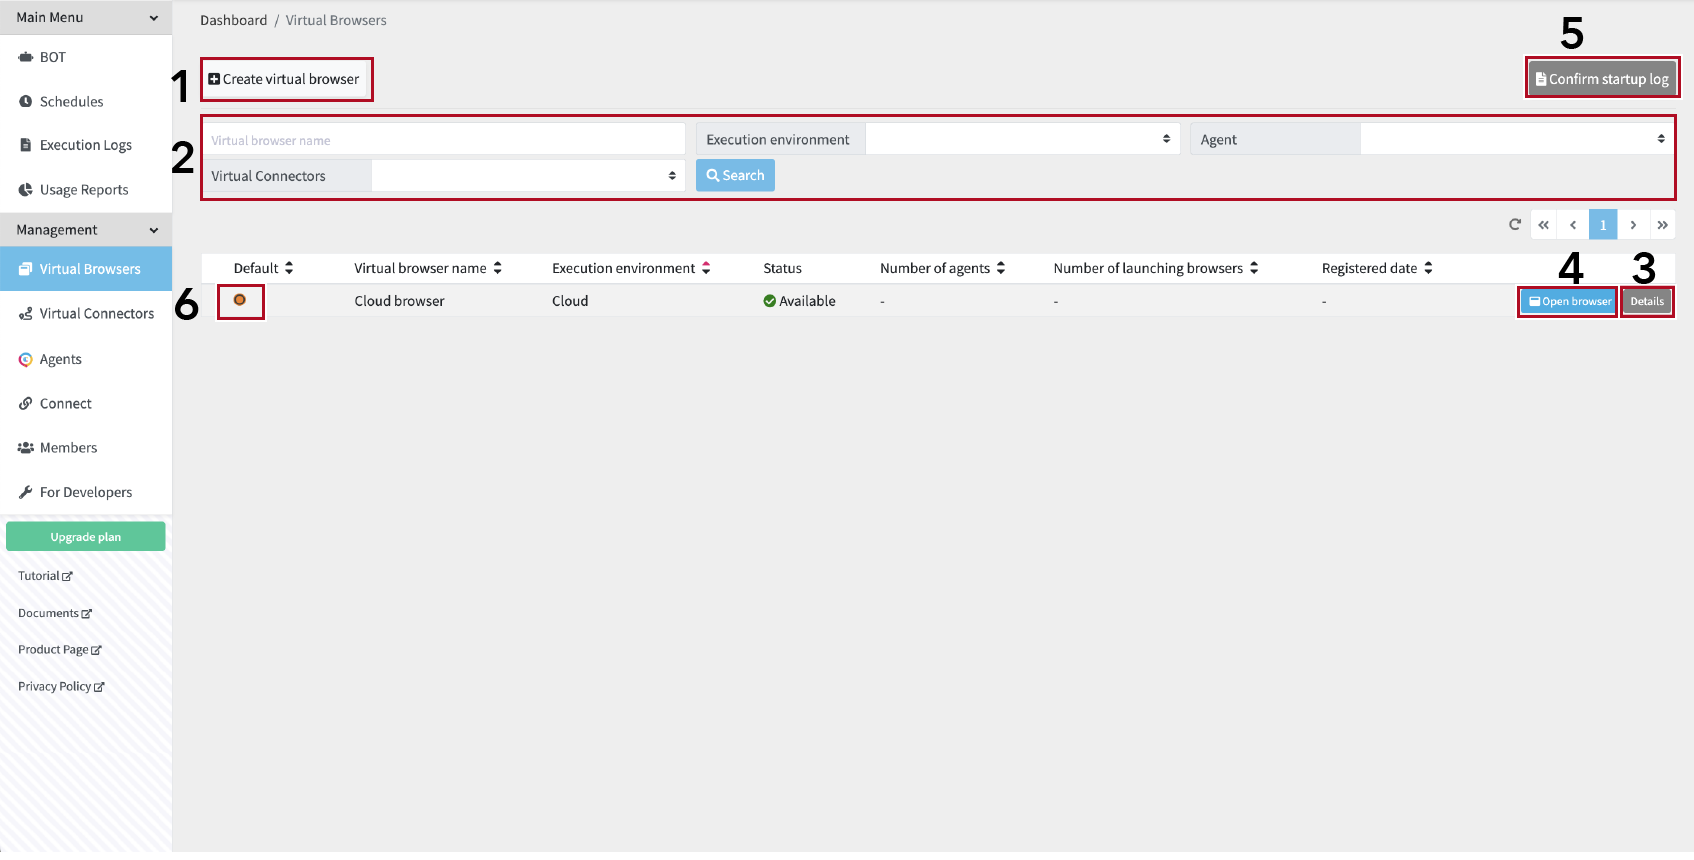
This screen has following features.
- Create a Virtual browser
- Search a Virtual browser
- Virtual connector Details(Edit / Delete)
- Open a Virtual browser
- Confirm Startup Log
- Change a Default Virtual browser
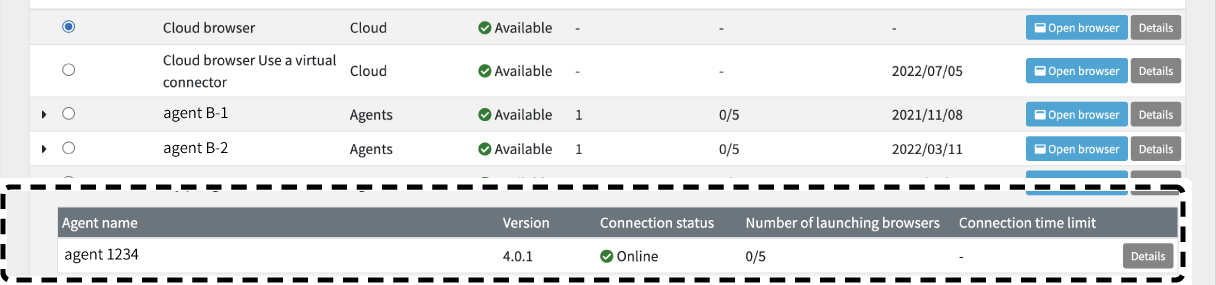
When execution environment is set to gateway, you can click the caret to see which gateway you are using.
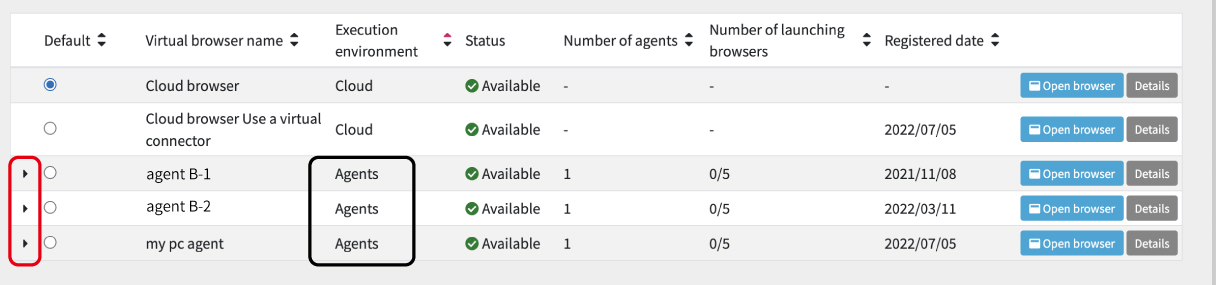
Click the [Details] button of the used gateway, Gateway Details page is displayed.
Create a Virtual browser
A Virtual browser can be created from the "Create Virtual browser" button on the Virtual browser list.
When creating a virtual browser, you can configure the execution environment, communication route, client certificates, etc.
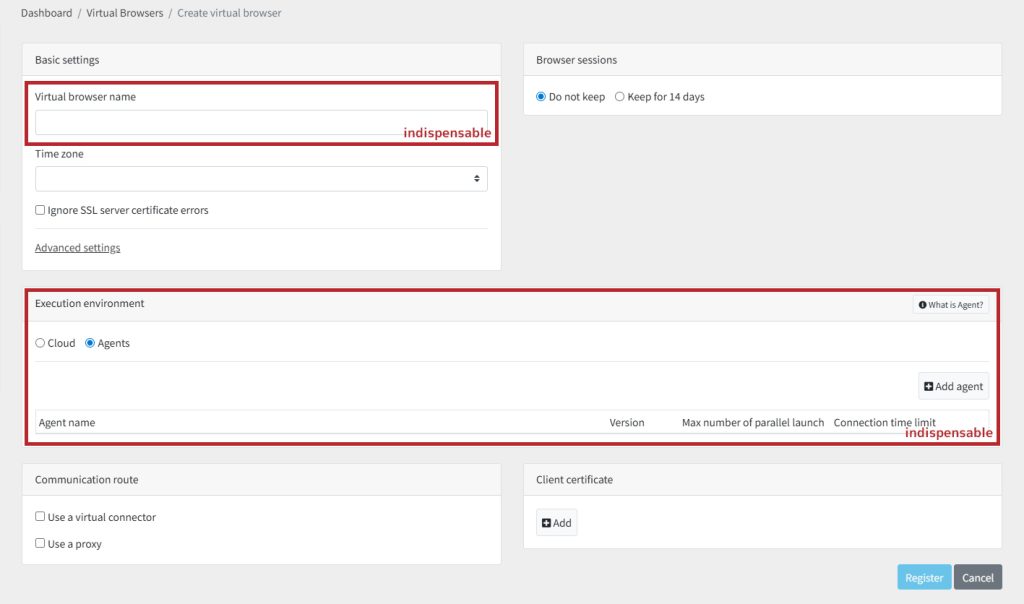
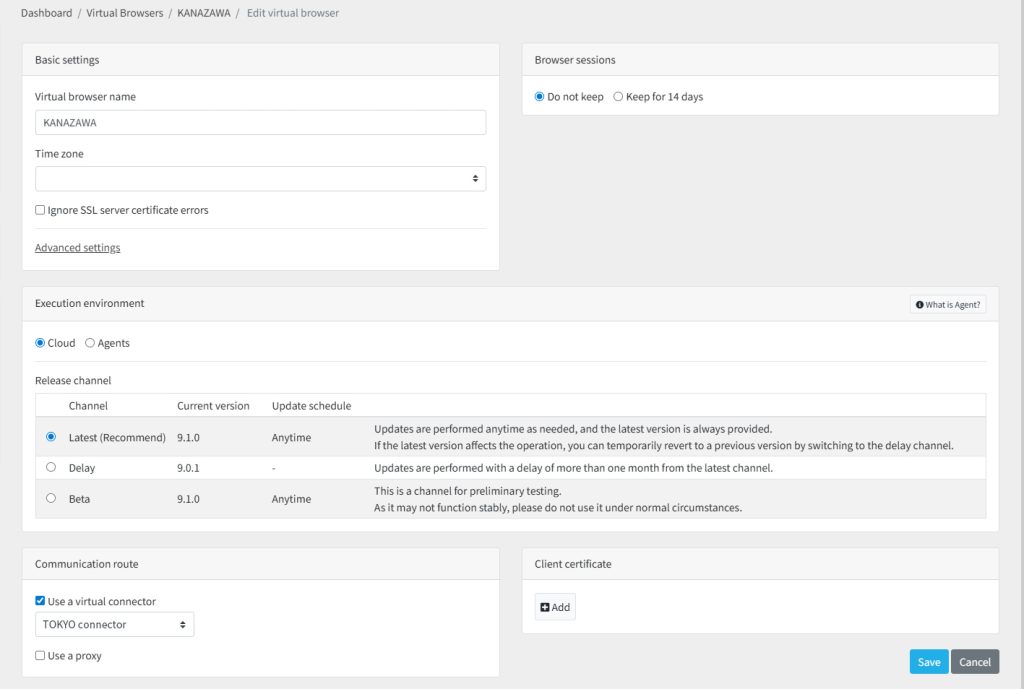
Basic Settings
Virtual browser name
Enter any name.
Time zone
Set the time zone for the virtual browser.
Ignore SSL server certificate errors
You can switch the setting to ignore SSL certificate errors. The default setting is disabled.
Advanced settings
You can even change to advanced settings.
Do not force HTTPS requests … It will no longer enforce HTTPS requests when accessing the web page.
Legacy communication mode … Start the virtual browser in the old communication mode.
* Normally you do not need to enable it.
* If enabled, the client certificate will not be applied.
Browser sessions
This setting is for maintaining the browser session.
By preserving the session, login status, cookie information, and other data can be retained the next time the virtual browser is run.
Keeping browser sessions is available with paid plans of Single office or higher.
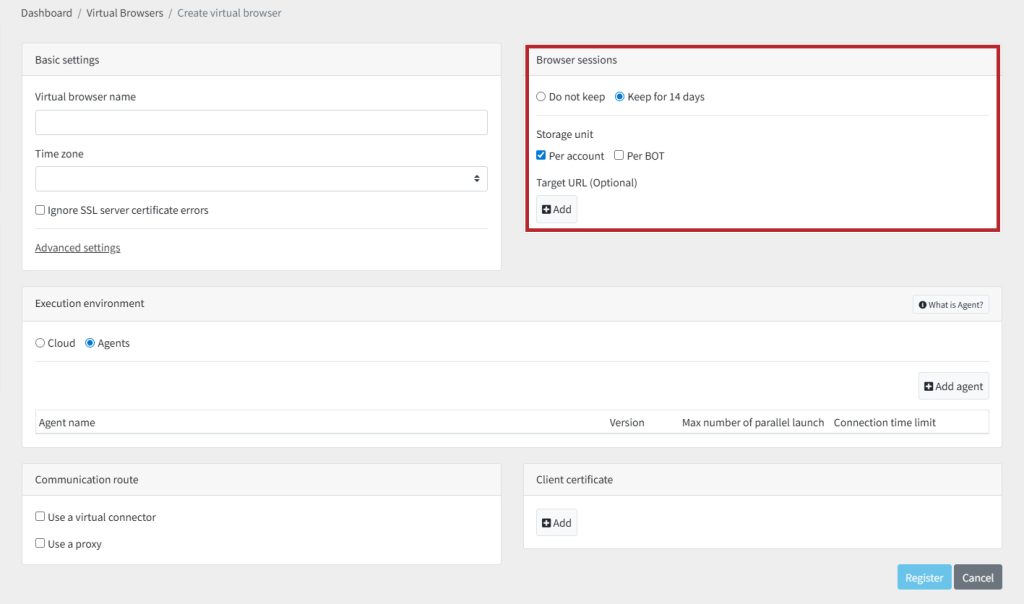
Do not keep : Sessions are not maintained in the virtual browser.
Keep for 14 days : Sessions are maintained in the virtual browser for 14 days.
*If 'Keep for 14 days' is selected, the virtual browser will save the 'Cookie information,' 'WebStorage information,' and 'Basic authentication information' of the pages that were open at the time of closure.
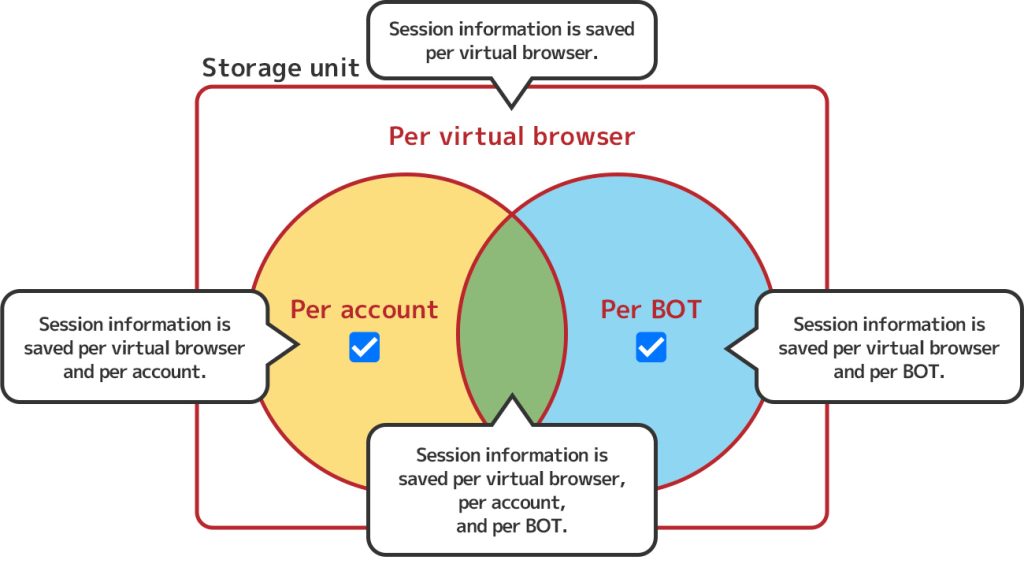
Storage unit
Per account : Sessions are kept for each account.
Per BOT : Sessions are kept for each BOT.
The session information storage unit is configured based on the combination of storage units.
| Per account | Per BOT | Session Information Storage Unit |
| - | - | Saved per virtual browser. |
| 〇 | - | Saved per virtual browser and per account. |
| - | 〇 | Saved per virtual browser and per BOT. |
| 〇 | 〇 | Saved per virtual browser, per account, and per BOT. |
Target URL (Optional)
The session information for the entered URL will always be saved.
The session will be maintained even if the target URL is not open when the virtual browser is closed.
Execution environment
Select one of the following for the execution environment of the Virtual browser.
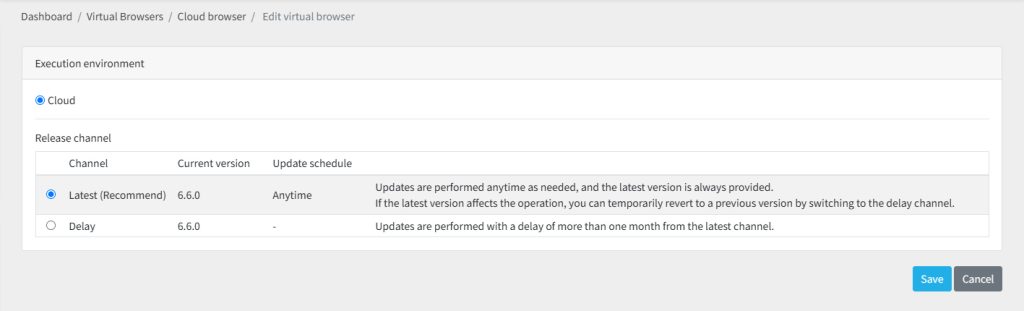
When Setting to a Cloud browser
Select the [Cloud] radio button.
Release channel
The release frequency of the virtual browser varies by channel, so you can choose according to your operational needs.
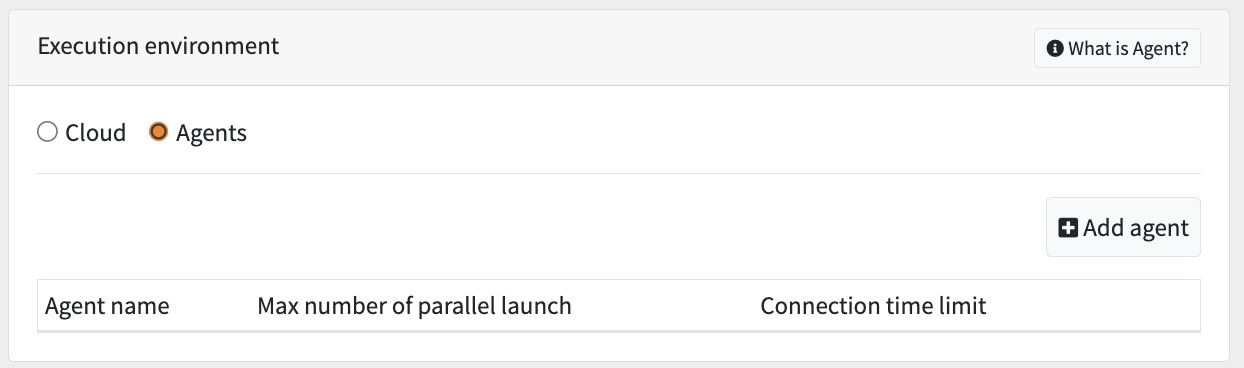
When Setting to an Local browser
Select the [Local] radio button.
Click [Add gateway], select any Cloud BOT Gateway, then click [Add].
* When setting the execution environment to an gateway, you need to link the Cloud BOT Gateway to your account.
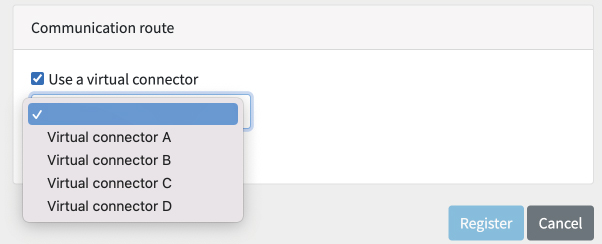
Communication route
You can set any communication route. Refer to this page how to configure each communication route.
Virtual connector
Refer to this page about creating a Virtual connector.
Select a Virtual connector form the pull down menu.
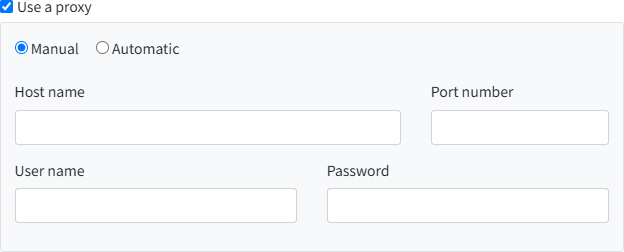
Web Proxy
Enter the required information.
Client Certificates
Client certificates can be set for each virtual browser.
Up to 100 client certificates can be set per virtual browser.
Settings can be deleted/added.
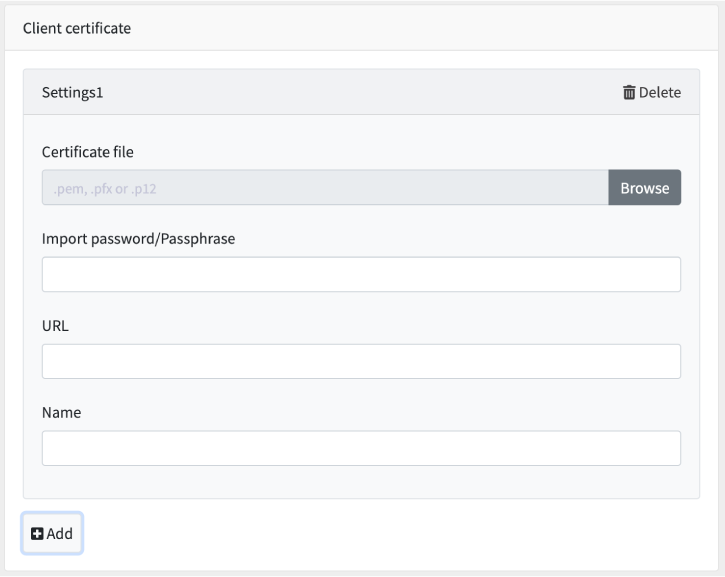
Certificate file
Select a locally located certificate file.
Import password/Passphrase
Enter the certificate import password/password.
URL
Enter the URL of the website to which the client certificate will be applied.
Input example... https://example.com/
Name
Enter any name. If not entered, the common name of the client certificate will be used.
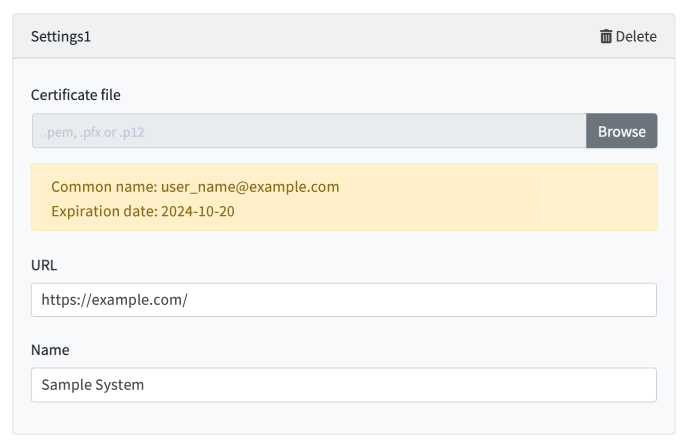
Expiration date of client certificate
If the client certificate is about to expire or has expired, it will be displayed in color on the Virtual browser detail screen and the Virtual browser edit screen.
[Within 30 days to expiration date] yellow
Virtual browser details screen

Virtual browser edit screen
[expiration of validity] red
Virtual Browser Details Screen

Virtual browser edit screen

Search a Virtual browser
You can search a browser from the Virtual browser list.
You can narrow the search result by the Virtual browser name, execution environment, the gateway used, or the Virtual browser used.

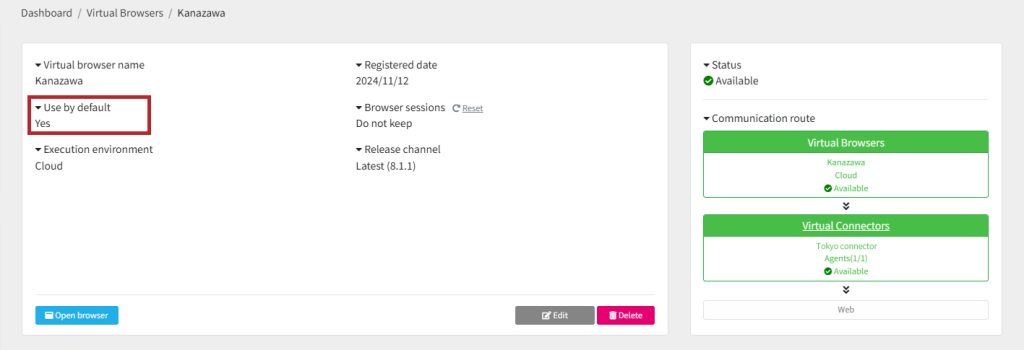
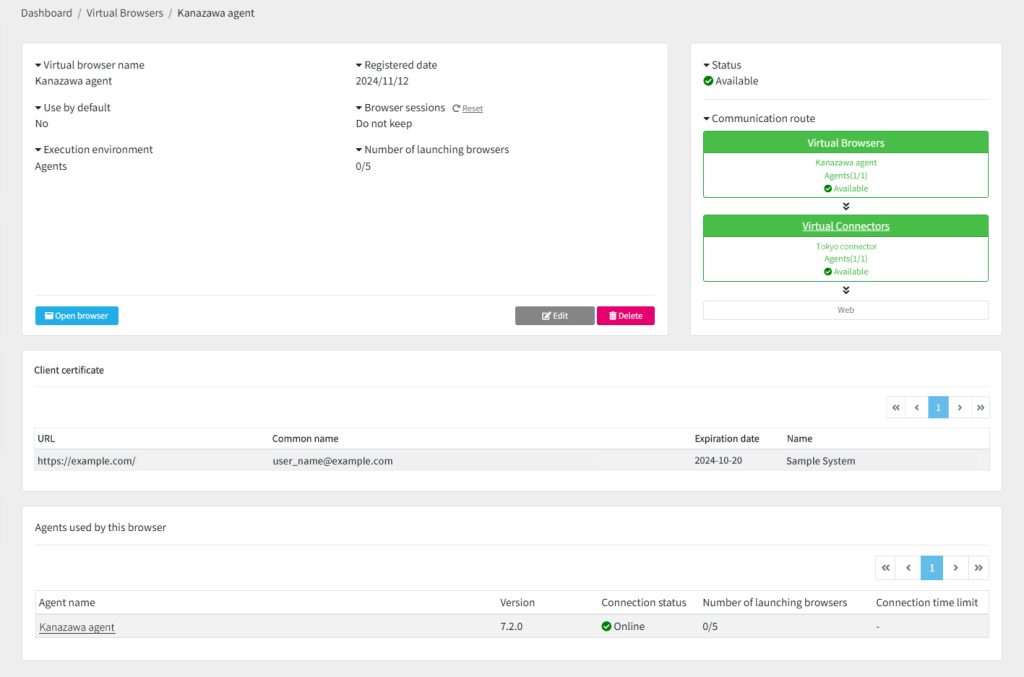
Virtual browser Details
You can see the details of the Virtual browser.
Click the [Details] button on the list in the Virtual browsers screen.
You can check the setting information, open/edit/delete/check the status/client certificate/communication route of the Virtual browser.
Edit a Virtual browser
You can edit the Virtual browser settings.
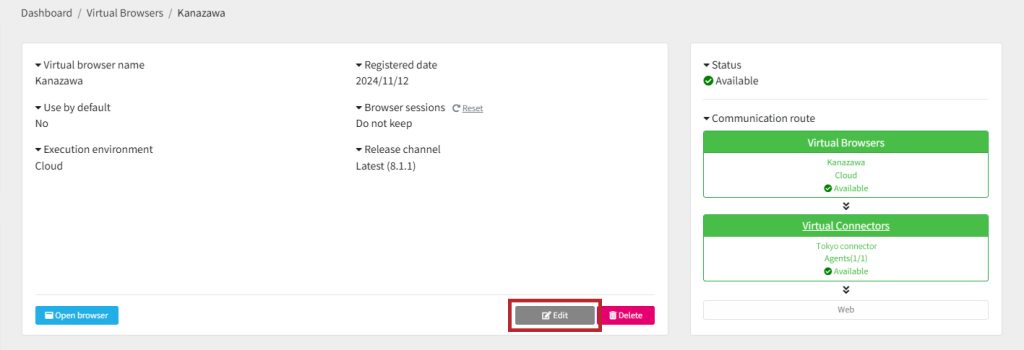
Click the [Edit] button. You can edit the Virtual browser with same way as creating a Virtual browser.
Delete a Virtual browser
You can delete a Virtual connector.
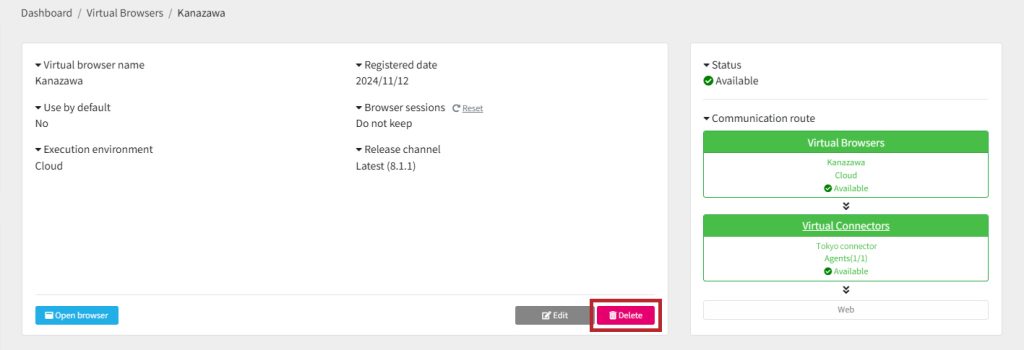
Click the [Delete] button. Click [OK]. Note that you cannot undone this deletion.

Open a Virtual browser
You can open a Virtual browser. You can also open it from the Virtual browser details screen.
Click [Open browser].
Confirm Startup Log
You can see the startup log of the Virtual browser.
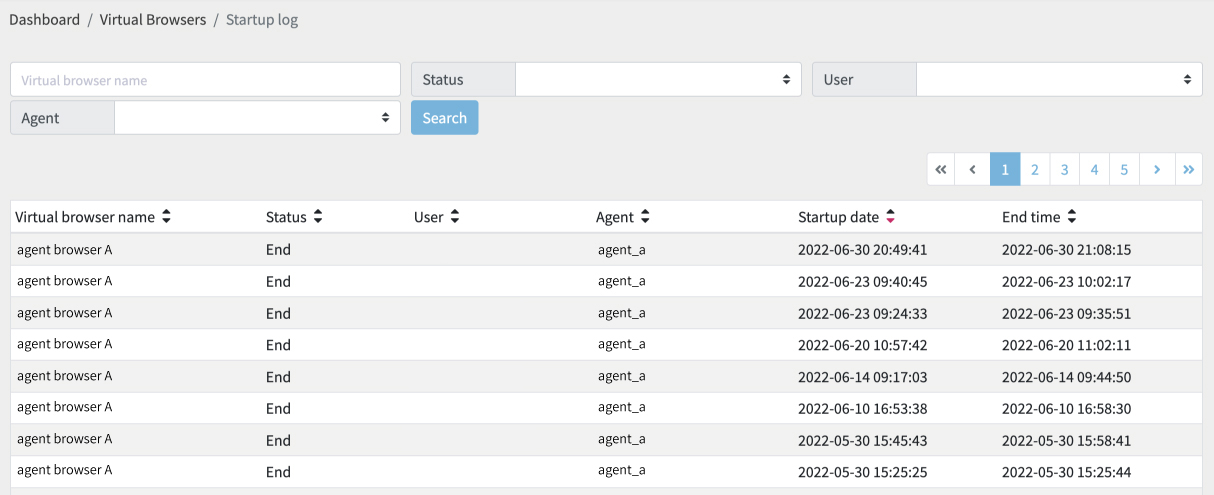
You can also search the contents of the startup log.
If you are using an unregistered gateway, the gateway field will display "Gateway deleted".
Change a Default Virtual browser
Change the default Virtual browser to be used when executing a BOT.
Change the [Default] radio button to select.
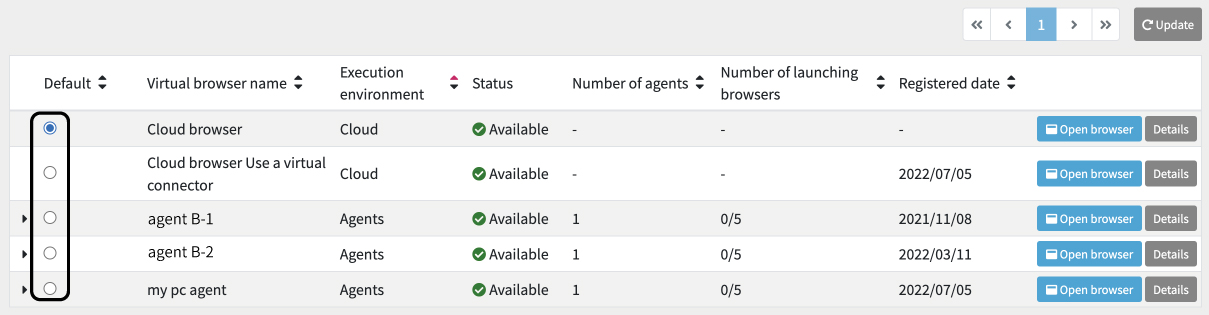
Click the [OK] button.

The default Virtual browser to be used when executing a BOT has been changed. You can check it at the Virtual browser details.