Members

Japanese may be displayed on some pages.
Home > User guide > Members
Introduction
Member management is a function that can manage members and guests.
Members and guests can be invited individually.
A Cloud BOT account invited to a contract is called a member.
Members will share the resources (BOT, schedule, execution log, usage status, member, contract information, etc.) in the contract they are invited to.
Member invitation is available on paid plans.
A guest is an email address used as a notification destination within the Cloud BOT service.
*Guests do not need a Cloud BOT account.
You can search for the email address on the member management screen.

Member
"Members" and "Invited Members" are displayed. Members can be assigned roles.
Role Permissions
Refer to the following for role privileges.
| Function | Function Permissions | Role | |||
| User | Payer | Manager | Owner | ||
| Plans | Change the Plan (Upgrade) | - | - | ○ | ○ |
| Free extension application for BOT execution time | ○ | ○ | ○ | ○ | |
| Free extension approval for BOT execution time | - | - | - | ○ | |
| Payment | Change the payment information | - | ○ | ○ | ○ |
| Contract Information | Edit the registration information | - | - | ○ | ○ |
| Members | Add/Delete of users/payment role member | - | - | ○ | ○ |
| Add/Delete of manager role member | - | - | - | ○ | |
| Change the member's name | - | - | ○ | ○ | |
| BOT function | Copy a BOT between contracts | - | - | ○ | ○ |
| External connection | External connection ON/OFF change | - | - | ○ | ○ |
| ON/OFF change of connected BOT | - | - | ○ | ○ | |
| Change API basic settings | - | - | ○ | ○ | |
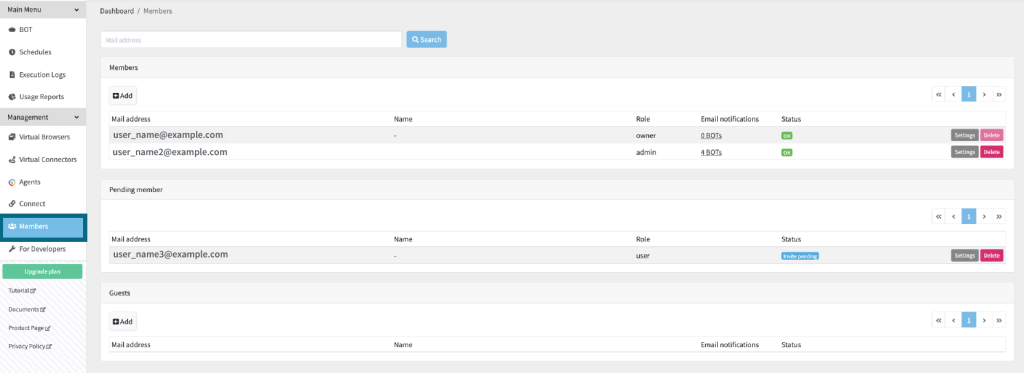
Members list

The following operations can be performed on this screen.
- Add a member
- Member Settings
- Delete a Member
- Confirm the number of BOTs with email notifications set
Add a member
You can add (invite) members. This operation requires role privileges. Please check this out for details.Please check here for details.
To add a member, follow the steps below.
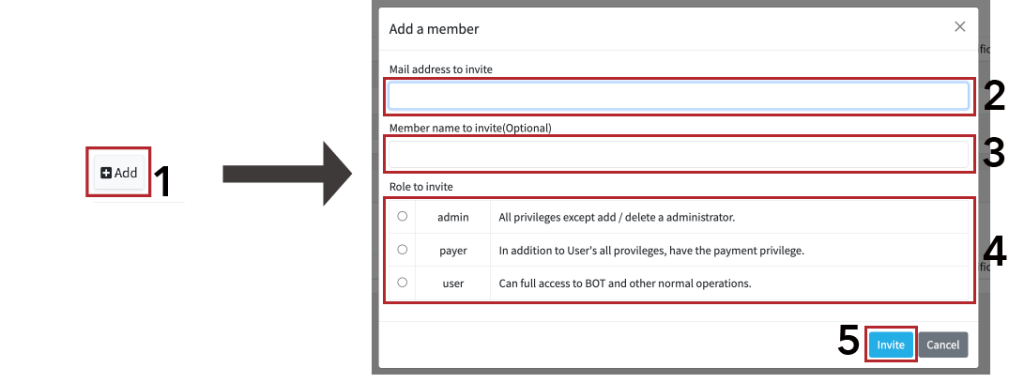
- Press the "Add" button. (A modal window will open.)
- Enter the email addresses of the members you want to invite.
- Enter the name of the member to add. (Optional)
- Select the role of the member to add.
- Press the "Invite" button. (An email will be sent to the address of the invited member.)

The invitation mail was sent successful when you see this alert
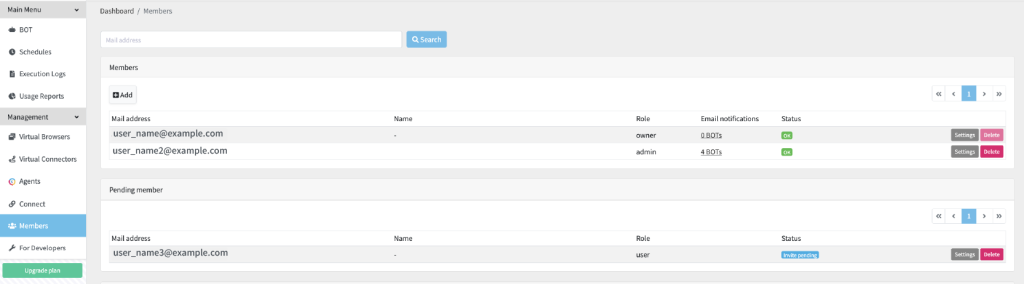
About the status of members
If enabled as a member, the status will be "OK".
If you are inviting, "Inviting" is displayed.
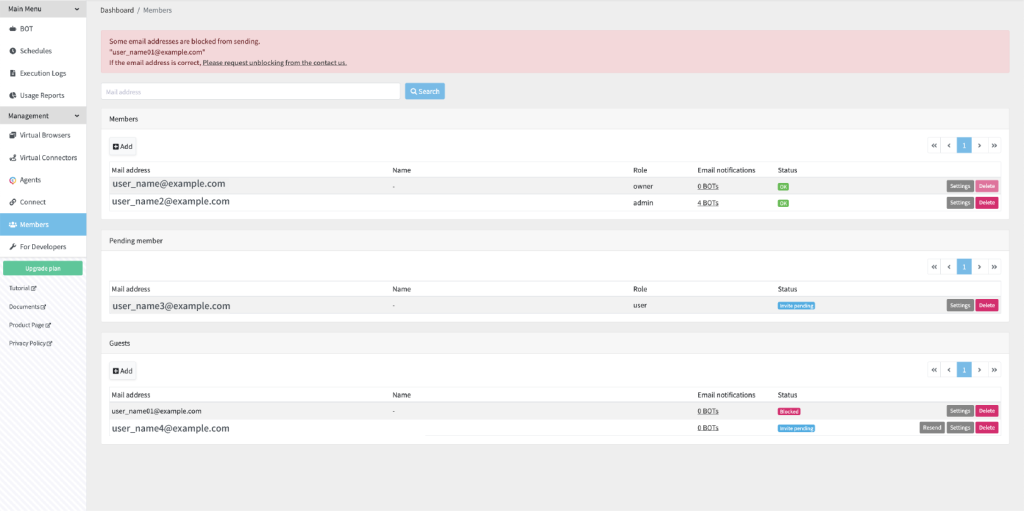
*If there is a blocked email address, the status will be "blocked". Please check here for details.
Cancel the Member Invitation
You can cancel the invitation by pressing "Delete" when the member's status is "Invite pending".
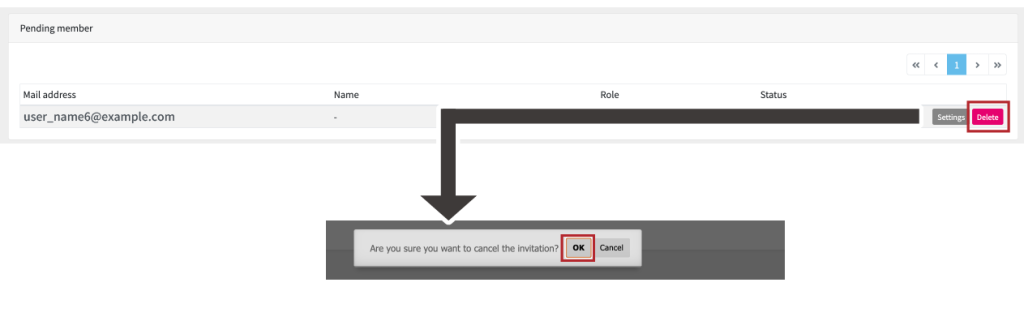
- Press the "Delete" button. (An alert will be displayed.)
- Select "OK".
Member Settings
You can change the member settings.This operation requires role privileges. Please check here for details.

- Press the "Settings" button. (A modal window will open.)
- Set member names and member roles.
- Click "Save".
Delete a Member
You can remove added members. Owners cannot be deleted.This operation requires role privileges. Please check here for details.
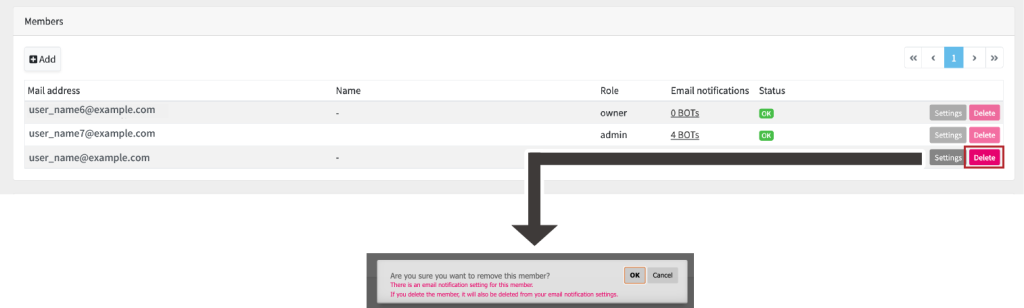
- Press the "Delete" button.
- Click "OK".
Confirm the number of BOTs for which email notification is set
Display the number of BOTs for which email notification is set for each member.
Redirect to the BOT search page. Check this page about BOT search.

Invited User's Operations
How to operate when you are invited.
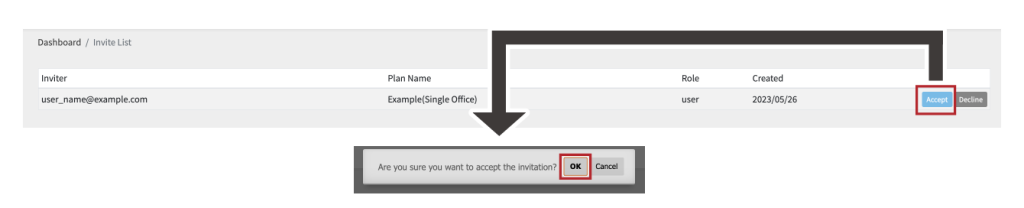
Accept the Member Invitation
Invited members will receive an email individually. From the link in the email, you will be transferred to the cloud BOT service. Also, you can check the alerts on your dashboard.
- Click the URL in the email you received. Log in as you will be transferred to the cloud BOT service.
- Press the "Accept" button, and if it is added as a member, it is completed.
In addition to checking by email, you can also check the alerts on the dashboard.

Decline the Member Invitation
You can decline a member invitation.
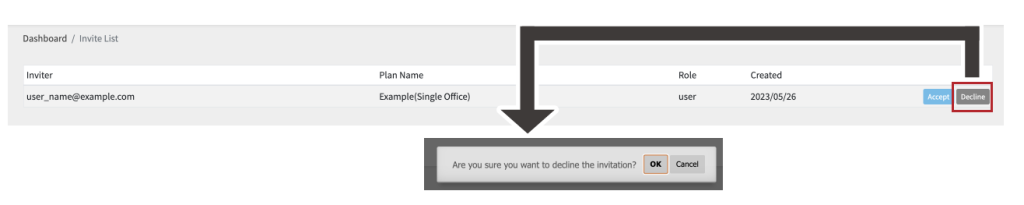
- Click the "decline" button.
- Select OK on the modal window.
Switch the Contract
If you have accepted the member invitation, you can switch contracts in the navigation bar. Click here for information on how to switch.
Guest
A list of "guests" will be displayed.
Guest List

The following operations can be performed on this screen.
- Add a guest
- Guest Settings
- Delete a Member
- Confirm the number of BOTs for which email notification is set
Add a guest
You can add guests. Follow the steps below to add a guest.
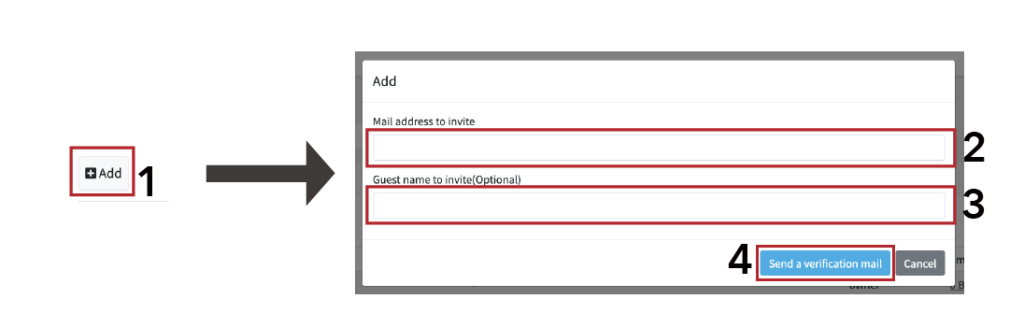
- Press the "Add" button. (A modal window will open.)
- Enter the email addresses of the guests you want to invite.
- Enter the names of the guests you want to invite. (Any)
- Press the "Send Verification Email" button. (An email will be sent to the address of the invited guest.)
About the status of members
If enabled as a guest, the status will be Enabled.
If you are inviting, it will be displayed as "Pending".
*If there is a blocked email address, the status will be "Blocked". Please check here for details.
Cancel guest invitation
You can cancel the invitation by pressing "Delete" when the member's status is "Invite pending".
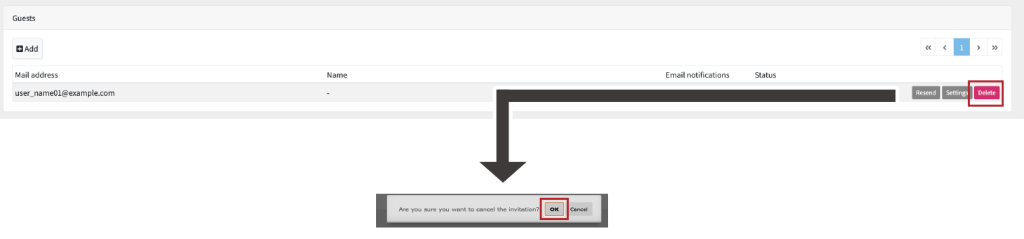
- Press the "Delete" button. (An alert will be displayed.)
- Select "OK".
Resend email
ゲストのステータスが「招待中」になっている場合に「再送信」を押すことで、メールを再送信します。
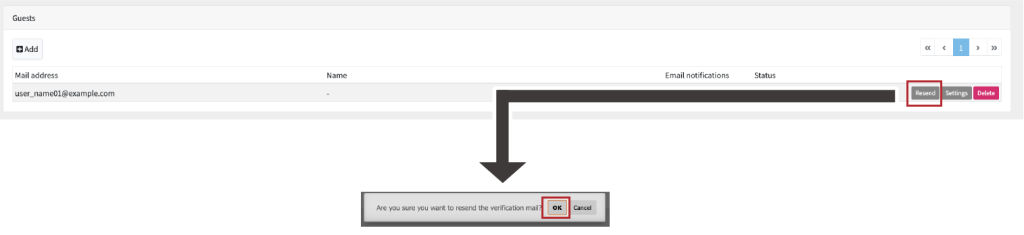
- Press the "Resend" button. (An alert will be displayed.)
- Click "OK".
Guest Settings
You can change the guest settings.
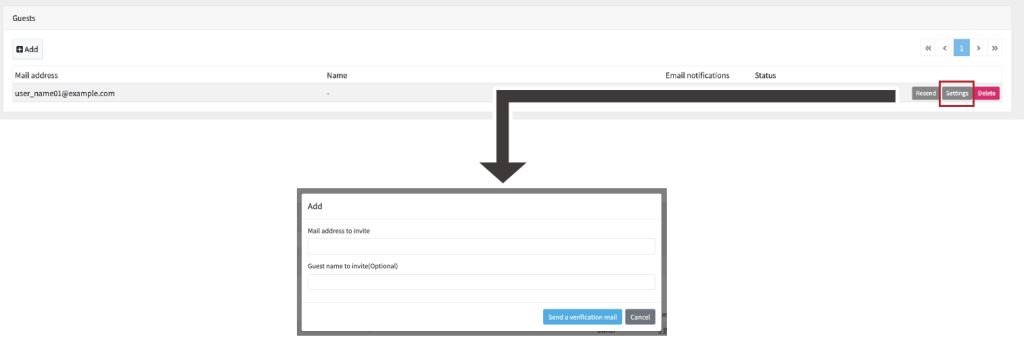
- Click the "Settings" button. (A modal window will open.)
- Set the guest name and member roles.
- Click "Save".
Delete a Guest
You can remove added guests.
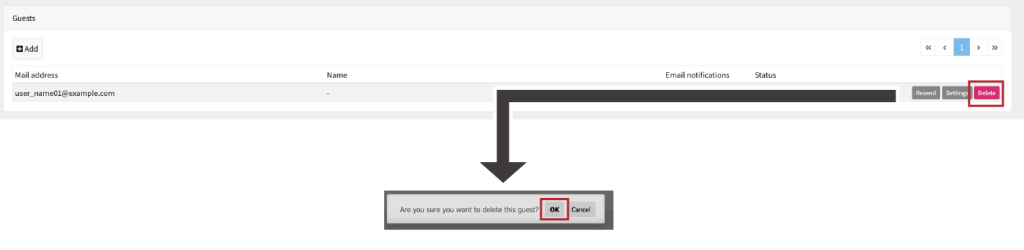
- Press the "Delete" button.(A modal window will open.)
- Click "OK".
Confirm the number of BOTs for which email notification is set
Display the number of BOTs for which email notification is set for each guest.
Redirect to the BOT search page. Check this page about BOT search.

Invited User's Operations
How to operate when you are invited.
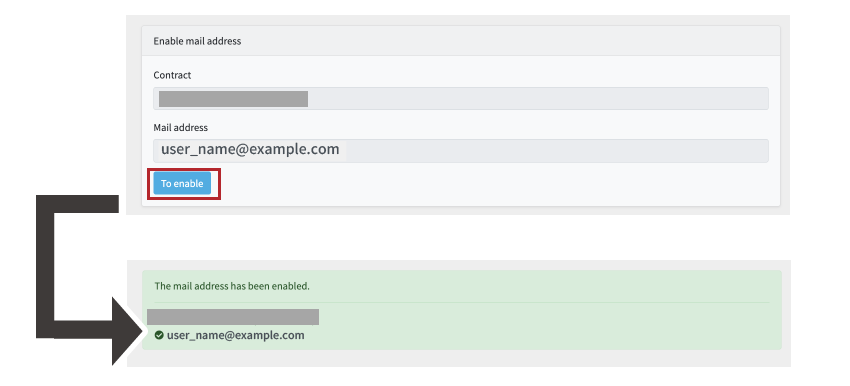
Email Address Activation
Invited guests will receive a separate email.
- Click the URL in the email you received.
- Press the "Activate" button on the transition screen.
About Block
If an email address is blocked from sending emails for some reason, the status will show "Blocked". It cannot be canceled by the user. Please contact us to request cancellation.