Use a Data Viewer

Japanese may be displayed on some pages.
Home > User guide > BOT > How to use the BOT editor > Use a Data Viewer
Introduction
Overview
This is a convenient function that allows you to check and operate all the data registered in the BOT being created (edited) in a list. Various operations such as creating, editing, deleting, and renaming the data used in the BOT are possible. Also, You can create, edit, delete, import, or export group data in the Data Viewer.

You can check the list of data registered in the BOT on the "Data" tab at the top of the Data Viewer. In addition, group data is displayed separated by one tab for each group.
Open a Data Viewer
Click [Viewer] in the "Data" field on the left side of the BOT Editor screen to display the Data Viewer.
Add New Data
- Click the "+" button in the data viewer.
- Select the type of data from the "Type" pull-down.
- Enter the data name and press the "" button.
* The icon displayed next to the value changes depending on the data type.
The flow to add new data (example: text type data)
Add a text type data.

- Select the basic type "Text" from the "Type" pull-down.
Add a file type data.

- Select the basic type "File" from the "Type" pull-down.
A icon will be displayed for file type data.
Add a multiple text type data.

- Select the basic type "Multiple text" from the "Type" pull-down.
A icon will be displayed for multiple text type data.
Enter a value in the data
After adding the data, you can enter a value in the cell next to the data name.
The input method varies depending on the type of data.

Enter a value for text type data
You can enter a string as a text type data value.
- Click the cell.
- Enter any text in the cell.
Enter a value for file type data
You can enter a local file as the data value for the file type.
- Click the cell.
- Press the "Select File" button in the modal window.
- Select a local file.
- When you select a file, "Transfering a file" will be displayed, and after the transfer, the file will be entered as the value.
Reselect local file as a value

- Click the cell of the data value you want to replace.
- Click the "Reselect File" button in the modal window.
- When you select a file, "Transfering a file" will be displayed, and after the transfer, the file will be entered as the value.
Enter a value for data of multiple text types
You can enter multiple strings as one data value. Multiple text types can be used for checkboxes and multiple input elements in multiple select.
- Click the cell.
- Enter any string in the text box in the modal window.
- To add text, press the "+" button next to the text box in the modal window. Add a text box. Enter any text in the text box.
- Press "OK" button.
Change a Data Name
- Open the Data Viewer then click the data name to edit.
Delete Input/Output Data
- Select the [Data] tab on the Data Viewer.
- Click the [-] button at the data row to be deleted.
If you have tasks using the data to be deleted, delete the tasks before deleting data. (Refer to “Working with Tasks : Delete Tasks”).
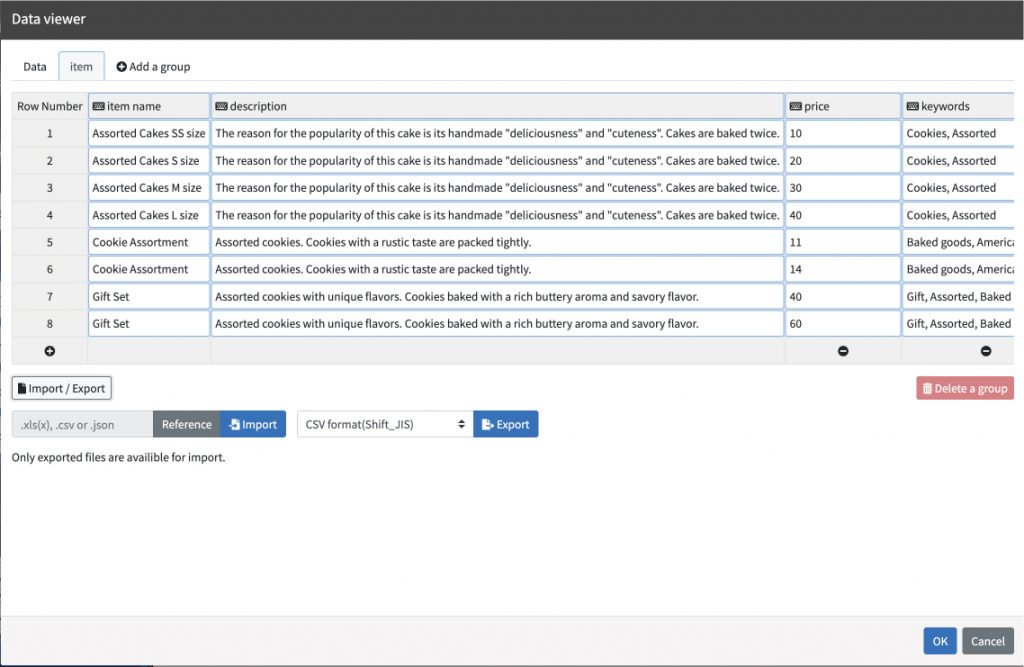
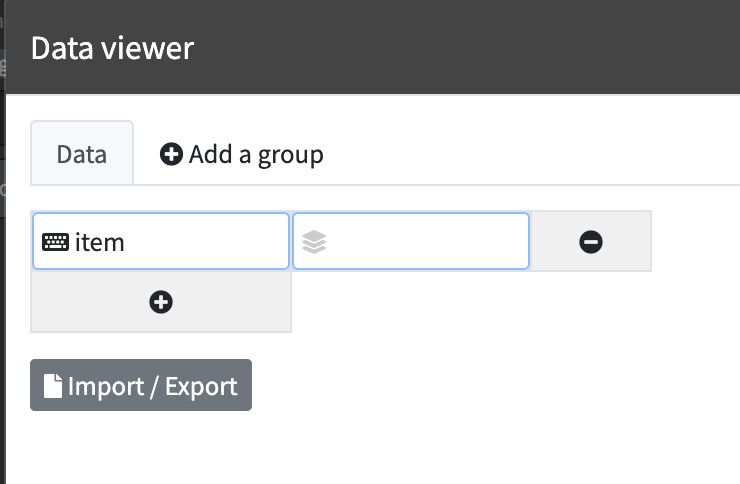
Add New Group Data
- Open a Data Viewer.
- Click [Add a group] and enter a group name.
- Enter a title of item data.
- Enter the item description.
Import data
- Browse a file and click [Import].
* Only text data with ”.xls, .xlsx, .csv, .json” format can be imported.
* Data whose title of group data matches the title of imported file are imported automatically. Note that data with unmatched titles will not be imported.
* File type data will not be import.
Export data
- Select the export format and click [Export]
(CSV format (Shift_JIS), CSV format (UTF-8), and JSON format files can be exported).

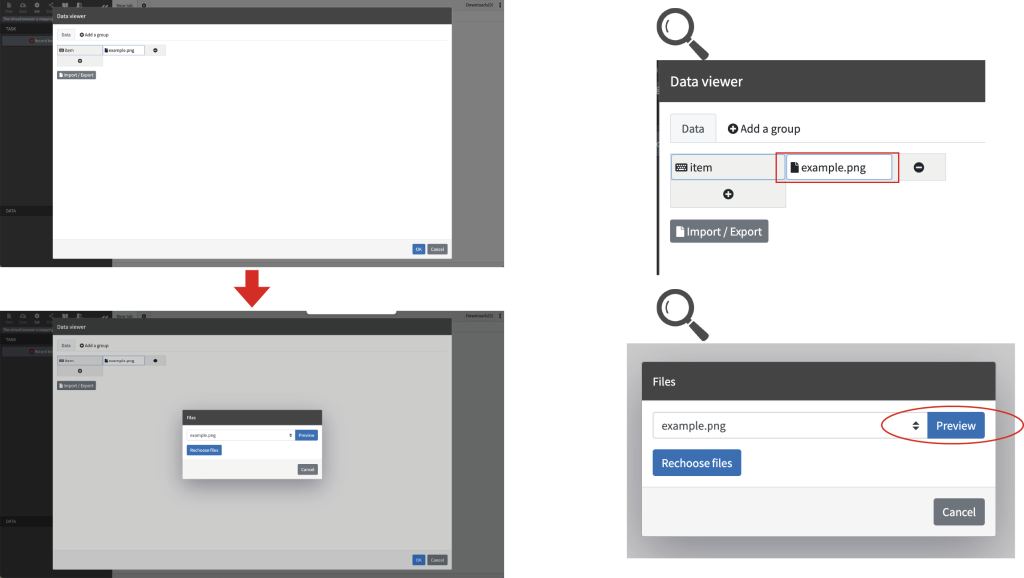
Preview the data value of the file type
- Click data value to preview.
- You can view the value in “Preview”.

 Cloud BOT Docs