Google Sheets / Add data row

Home > User guide > BOT > How to use the BOT editor > Extention> Google Sheets > Google Sheets / Add data row
App overview
Add a new data row to the Google Sheets.
| Extended Feature URL | cbot-extension://cloud-bot:google-sheets:add-data:1 |
| Provider | Cloud BOT official |
| External communication | Yes *This application communicates with Google Cloud's API. |
| Version | 1 |
| Transaction | Use a transaction for each execution. 2 transactions per execution |
Preconfiguration
Google Cloud Settings
When using the Google Sheets extension, it is necessary to configure Google Cloud beforehand.
Please refer to the detailed instructions here and complete the setup.
Screen description
Input screen
Step1
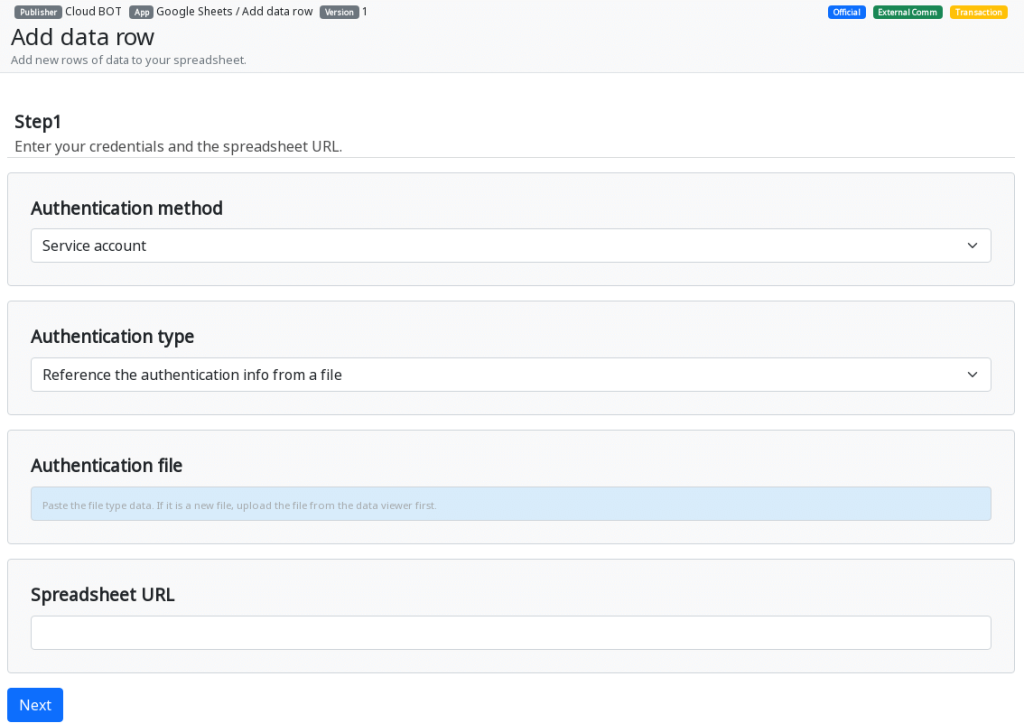
Authentication method
Select the authentication method.
Service Account: Authenticate using a Google Cloud service account.
Authentication type
Specify the authentication type.
Reference the authentication info from a file: Authenticate using a JSON file.
Enter the authentication info in JSON format: Authenticate by entering credentials in JSON format.
* For authentication information, please refer to this.
Authentication file
This is displayed when you select 'Reference the authentication info from a file' as the authentication type.
Specify the JSON file.
Authentication text (JSON format)
This is displayed when you select 'Enter the authentication info in JSON format' as the authentication type.
Enter the JSON text.
Spreadsheet URL
Specify the URL of the spreadsheet to be edited.
Step2
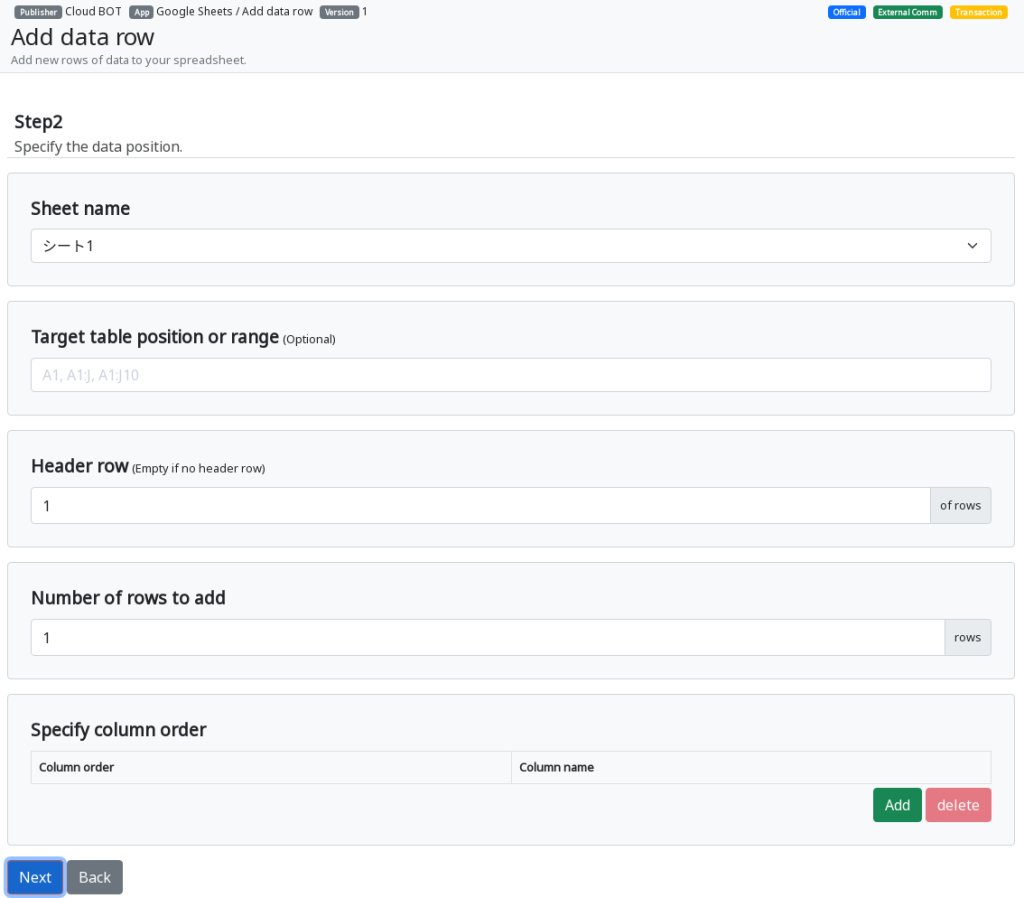
Sheet name
Select the sheet to add a data row to.
Targeted table position or range (optional)
This option allows you to specify a range of cells to target. If not specified, the target is the entire sheet selected as [Sheet Name]. Refer to this page about a targeted table position or range.
*Notes on the input range for the target table can be found here.
Header row
Specify the header row. Refer to this page about a header row.
* Leave blank if the header row is not necessary. An alphabet is assigned automatically for a column name.
Number of rows to add
Specify a number of rows added to the file.
Specify column order (Optional)
If you want to limit rows to input, specify the column name. The column with no data become blank. You can increase or decrease columns to be displayed by pressing the Add / Delete buttons.
* If multiple columns have the same name, they are displayed in order from left column to right.
* If not specified, all columns are displayed.
Step3
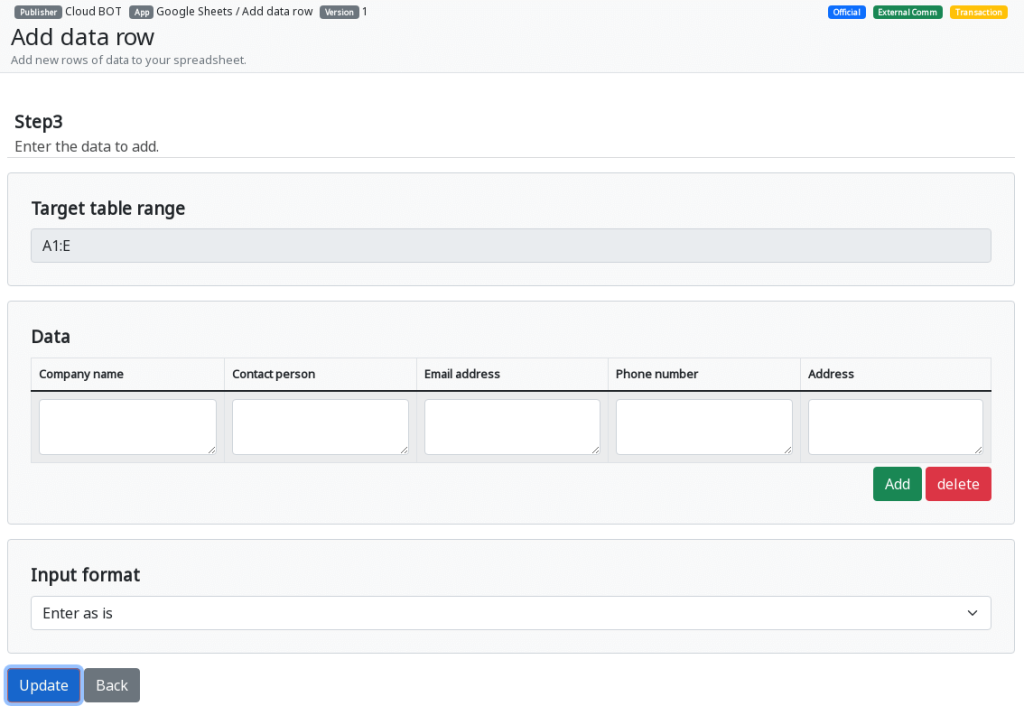
The target table range
The target table range is displayed.
Data
Input data to add. You can increase or decrease data rows by pressing the Add / Delete buttons.
* [Link elements and rows] function is useful to paste group data.
Input format
Specify the input format.
Enter as is: Values will be entered exactly as the user inputs them. Values starting with '=' will not be evaluated as formulas.
Enter as a formula: Values will be parsed in the same way as if entered through the spreadsheet's UI. If you input a formula starting with '=', it will be evaluated as a formula.
Result Screen
Edited data
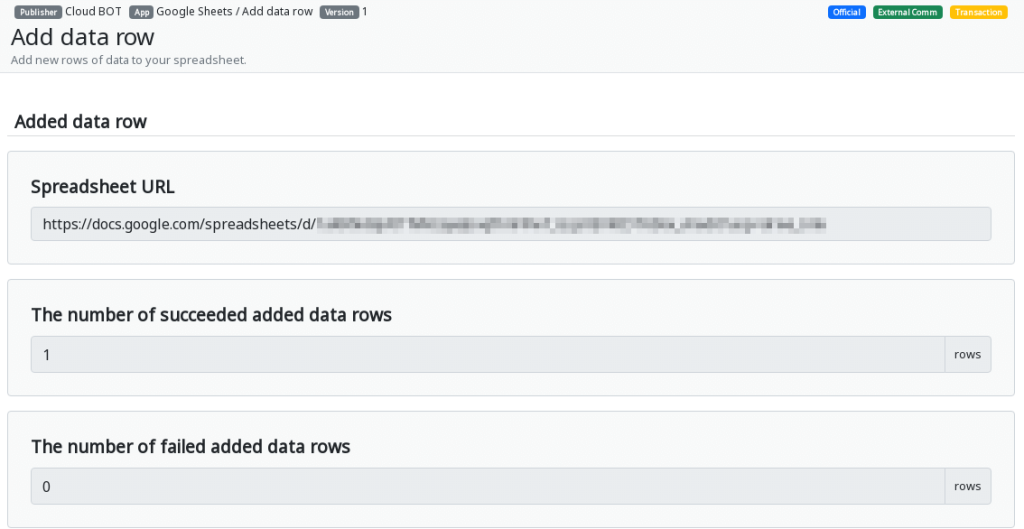
The results will be displayed.
The number of succeeded added data rows
The number of successfully added data rows is displayed.
The number of failed added data rows
The number of data rows which were failed to add is displayed. Refer to this page for example of failing to add.
Notes on the Target Table
Depending on the input status of the Google Sheets, data rows may be added in unintended locations.
When adding data rows, the existing data in the spreadsheet is searched to recognize the 'table' within the specified input range.
A 'table' refers to a collection of adjacent cells containing values.
Data is added based on the first column of the lowest table within the specified input range.
Let's take the following as an example.
This sheet has two tables, A1:C2 and B4:D6.
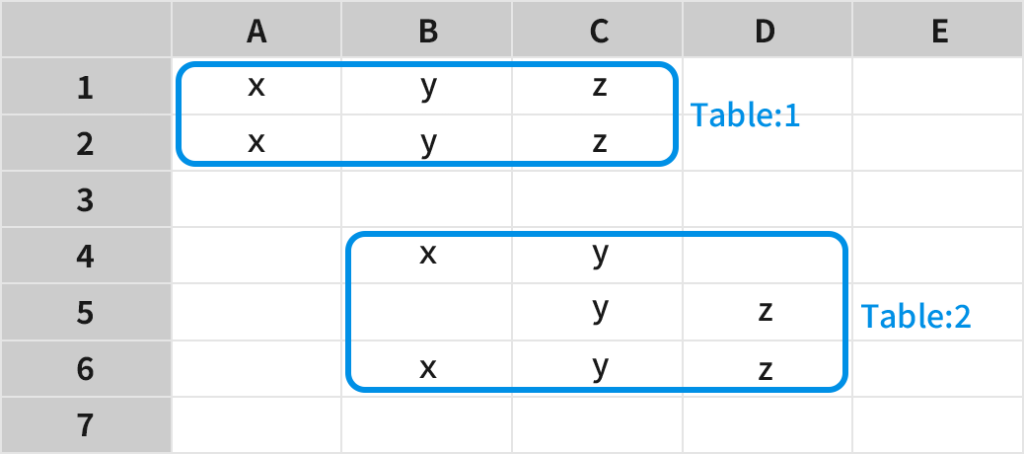
In the following case, row addition starts from B7.
- If the target table position or range sheet is not specified (since Table :2 is the last table).
- If B4 or C5:D5 is specified (as both are within Table:2).
- If B2:D4 is specified (since the last table within the range is Table:2).
- If A3:G10 is specified (since the last table within the range is Table:2).
In the following cases, row addition starts correctly.
- If A1 is specified, writing starts from A3 (since it is within Table:1).
- If E4 is specified, writing starts from E4 (since it is not within any table).
- If A4 is specified, writing starts from A4 (since it is not within any table).