Run a BOT using the list data acquired from the spreadsheet as the input value (group data) for BOT

Home > Connect > Power Automate > Run a BOT using the list data acquired from the spreadsheet as the input value (group data) for BOT
Creating a flow
Create a flow that executes the list data obtained from the spreadsheet as the BOT input value (group data).

Schedule (Recurrence)
Generate a trigger at specified time.
Google Sheets(Get multiple rows)
Get multiple rows of data in the spreadsheet.
Control(Apply to each)
The following actions are executed sequentially for the number of rows of group data acquired by "Get multiple rows".
Cloud BOT(Execute BOT)
Execute BOT with the array output by the control as the input value (group data).
Setting a Schedule
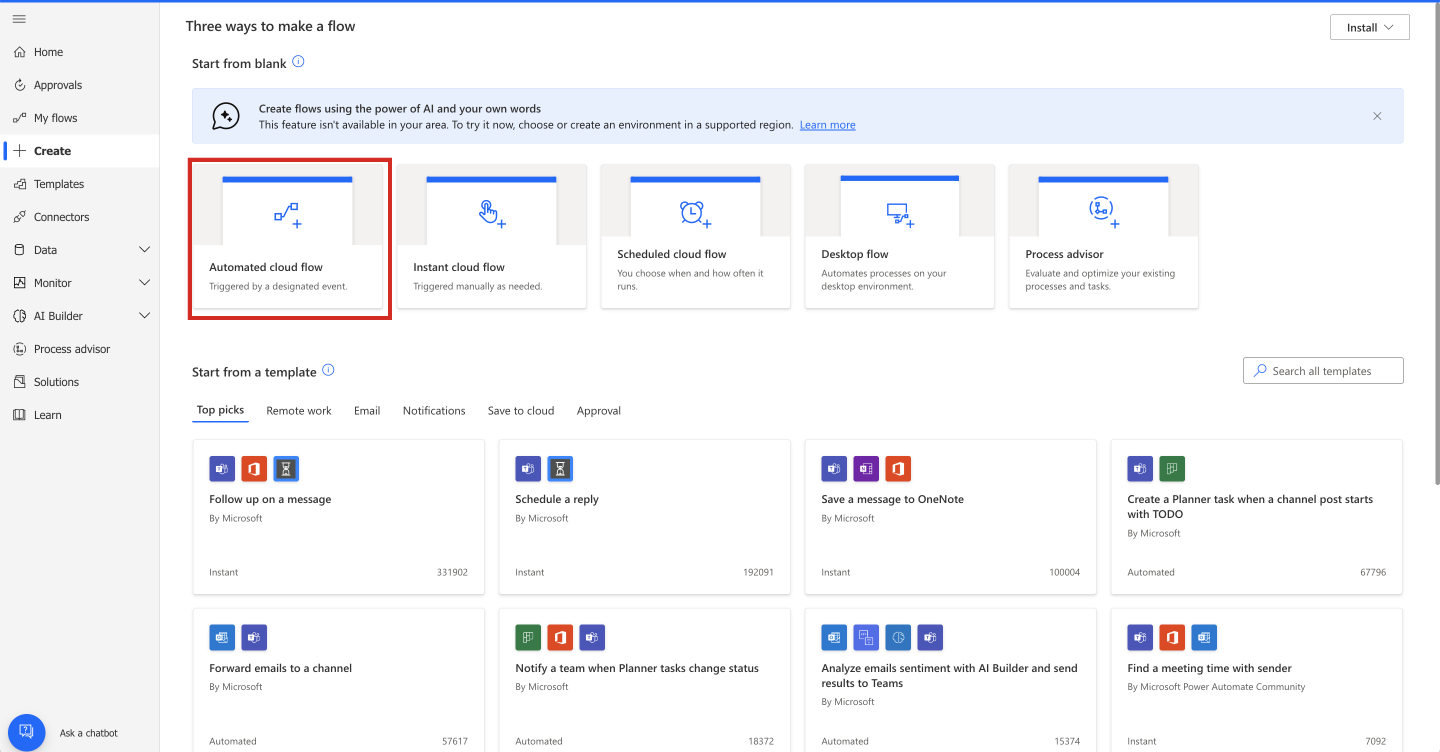
1. Click "Create" from the navigation menu on the left side of the screen and select "Automated Cloudflow".
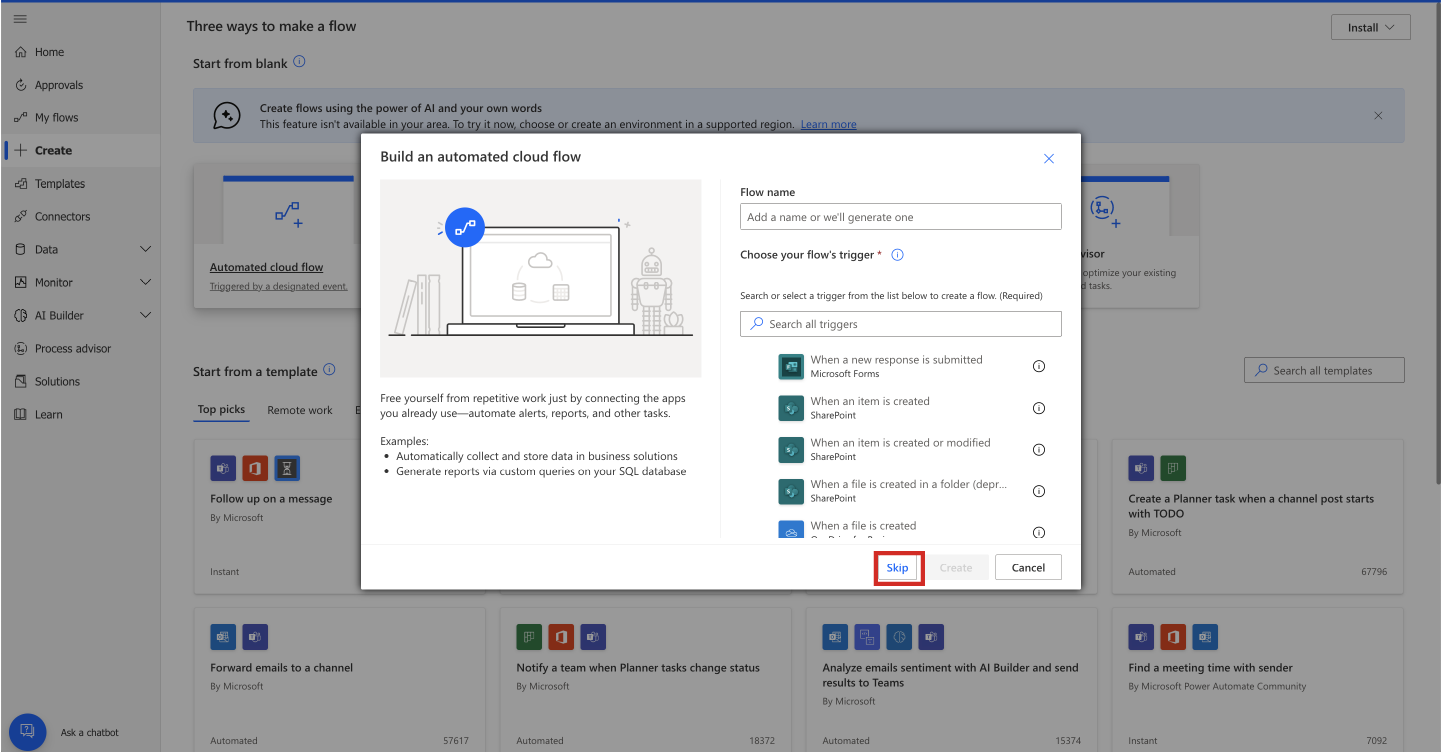
2. Although a modal window of "Build an automated cloud flow" will be displayed, press the "Skip" button."
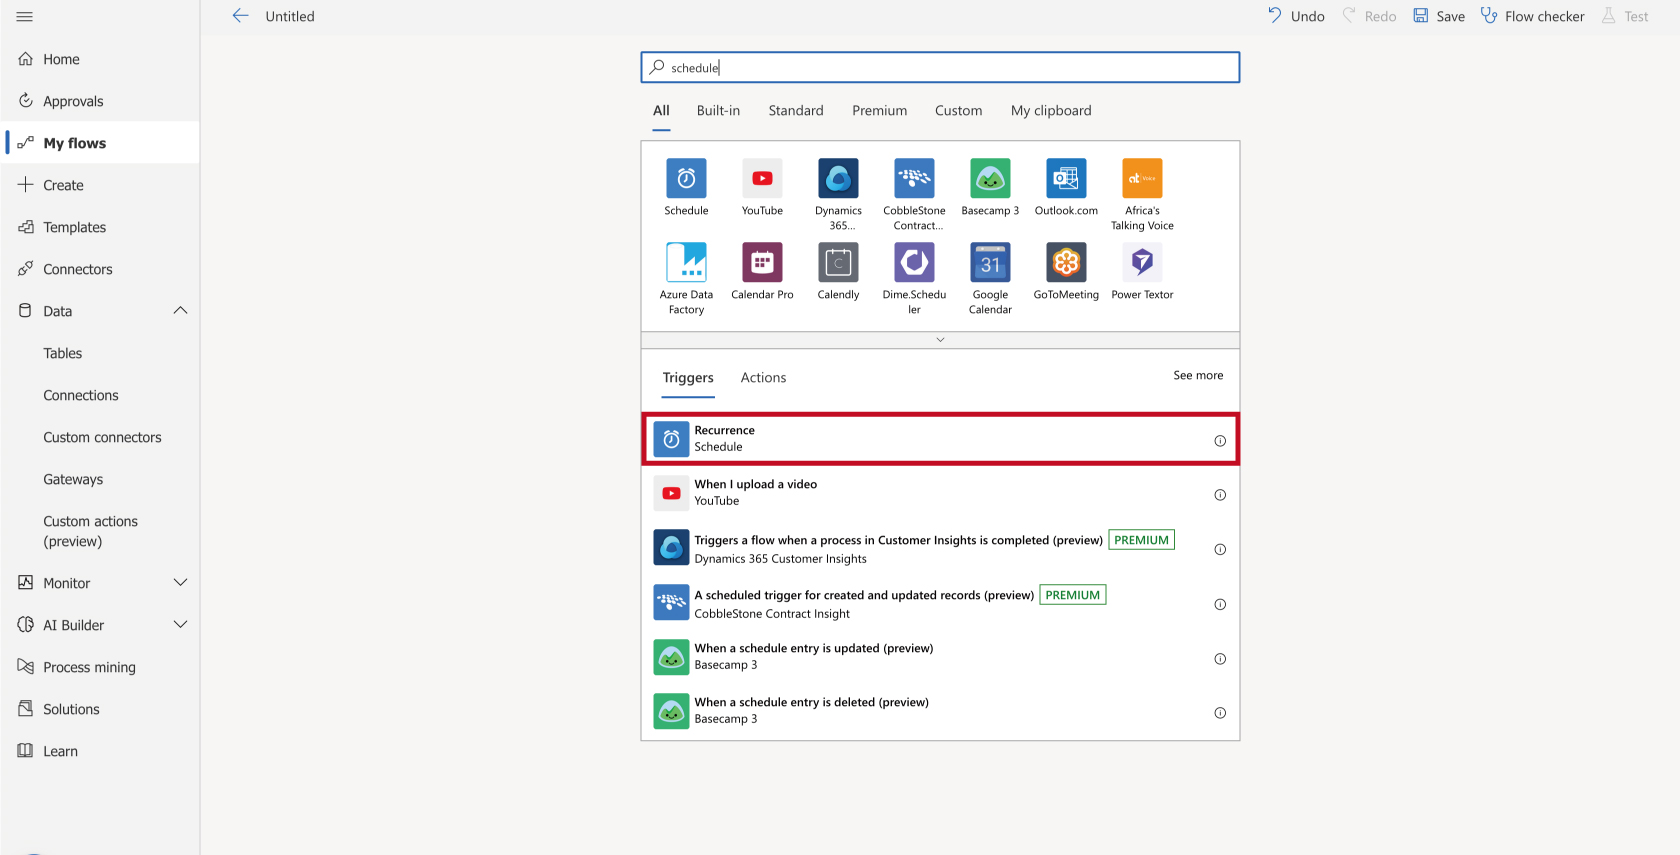
3. Search for "Schedule" in the built-in tab and select "Recurrence".
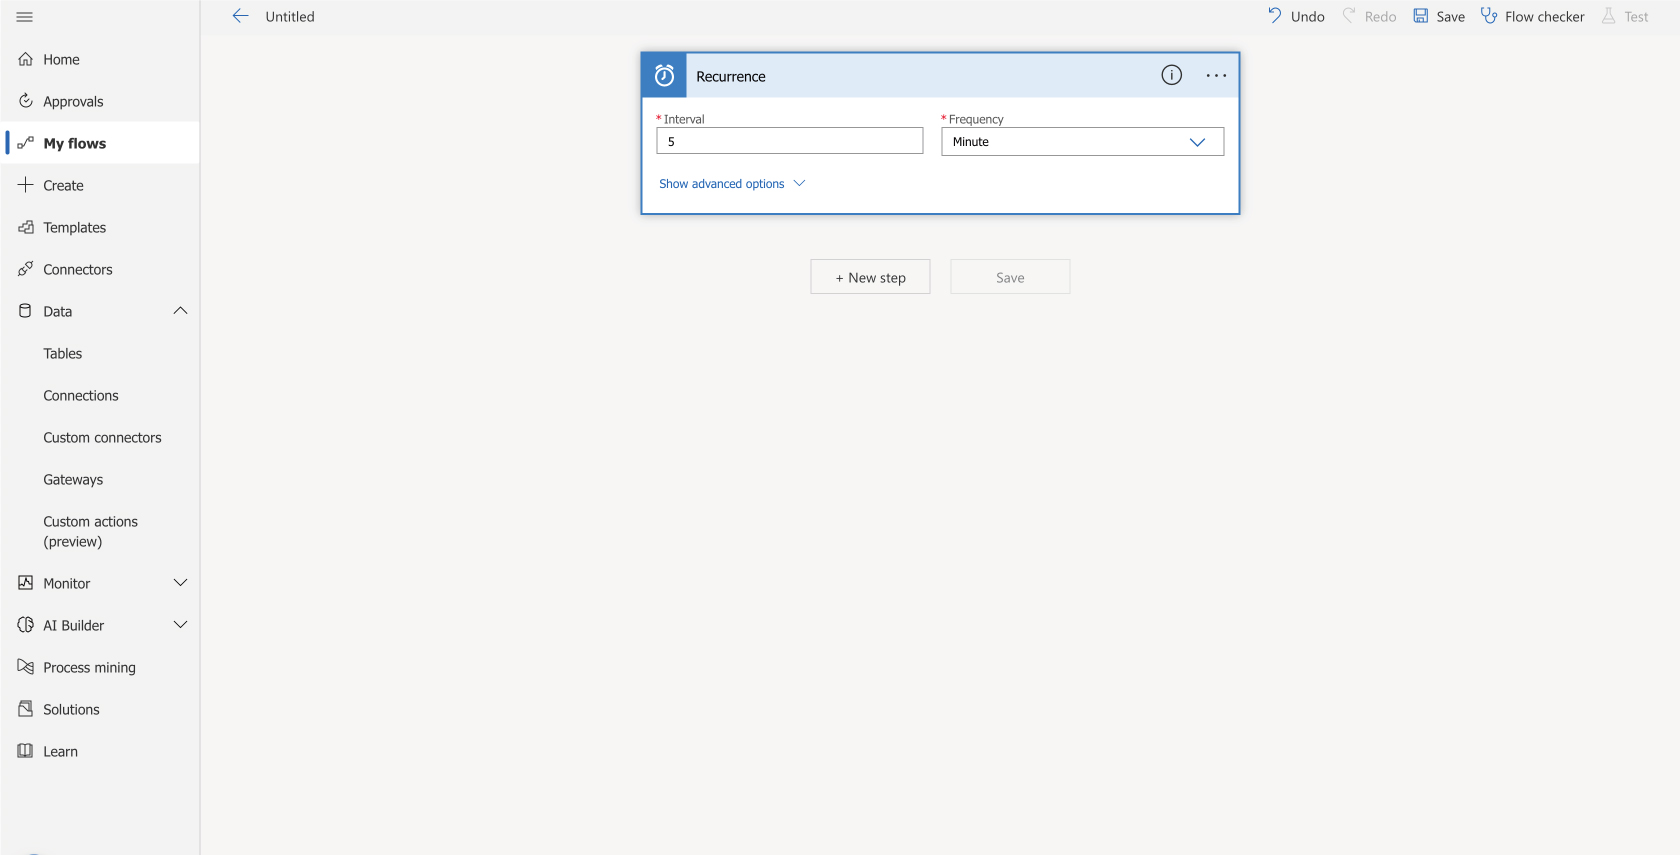
4. Set "Interval" and "Frequency".
Setting Google sheets
1.Select "New Step".
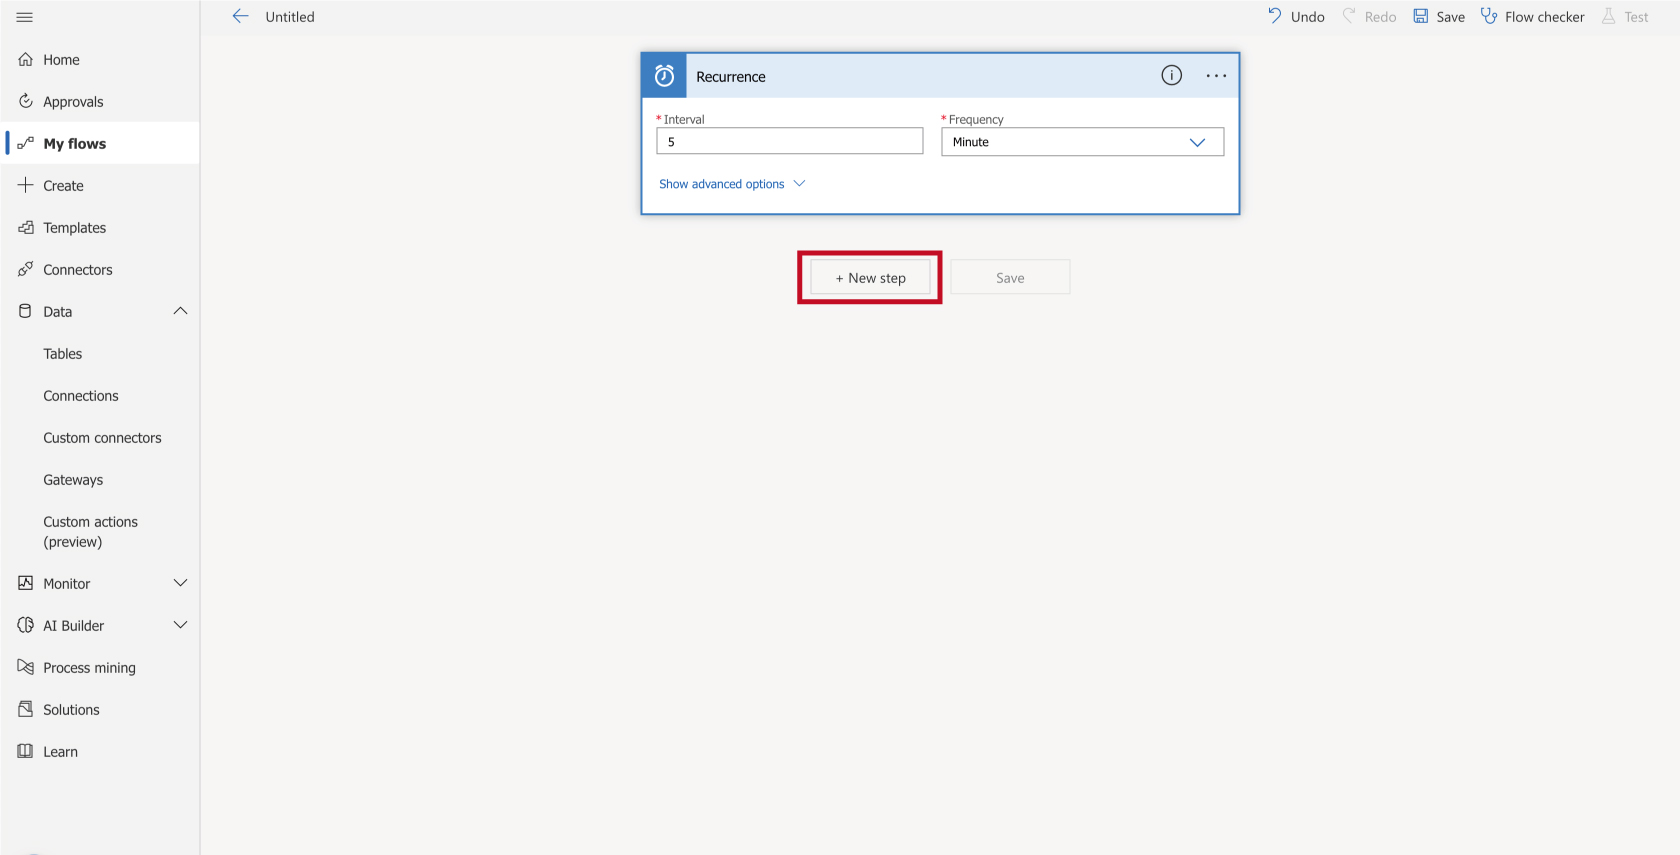
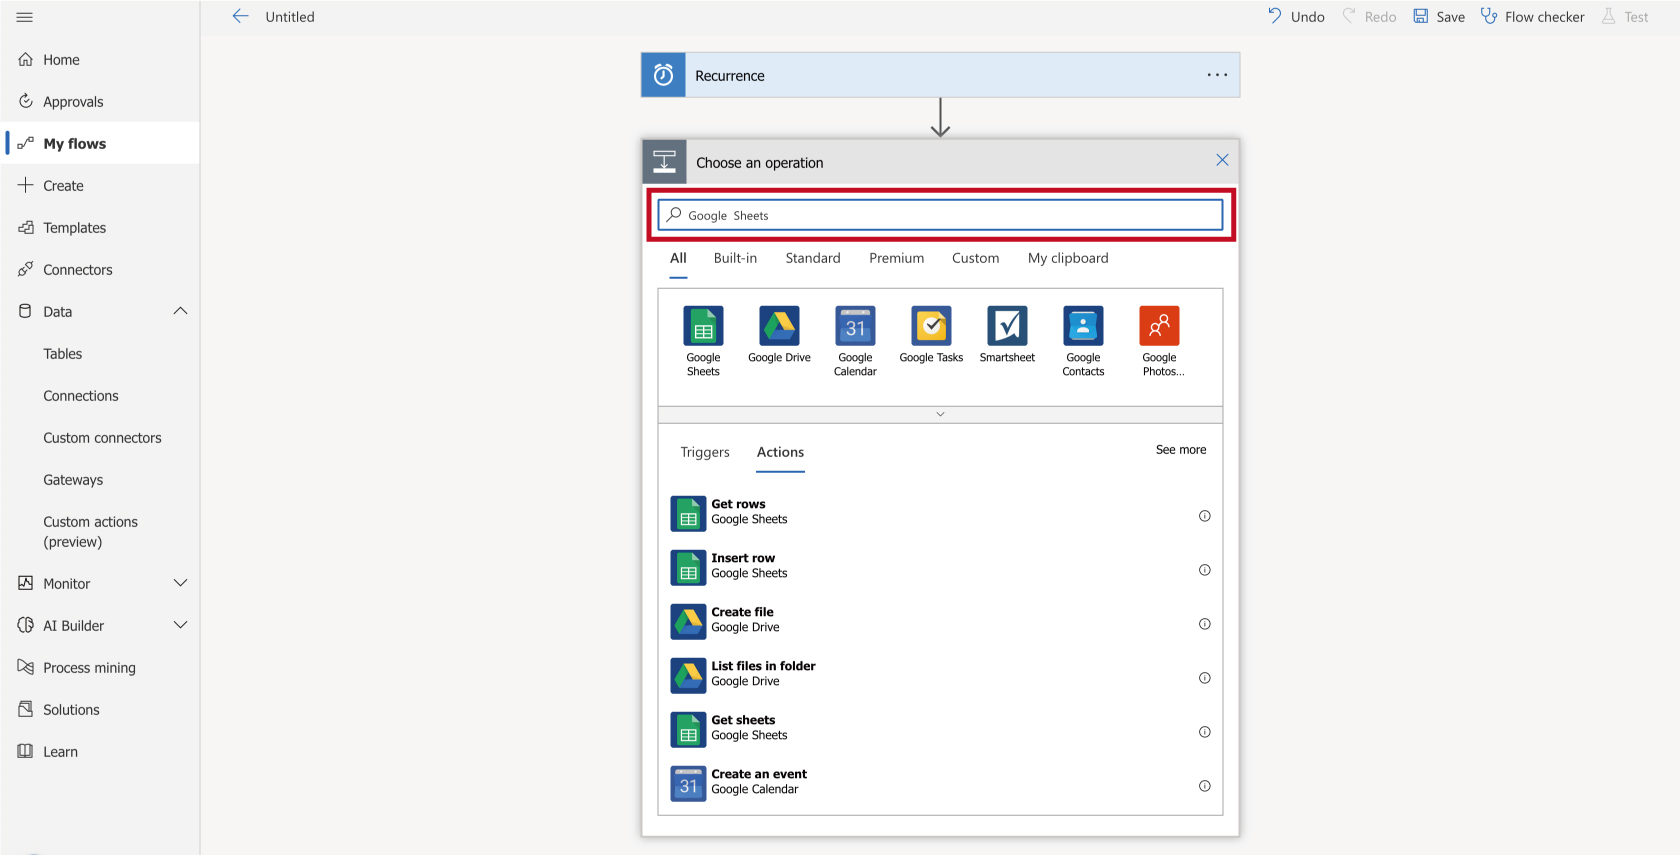
2. Search for "Google Sheets", click the icon and select "Get Rows".
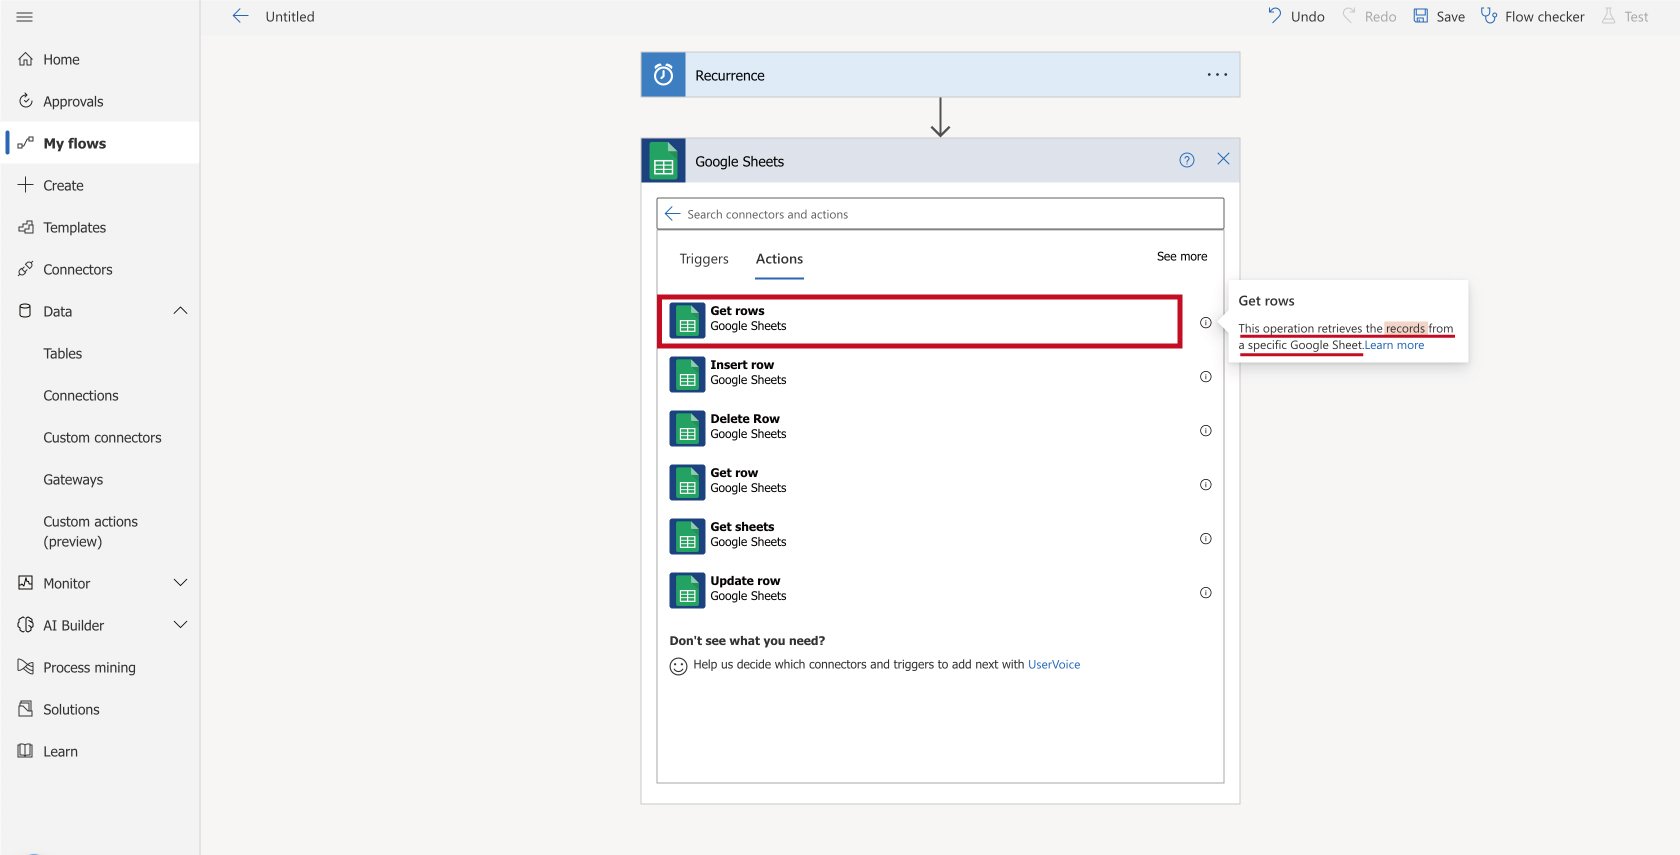
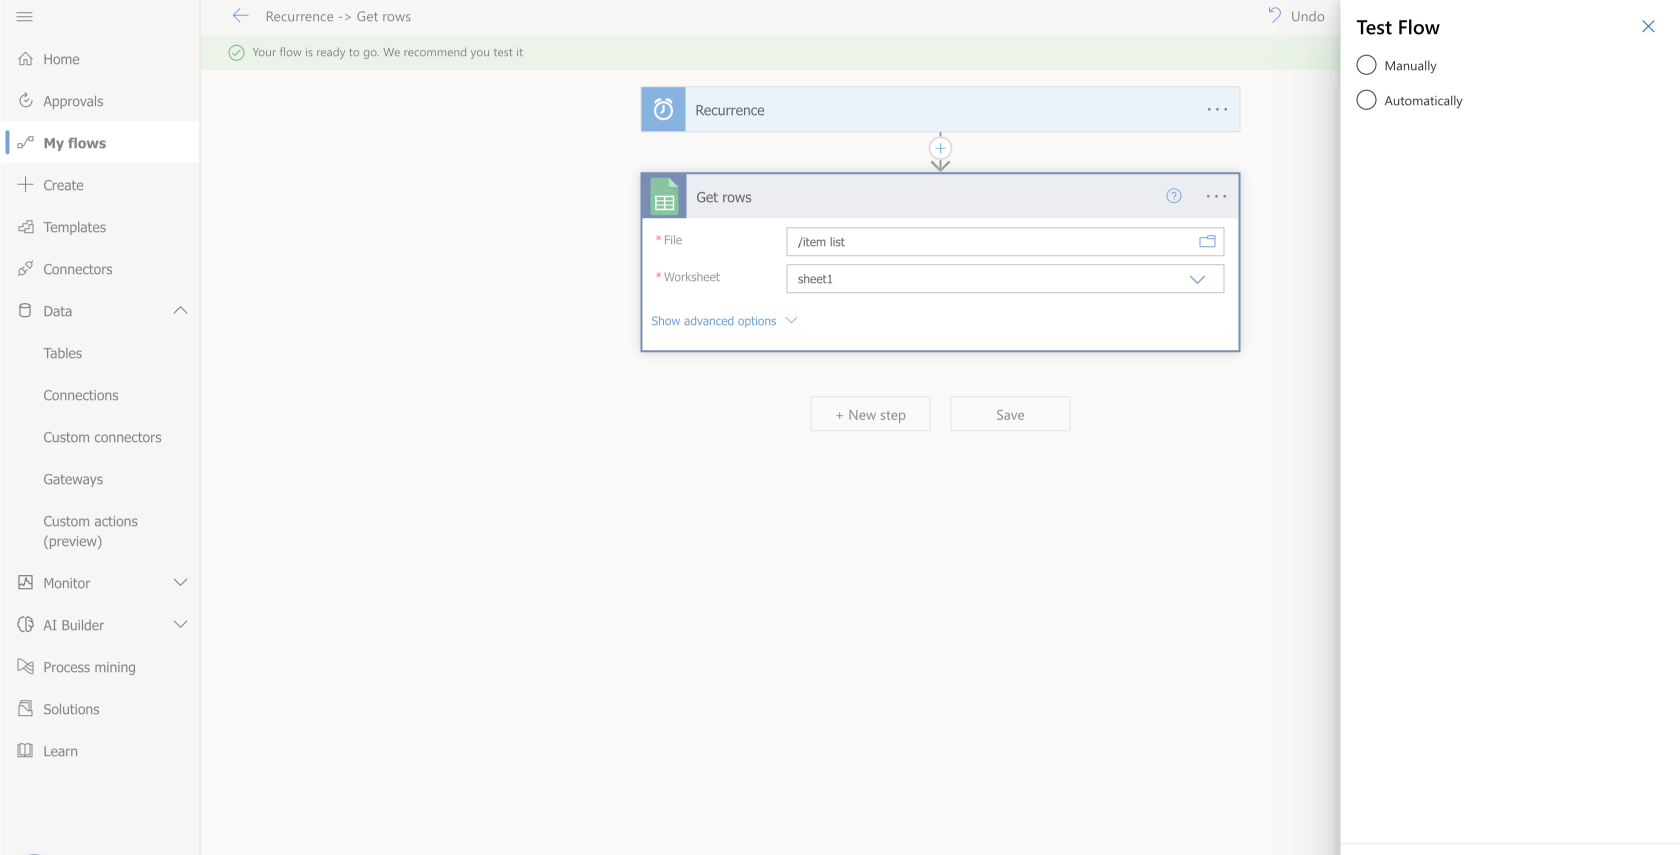
3. Set the action. Set "File" and "Worksheet".
*Create a connection if it doesn't exist.
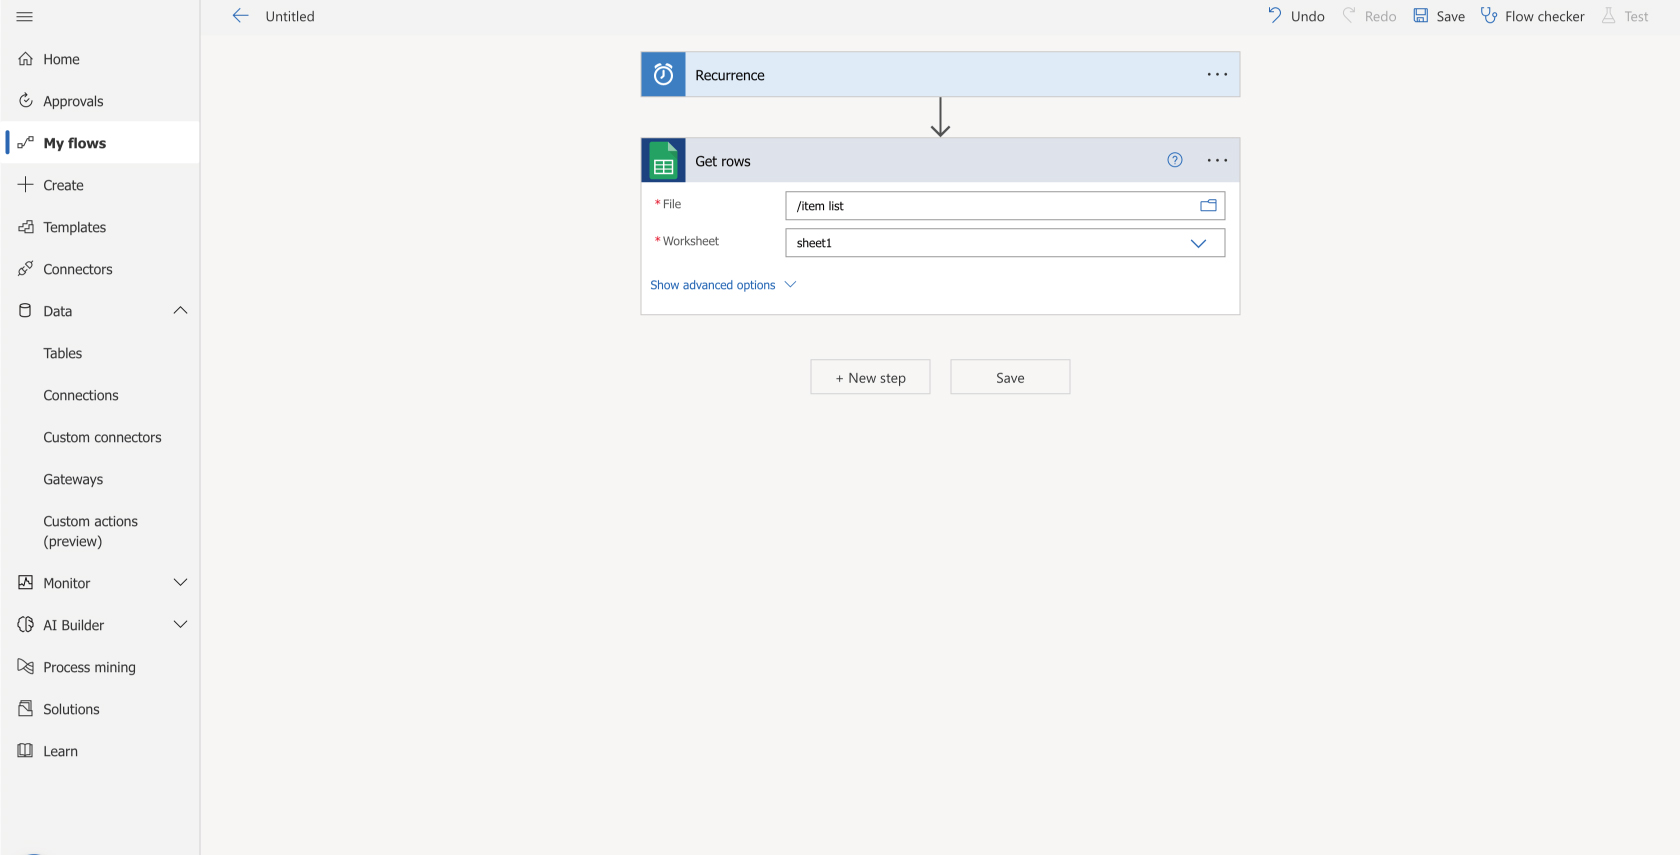
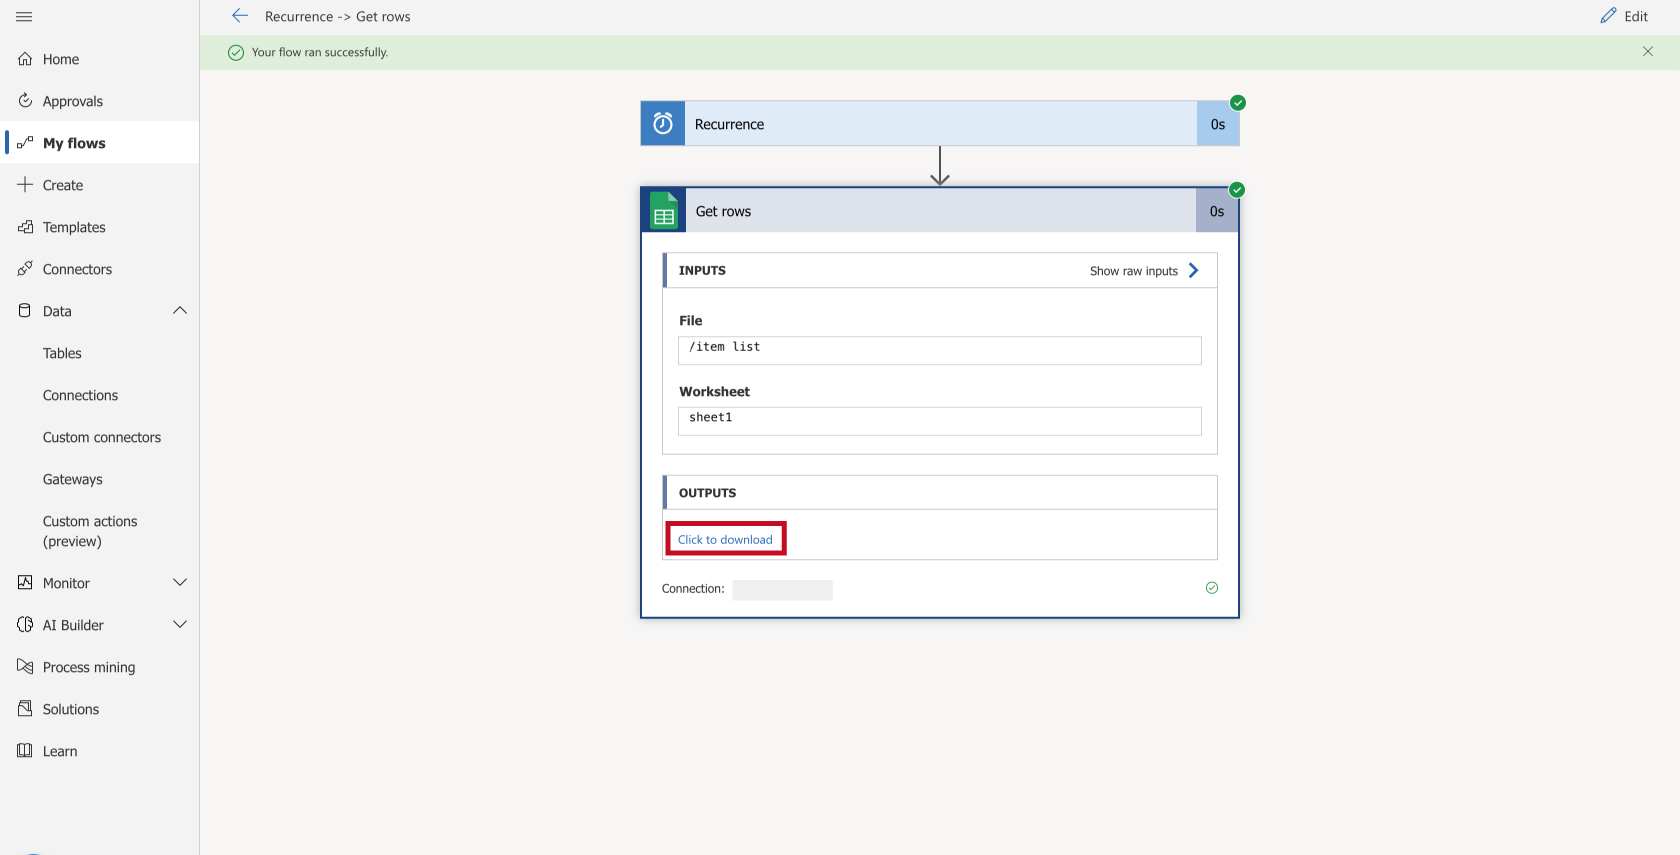
You can check the output value by performing "Test" on the upper right after setting.
Setting control
In order to execute the list data obtained from Google Sheets as the BOT input value (group data), it is necessary to format the list data into the text format of the group.
Create an empty array and add Google Sheets records to the array in a sequential run. Finally, format the group into a suitable text format.
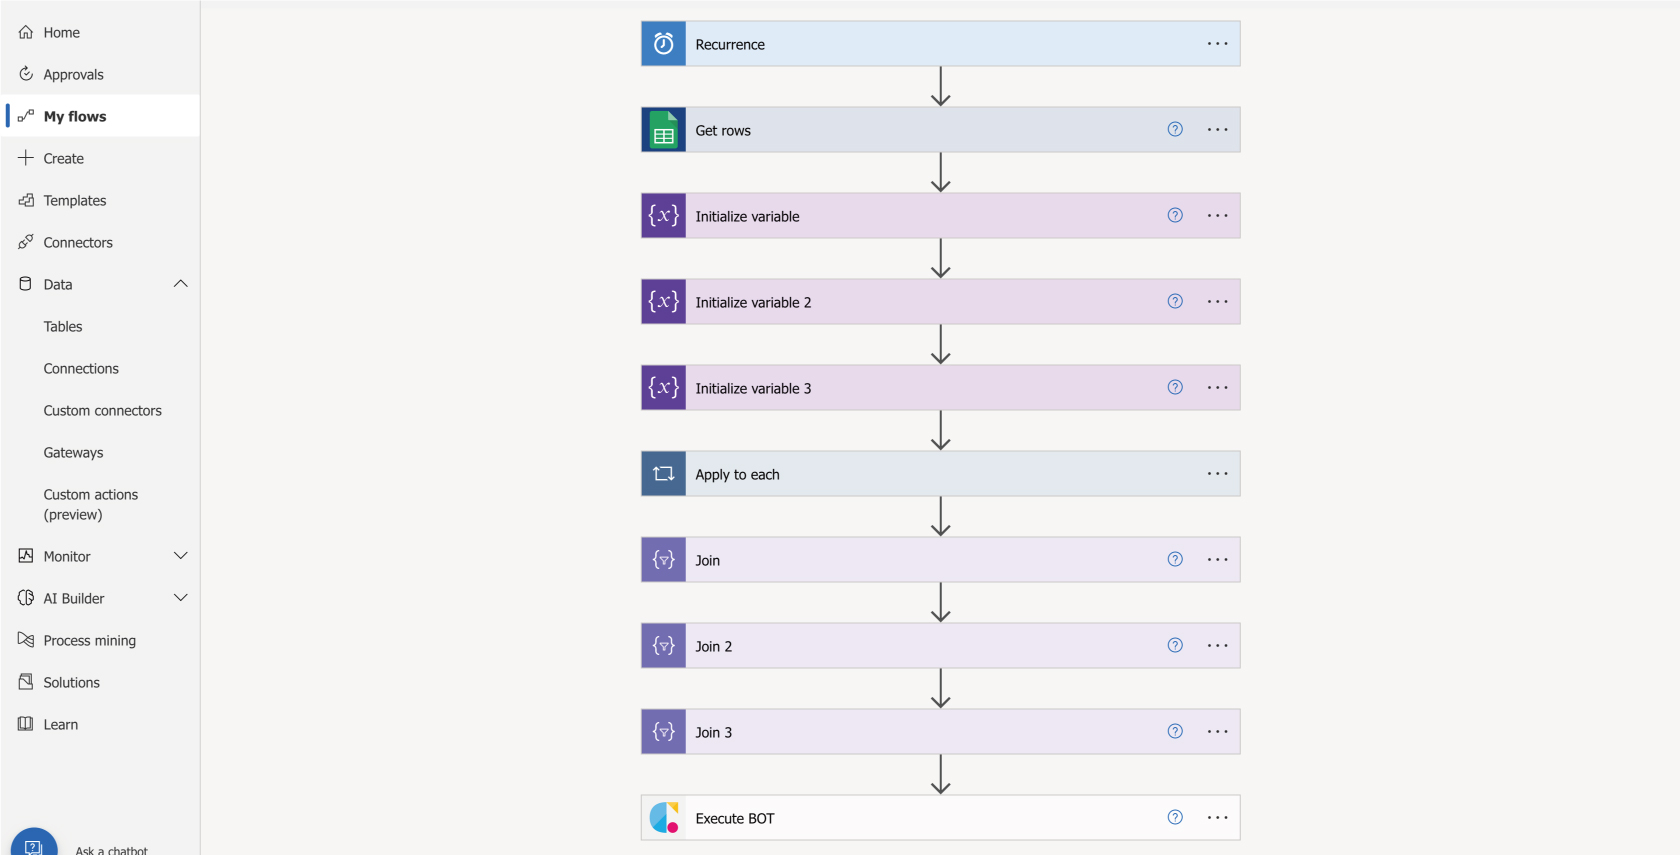
Create a flow as follows.
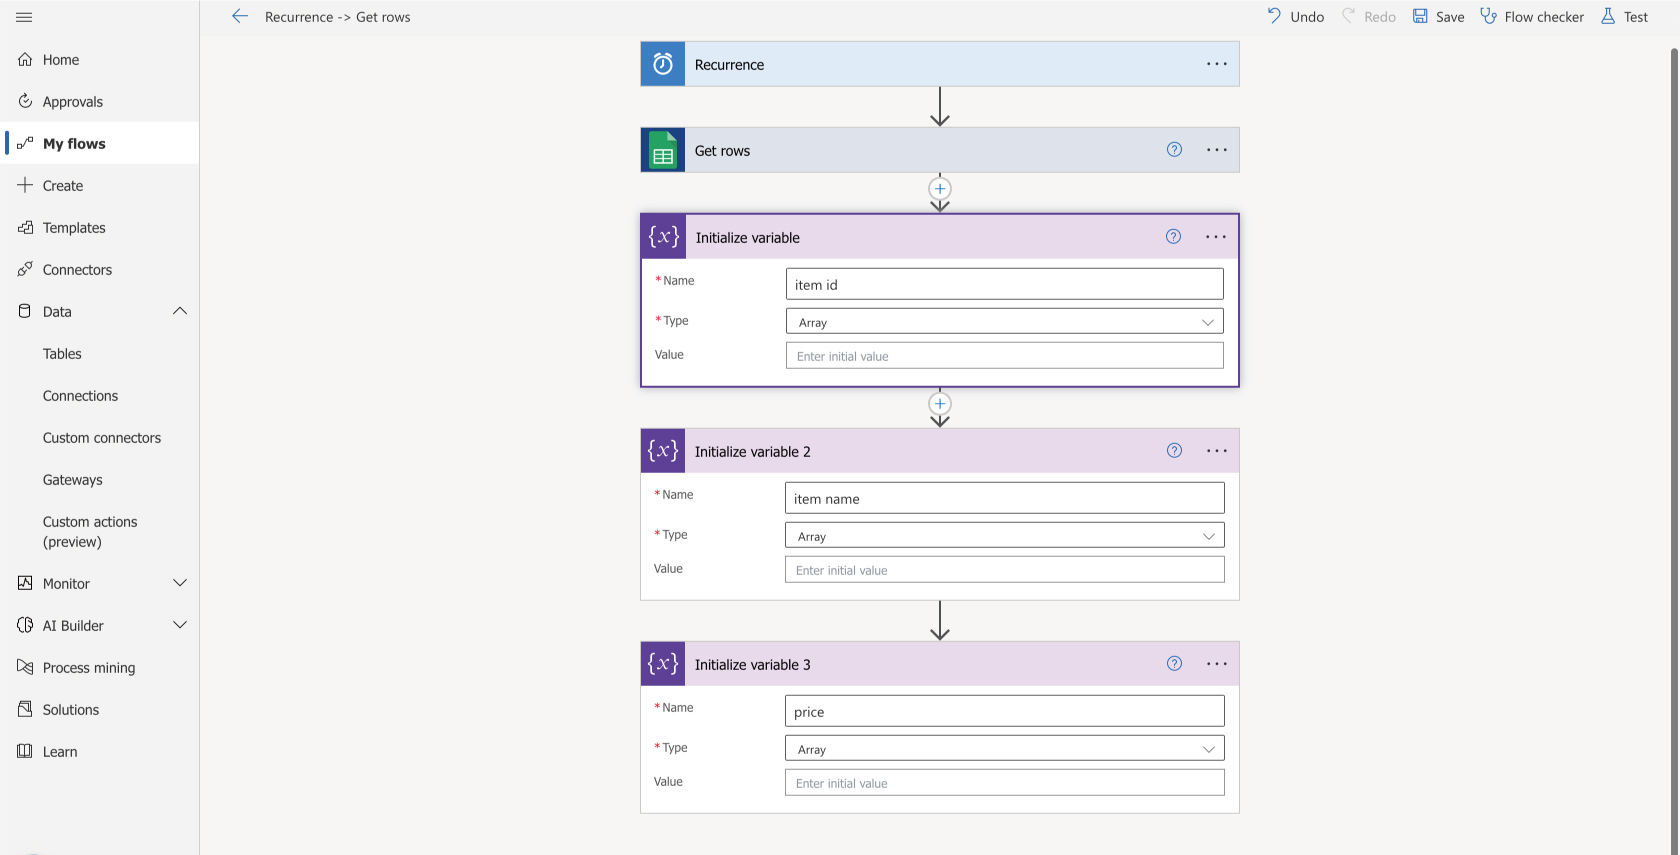
Create an empty array
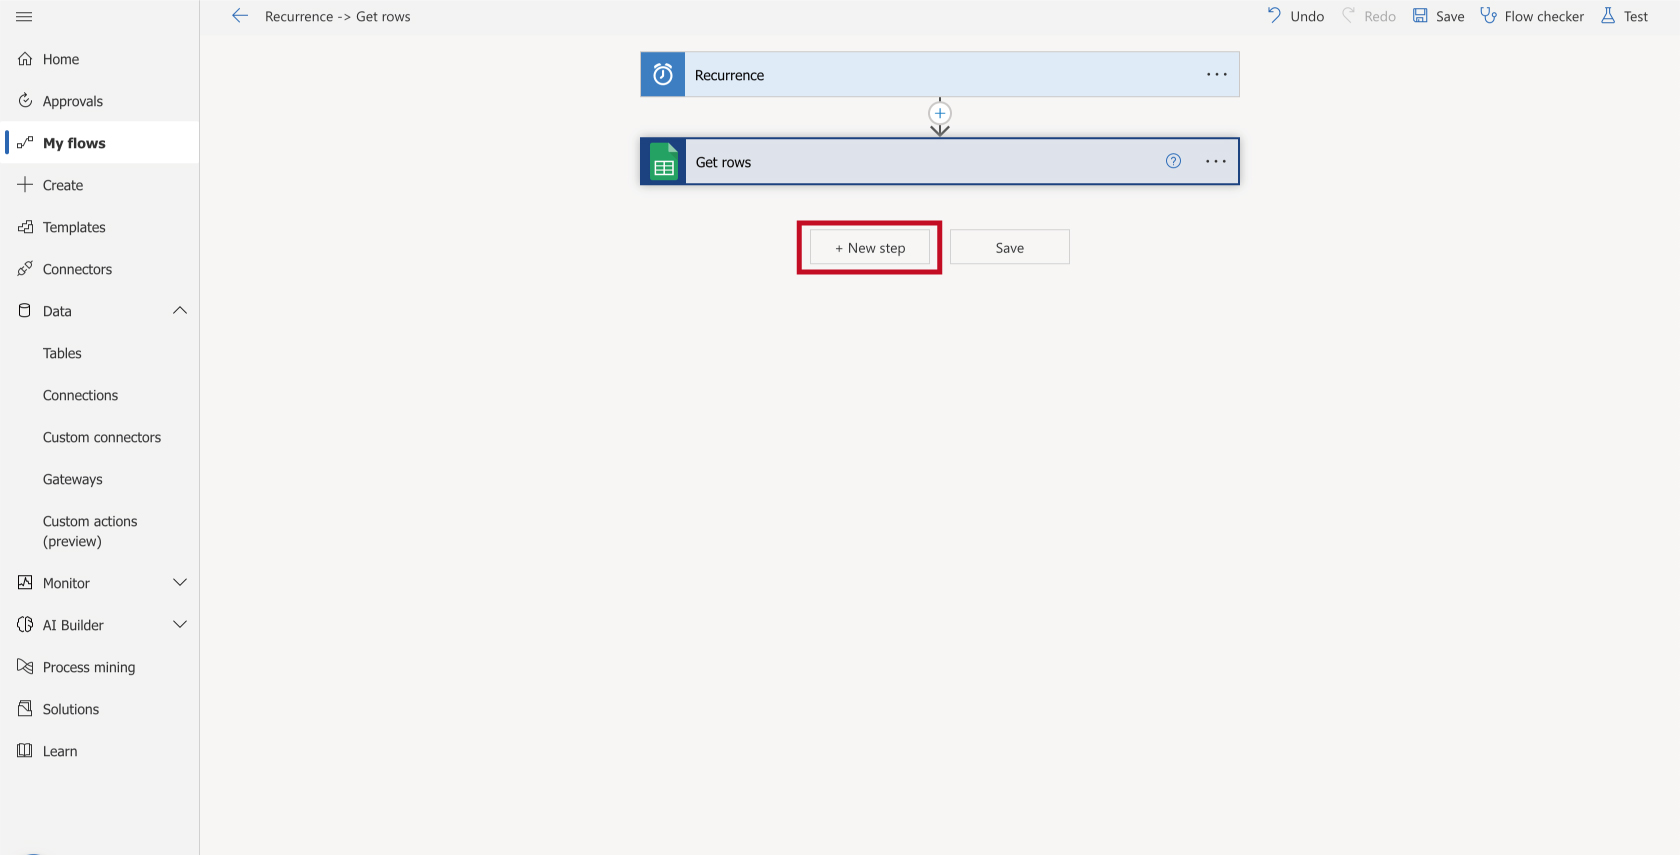
1. Select "New Step".
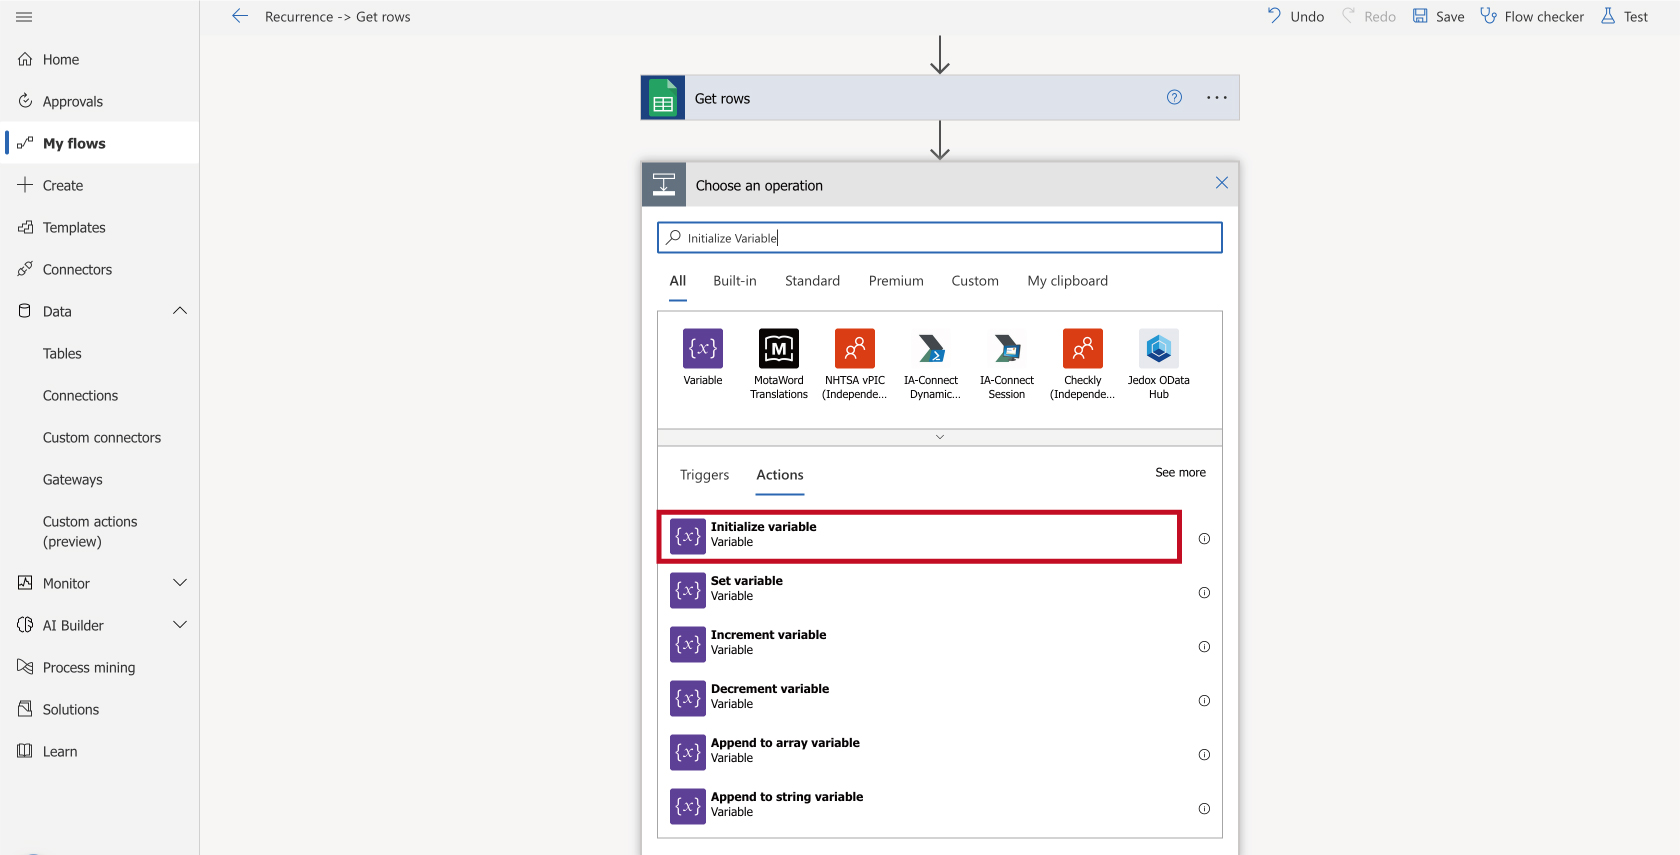
2.Search for "Initialize variable", click the icon and select "Initialize variable".
3. Specify "Name" and "Type".
Initialize variables for the number of target columns that you want to set to the action. Create an empty array by leaving the value blank.
Set up sequential execution
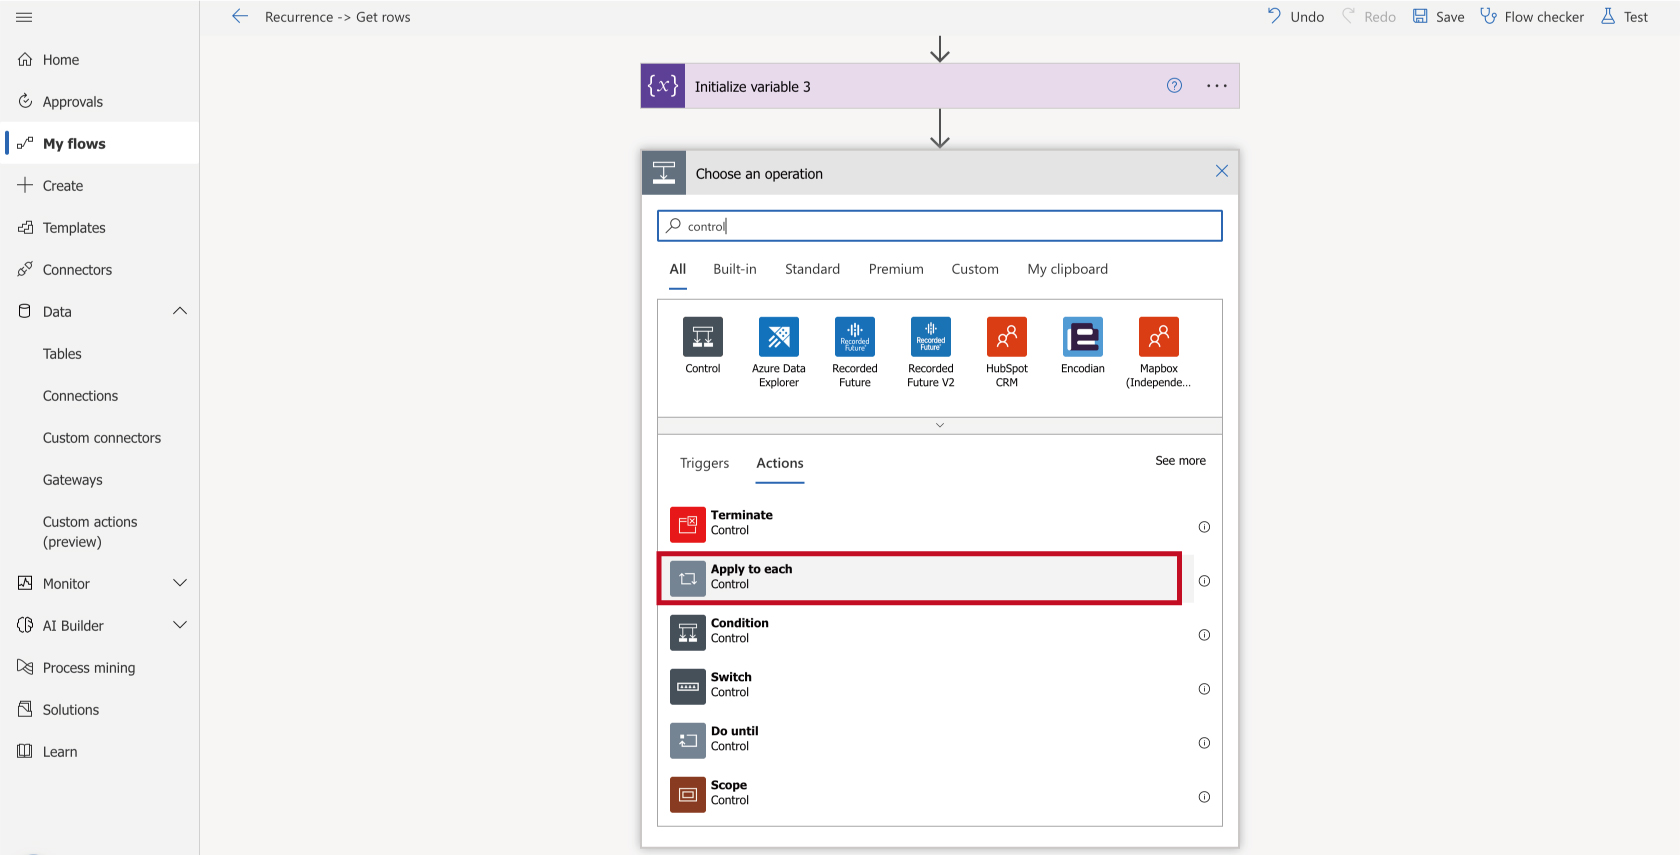
1. Select "New Step". Press the built-in tab and search for "Control". Click the "Apply to each" icon."
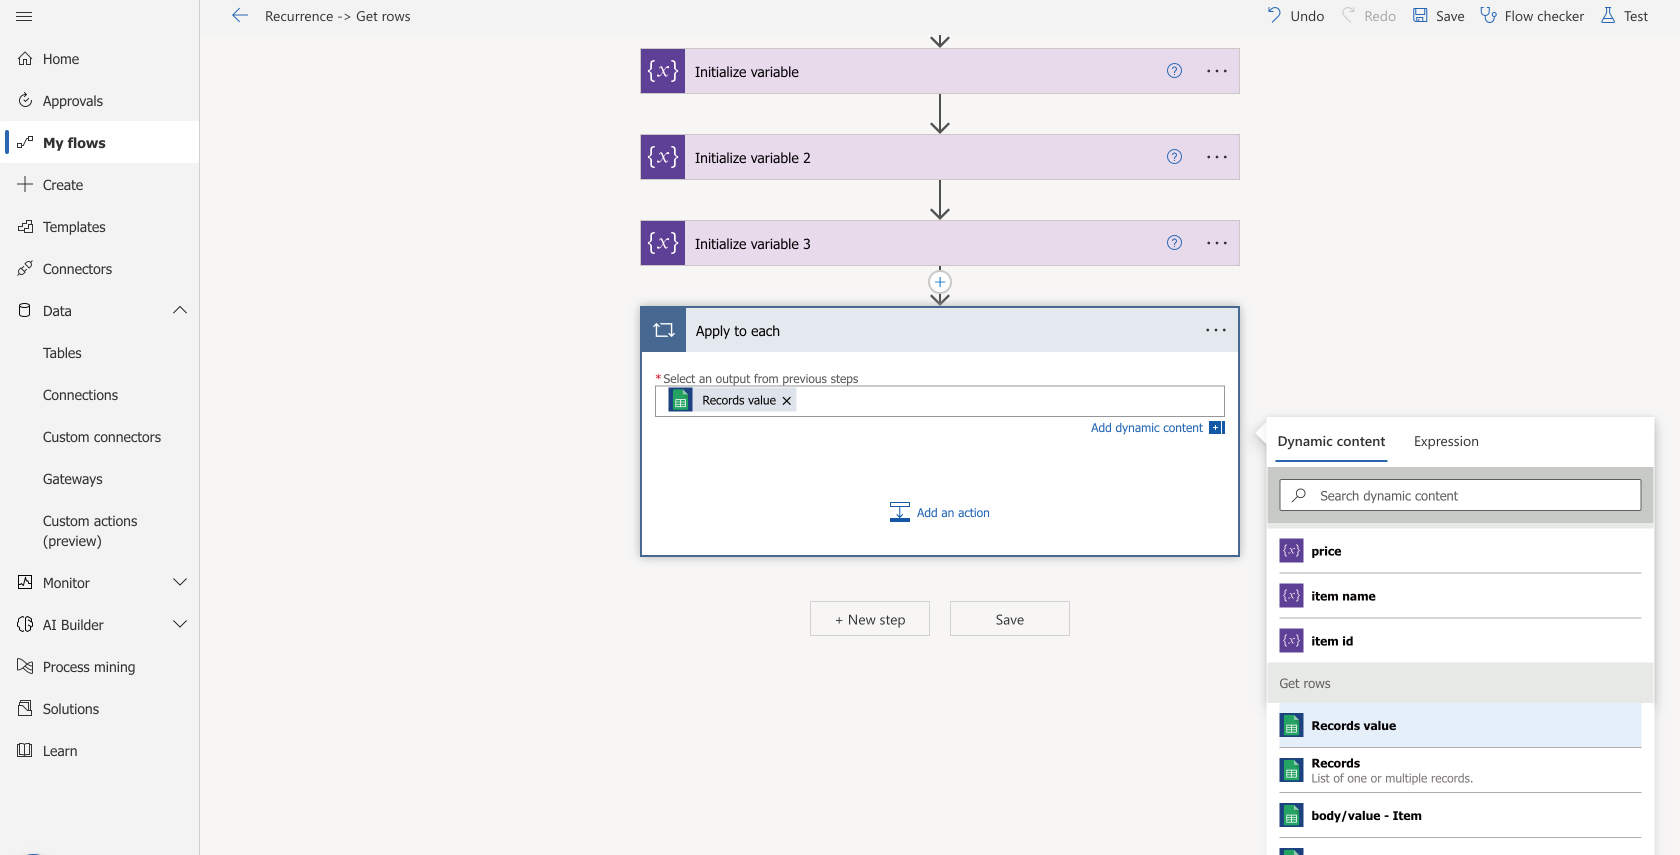
2. Specify "Select an output from previous step".
In this example, specify "Records value" from "Add dynamic content".
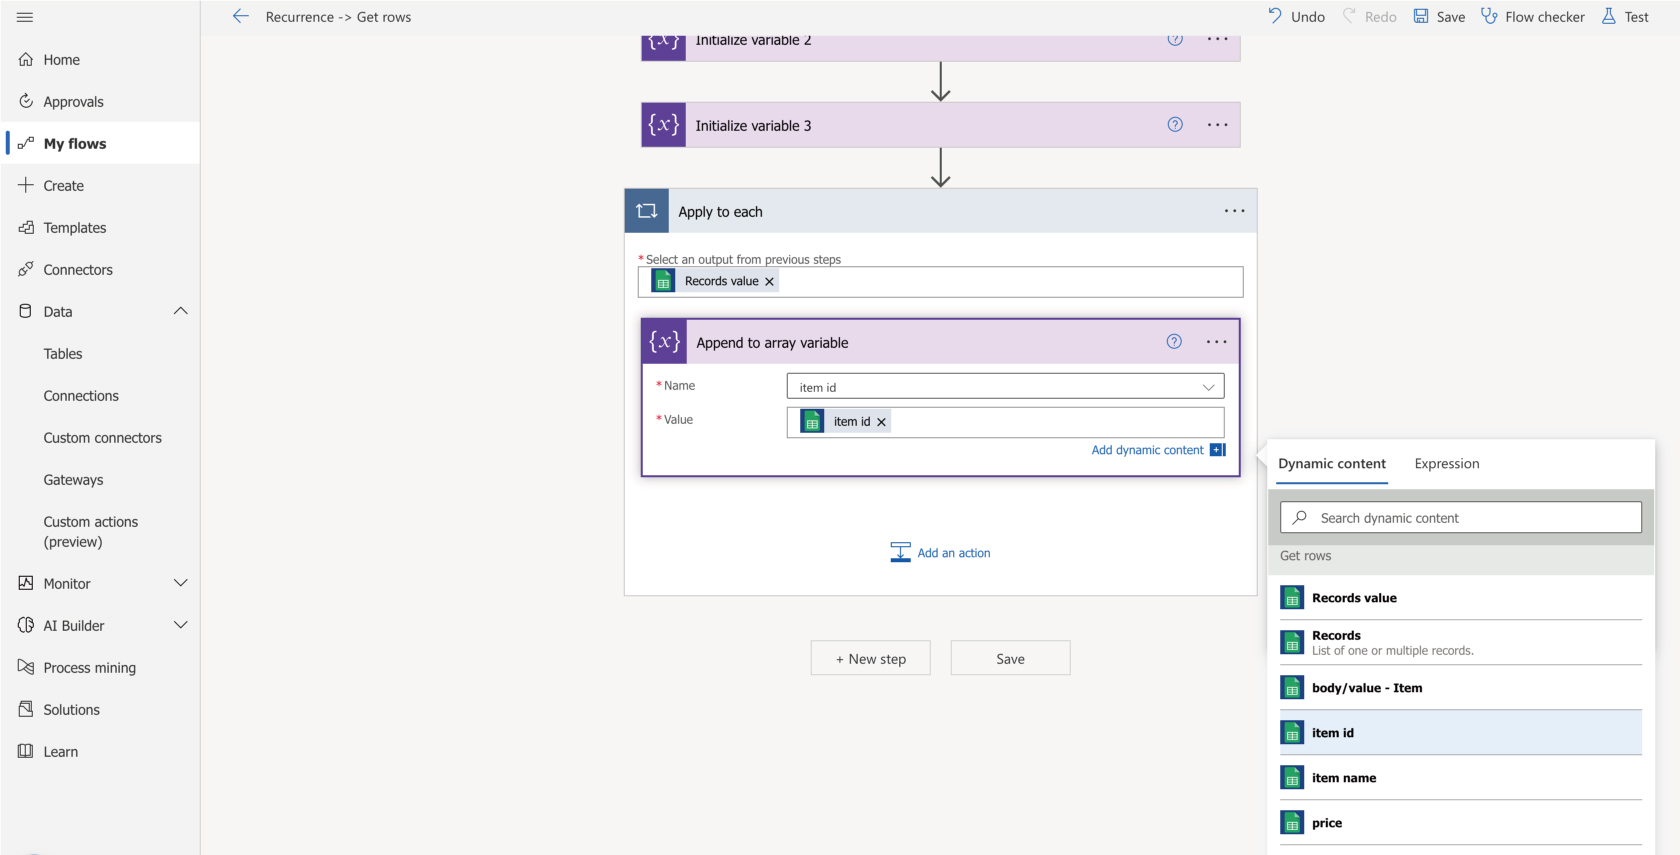
Add records to array
Specify the records required as data to be passed to the cloud BOT from the column names of the sheet obtained by "Get rows".
1. Click "Add Action". Search for "variable" and select "Append to Array variable".
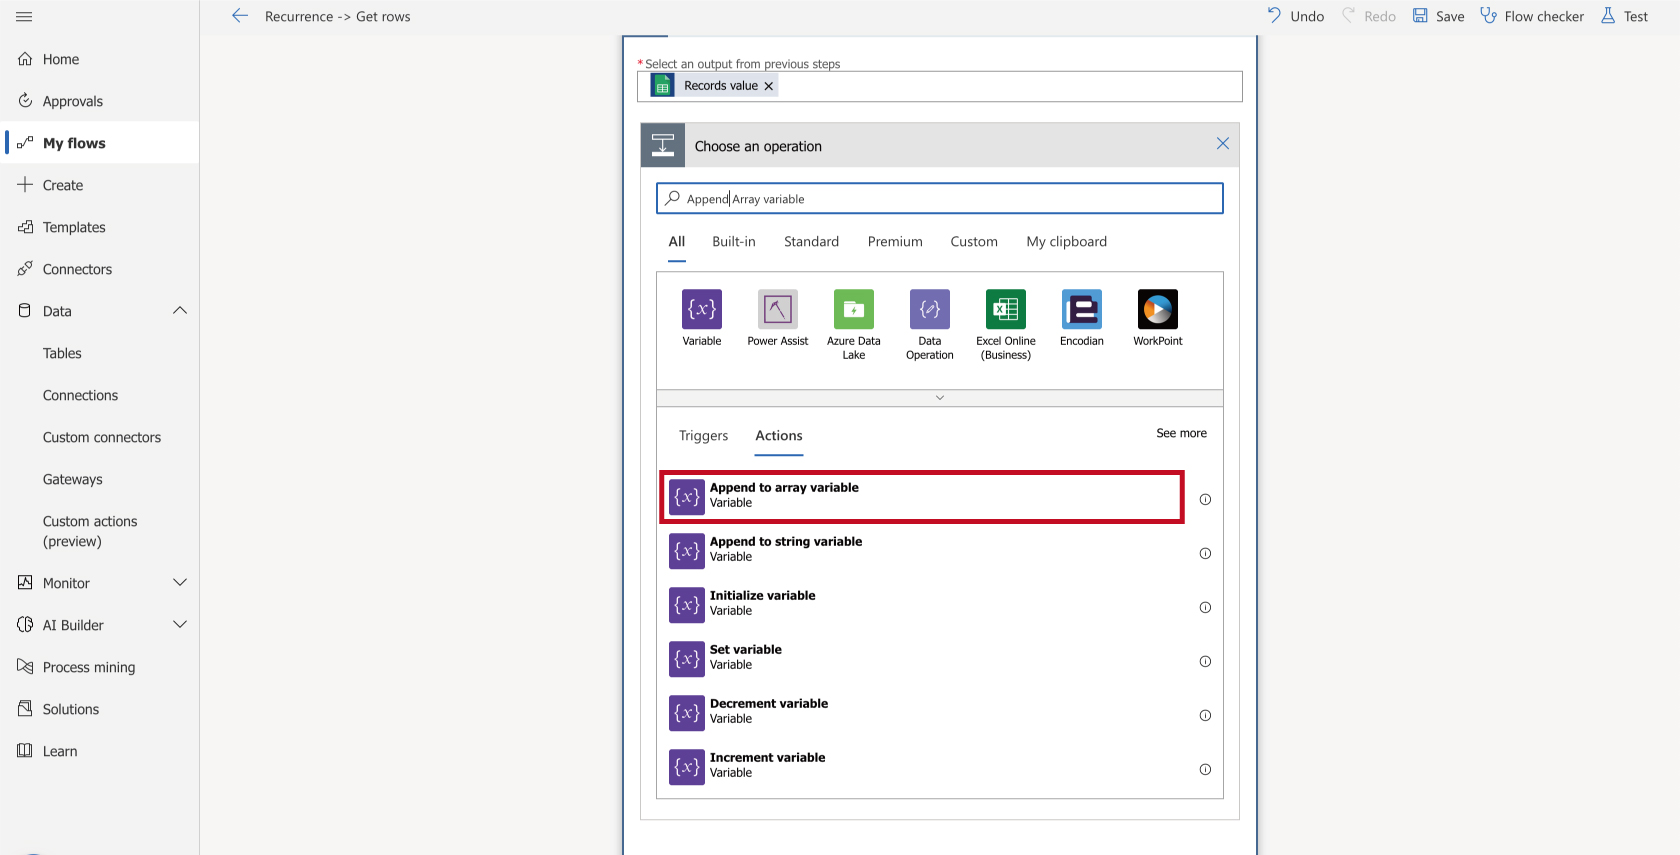
2. Specify "Name" and "Value".
The value can be specified from "Add dynamic content". Set the number of target lines that you want to set to the action after this.
Join arrays and format text
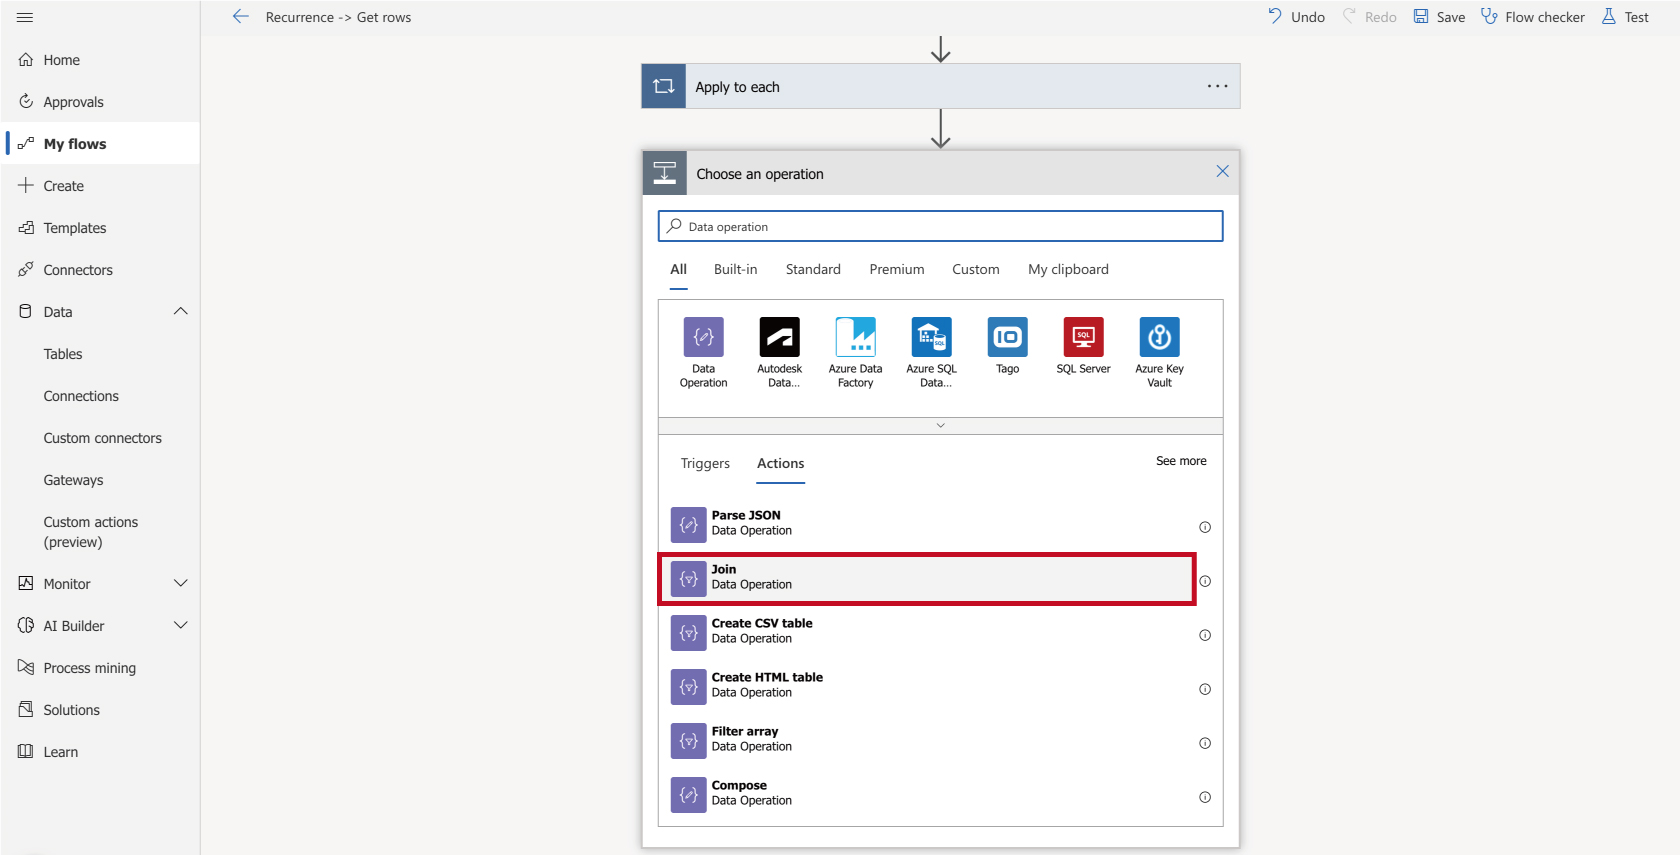
1. Select "New Step". Search for "Data operation" and click the "Join" icon.
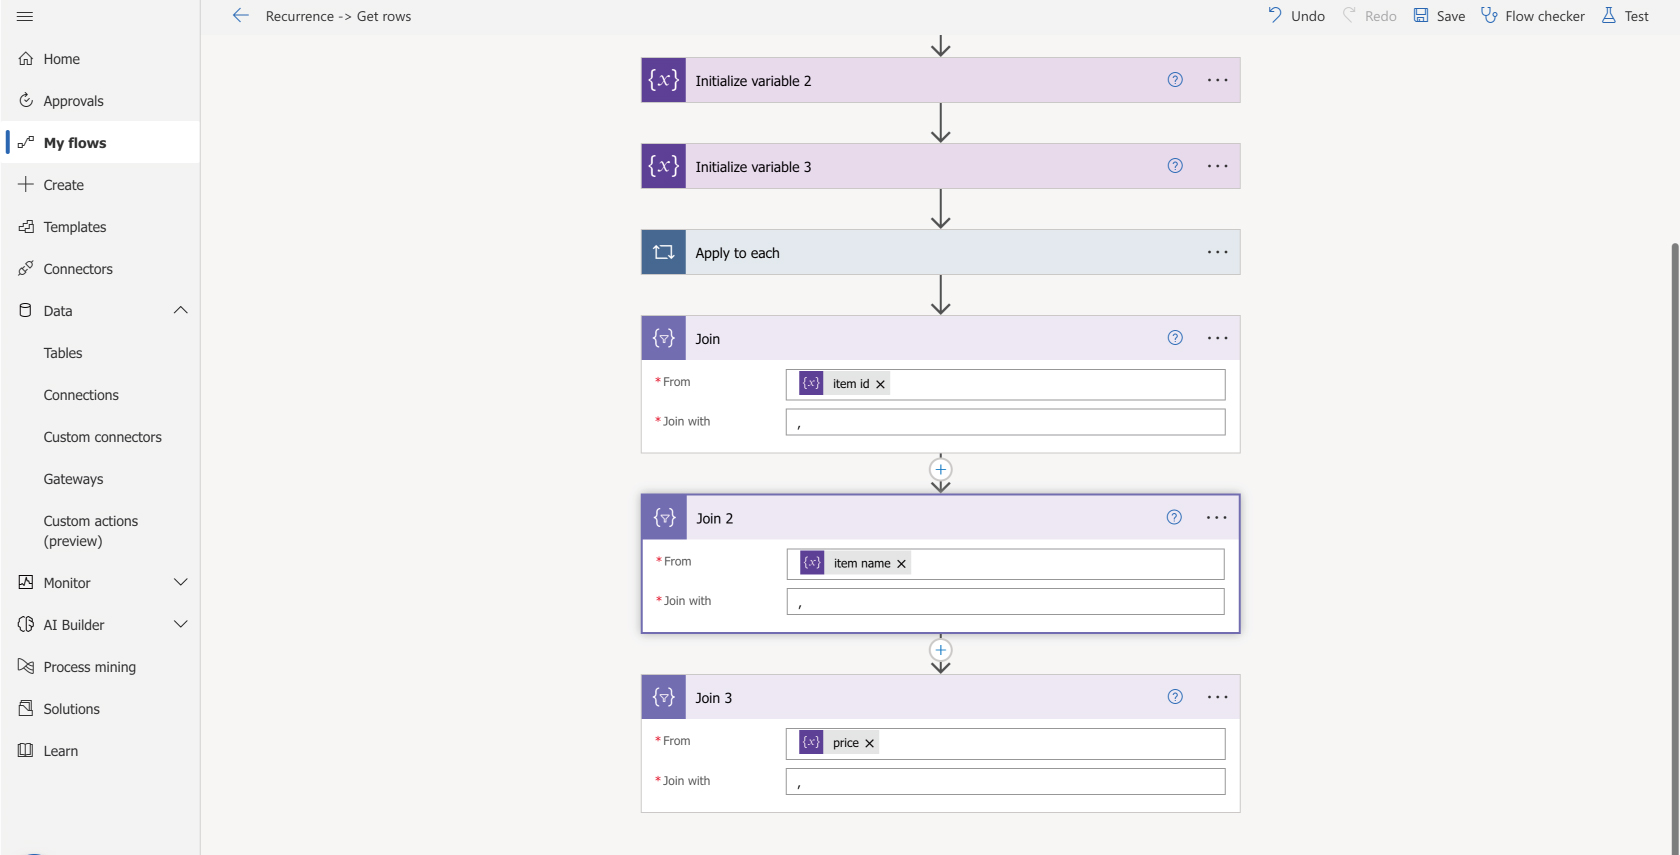
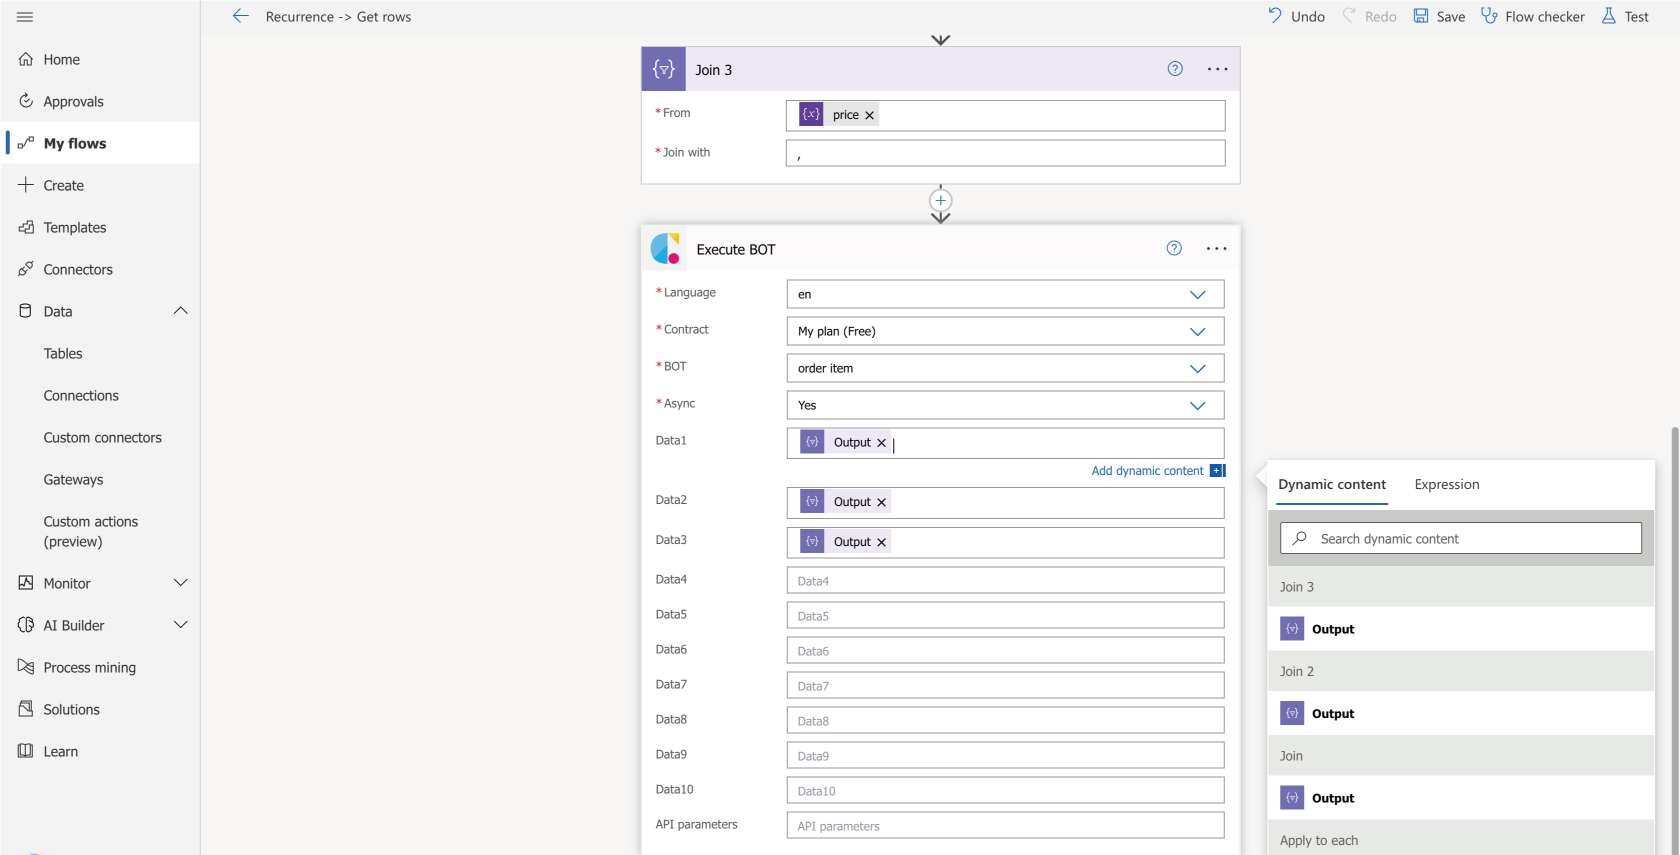
2. Set "From" and "Join with". You can specify the elements in the arrays to be combined.
Set the number of targets you want to set for the action after this.
Setting Cloud BOT
1. Select "New Step". Search for "Cloud BOT" and select "Execute BOT" from Actions.
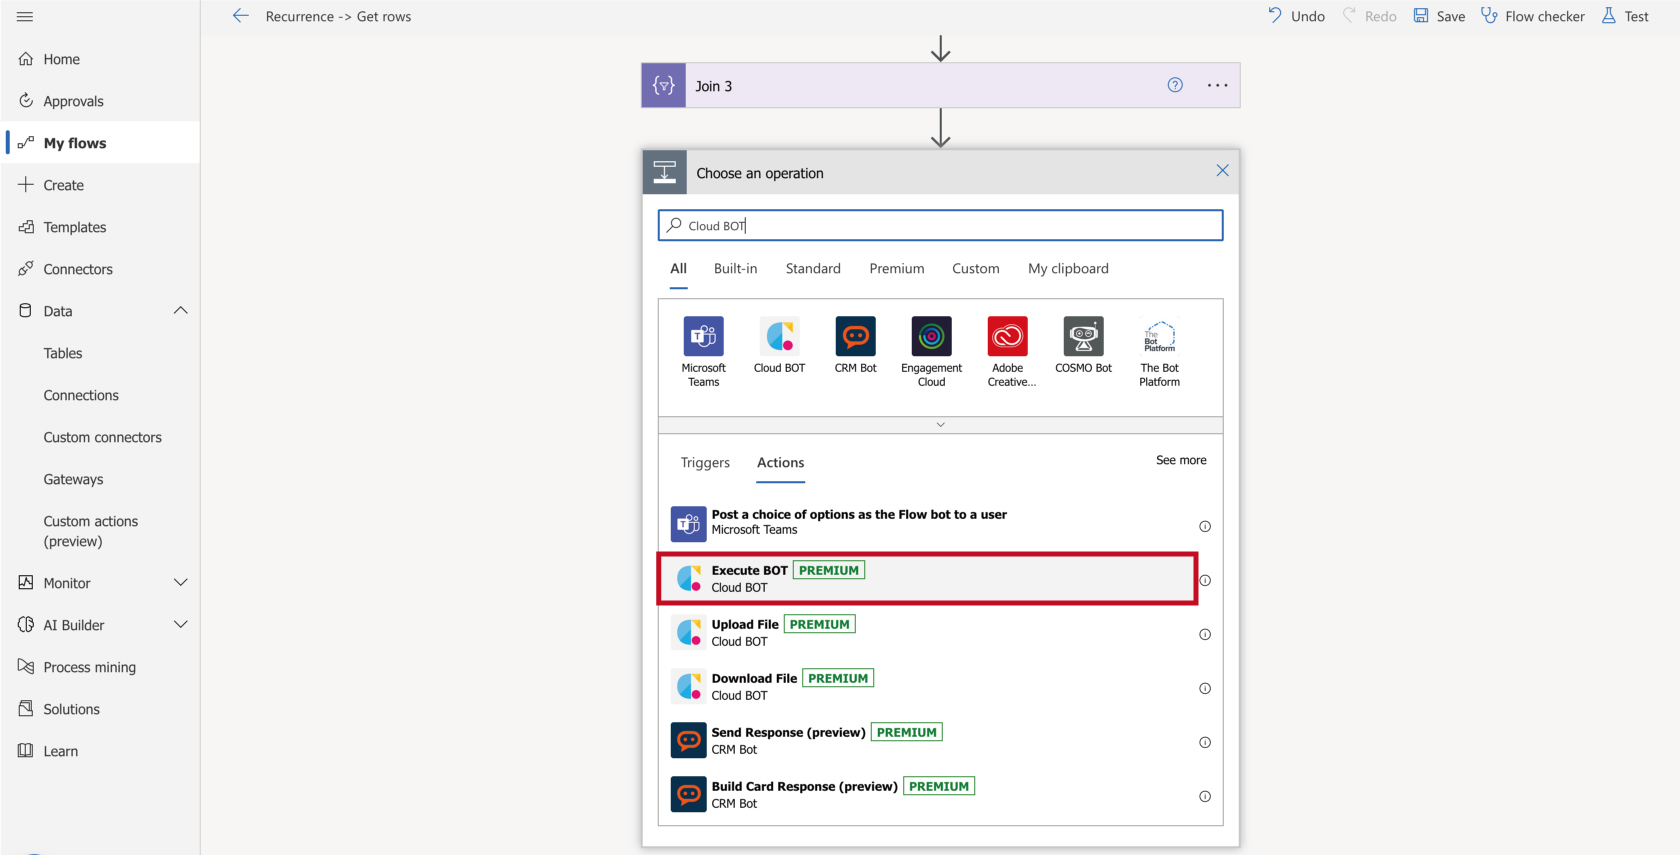
2. Set the action. Click here for setting values and here for Data values.
In this example, we will set the output value of the data manipulation.
*Create a connection if it doesn't exist. Click here for information on creating a connection.
A flow has been created. Check the operation from "Test" in the upper menu (upper right of the screen). If you can confirm the execution result, the setting is completed.
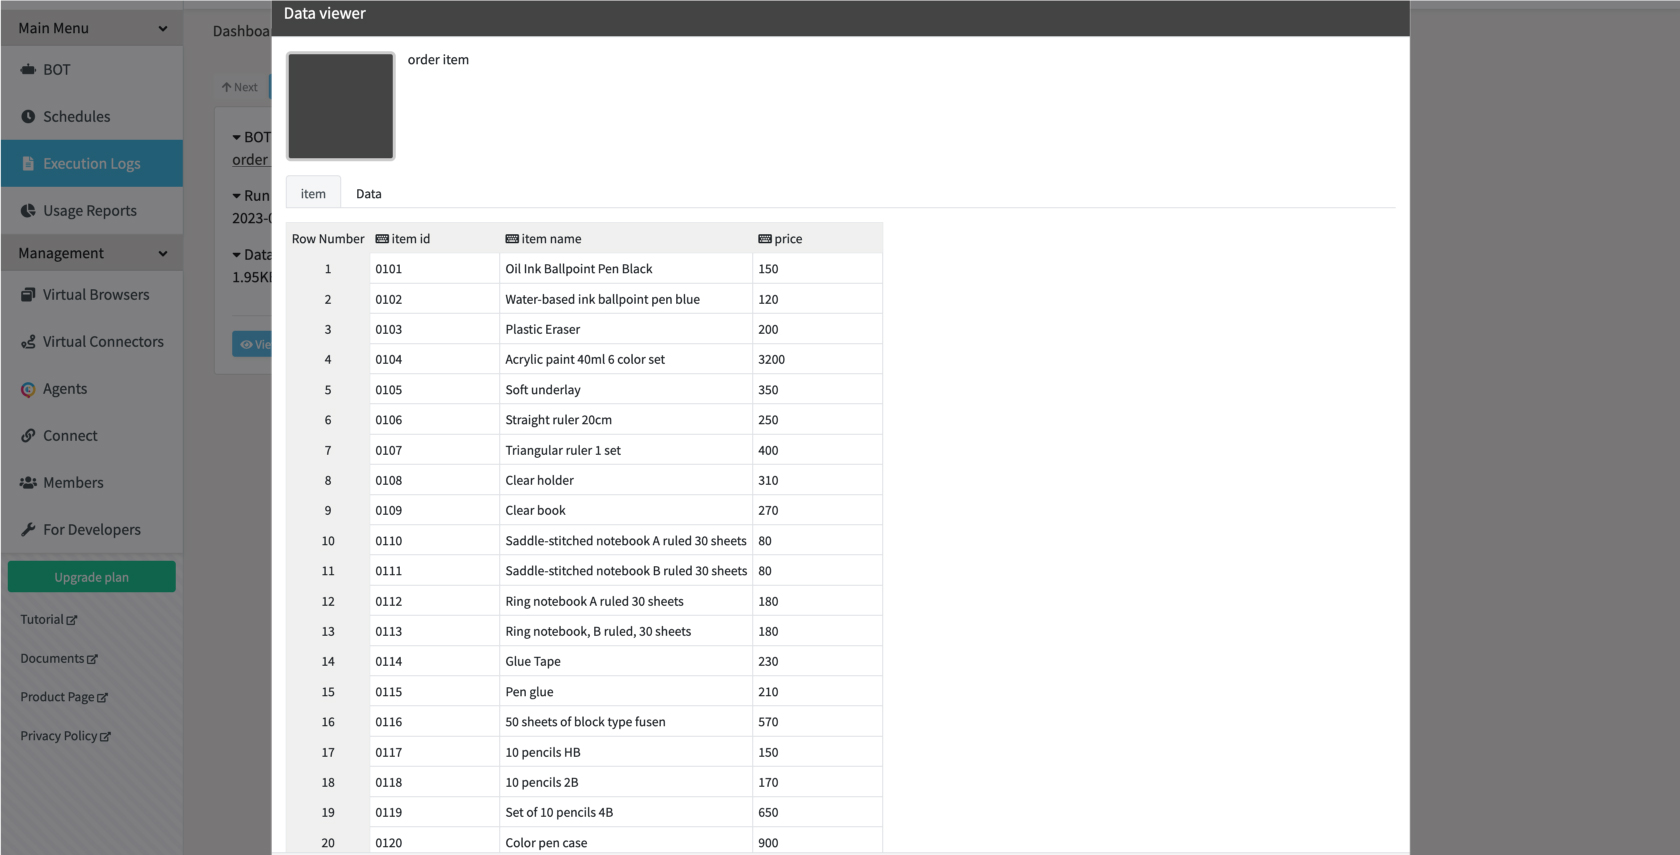
You can check the execution result in the execution log of the cloud BOT.
 Cloud BOT Docs