For developers-2

Home > User guide > For developers
Introduction
Transition from "For Developers" in the global menu.
With the developer functions, you can make settings for calling BOTs created in the cloud BOT as APIs, execution tests, and advanced settings related to cooperation with external services.
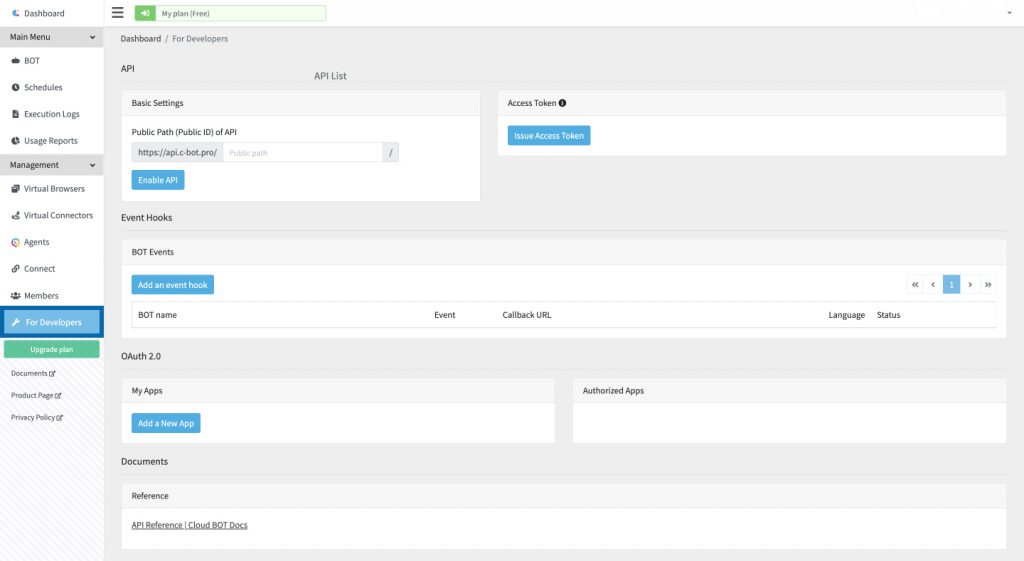
API
The created BOT can be published as an API.
Basic settings
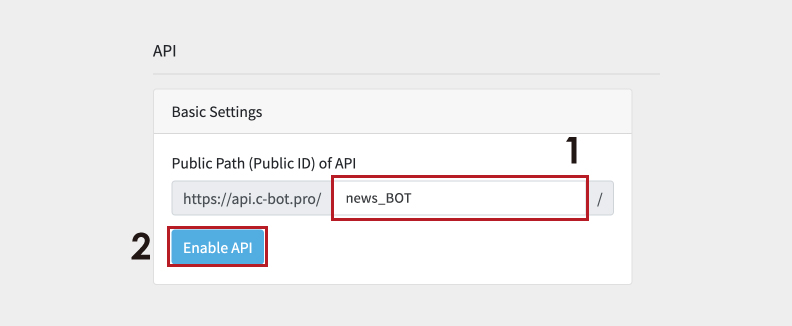
Sets a public path (ID) and enable the API. The public ID you set will be used as part of the endpoint when calling the BOT.
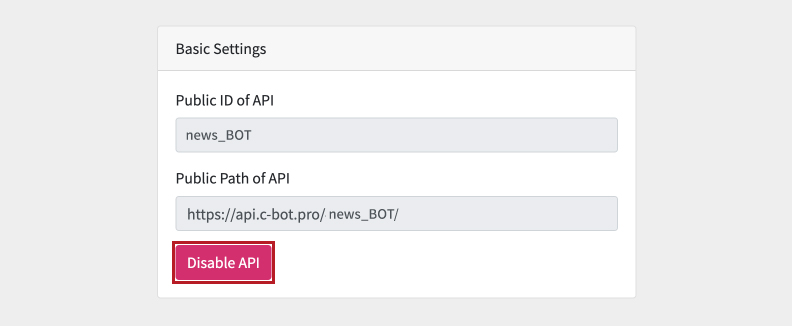
When the API is published, "Disable API" is displayed to disable the API.
Access Token
Manages the access tokens and secret keys needed to access the API.
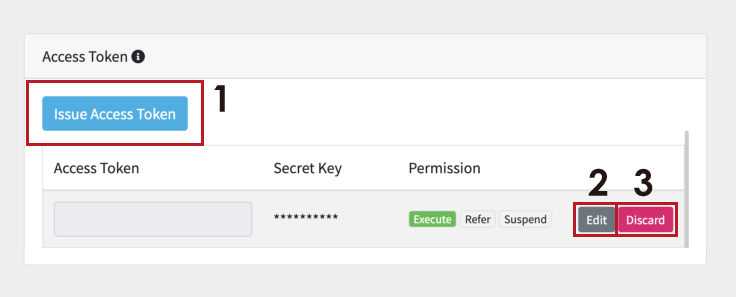
Lists already published access tokens. You can view access tokens, secret keys, and permissions.
The following operations are available from this screen.
Issue Access Token
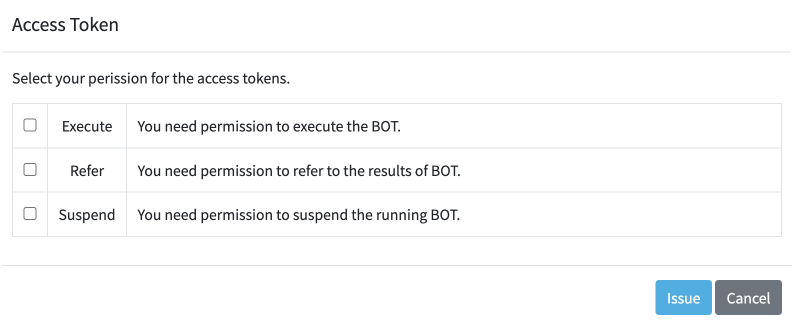
- Click [Issue Access Token].
- A modal window is displayed. Select a permission to grant to the access token.
- Click [Issue] to publish the access token.
Up to 3 access tokens can be issued per user.
If the secret key is leaked, a malicious third party can operate the API.
Be sure to store it in a safe place.
The secret key can no longer be verified.
Be sure to keep it with the access token.
If you should lose it, discard the access token and reissue it.
Edit the Access Token Permissions
- Clicking the [Edit] button displays a modal window as same as when issuing an access token. Change a permission to grant to the access token.
Discard Access Token

Click [Discard] to discard the access token.
API List
You need to enable the API in advance. In addition, public settings must be set for each BOT. The public ID you set will be used as part of the endpoint when calling the BOT.
By switching tabs, currently published BOTs and unpublished BOTs are displayed alternatively.
Publishing your BOT as API
BOT is set to "Private" by default.
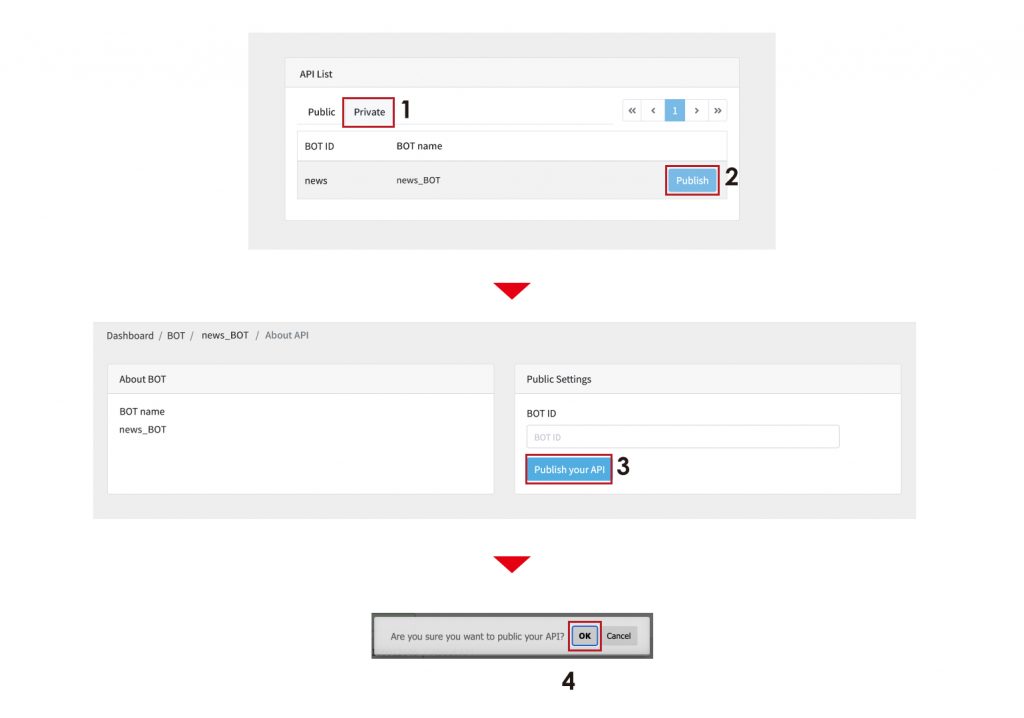
- Select the [Private] tab.
- Press the [Publish] button of the BOT whose API you want to publish.
- Click the [Publish your API] button.
- Click [OK] in the modal window.
About API
You can view the information such as about BOT, Public settings, Endpoint.
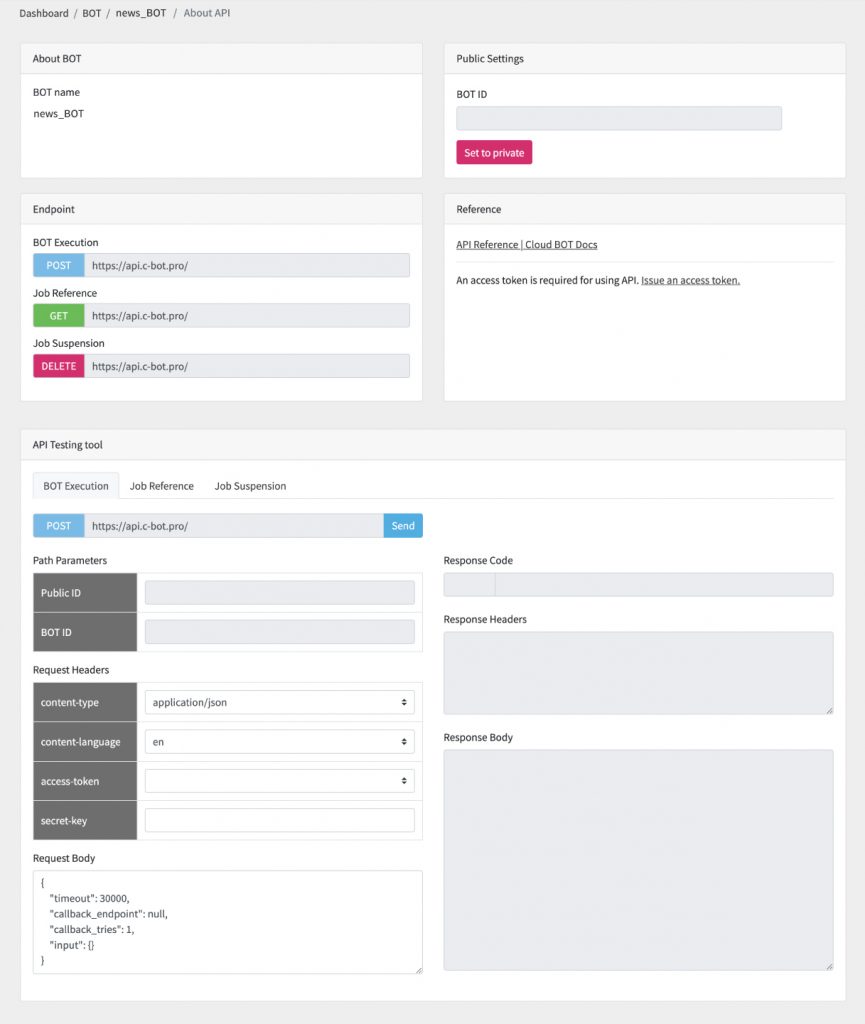
Enable/Disable API
You can enable/disable it with the button in the "Public Settings". It is same as the button in the "Basic settings".
Testing API Using API Test Tool
You can actually run the BOT API using the test tool.
Scroll down the About API screen to test three types: BOT Execution (POST), Job Reference (GET), and Job Suspension (DELETE).
Here, we explain the steps with using "BOT Execution" as an example.
The Request Body shows the parameter sample used when executing the BOT API. The sample is created with the initial values in the BOT.
It is possible to rewrite the Request Body and test the execution.
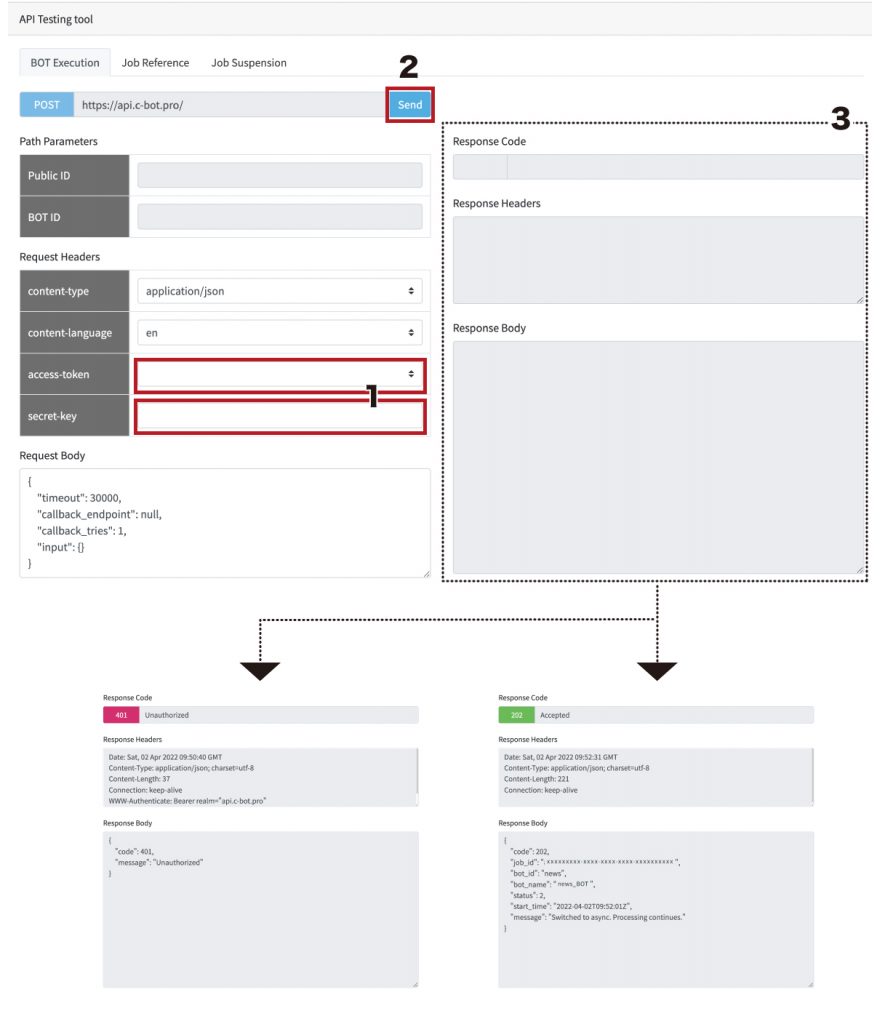
- Select the access token to be used and enter the secret key.
- Click [Send] to execute the API.
- When the API execution is completed, the response contents will be displayed in "Response Body".
Event Hook
A setting to notify the specified callback when a specific event occurs.
BOT Event
A list of event hooks set in BOT will be displayed.
- You can register, edit and delete it.

Register or edit an event hook
You can register event hooks to any BOT. The same operation will be performed when you press "Edit" from the list.
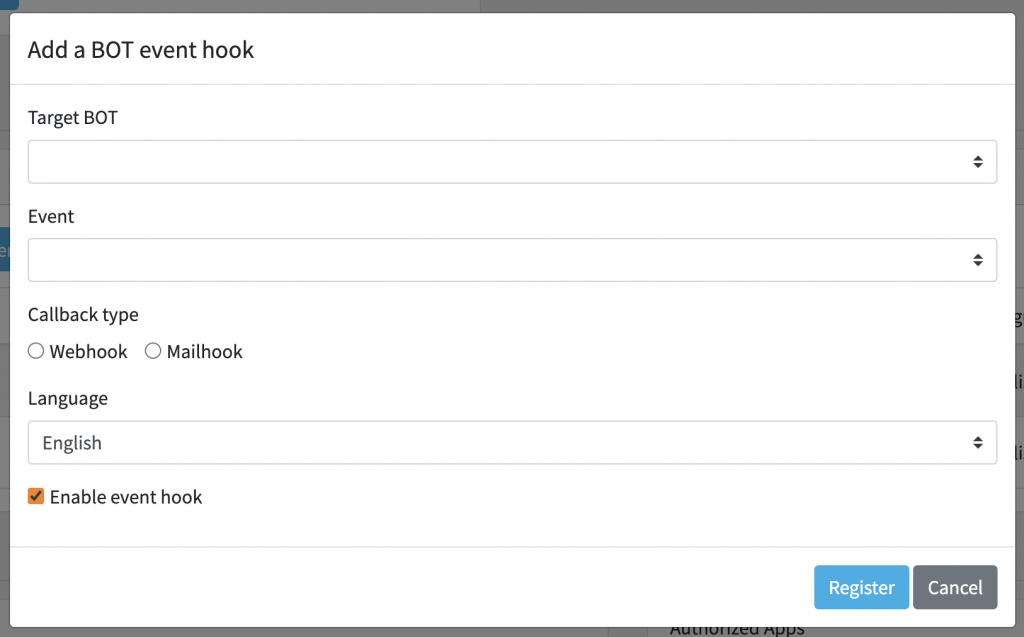
Target BOT
- Select the BOT that will be the condition for triggering the event.
Event
- Specifies the condition for triggering the event.
Callback Type
Language
- Select the language.
Enable/disable event hook
- Enable the event hook by checking the checkbox. Uncheck to disable.
- You can check the status is enabled or disabled in the list of event hooks.
About the callback type
Webhook
When an event occurs, the BOT execution result will be posted to the endpoint.

- Enter your endpoint.
*The endpoint must always start with https://.
*Please refer to 「Cloud BOT RESTful API Callback Endpoint Implementation Requirements」 for endpoint implementation requirements.
Mailhook
When an event occurs, the BOT execution result will be sent to the specified email address.
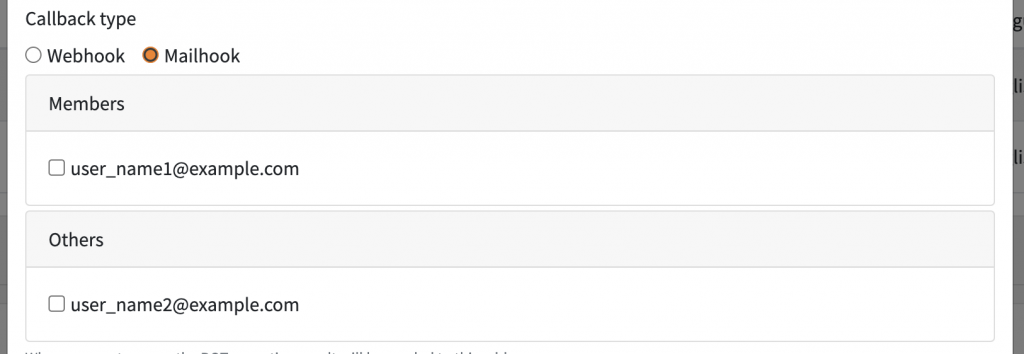
- Select the email address to send. (Multiple selection possible)
*Only verified email addresses can be selected. Please check the Verified email address part.
OAuth 2.0
By using OAuth authentication, users will be able to authorize access to external applications with their own account privileges without being aware of specialized settings such as access tokens and secret keys.
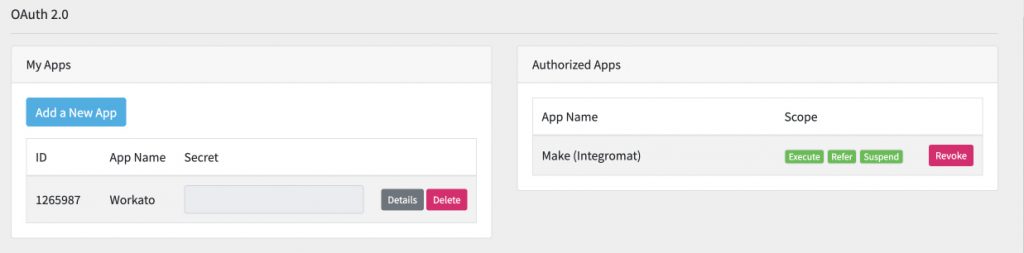
My Apps
Displays the registered apps. You can set the setting which allows external applications to be authorized via OAuth authentication.
- You can register, edit or discard apps.
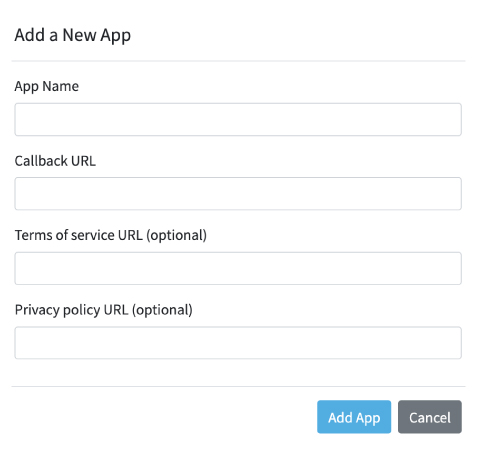
- Click the [Add a New App] button to display a modal window. Enter the app name and the callback URL.
- Be sure to set your company name or personal name before adding My Apps.
Authorized Apps
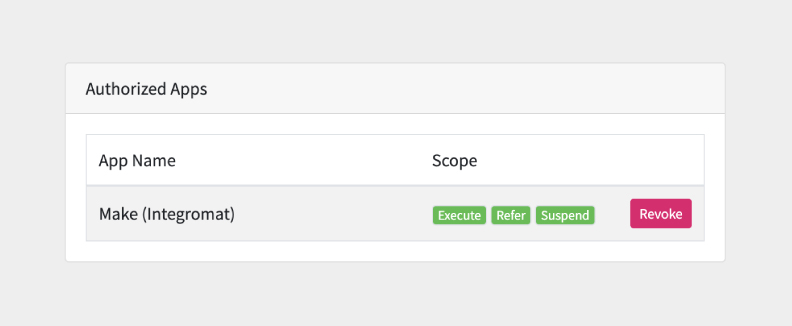
Displays authorized apps if applicable. Lists the applications authorized by OAuth authentication.
- You can revoke the authorization with the [Revoke] button.