Adding group data obtained by BOT to a spreadsheet

Home > Connect > Zapier > Adding group data obtained by BOT to a spreadsheet
Creating a Zap
Creates a recipe that sequentially writes to a spreadsheet using the list data obtained in the cloud BOT.

Cloud BOT(BOT Done)
Retrieves the BOT execution result when a BOT has executed completely.
Spread Sheets(Create Multiple Spreadsheet Rows)
Create multiple rows in the spreadsheet.
Setting Cloud BOT
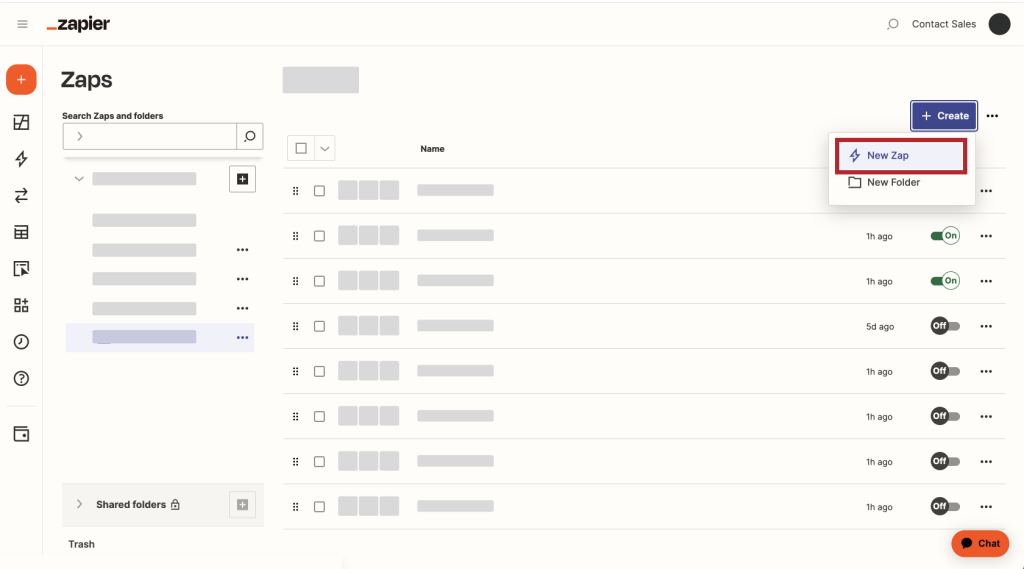
1. Click "Create" to create a Zap.
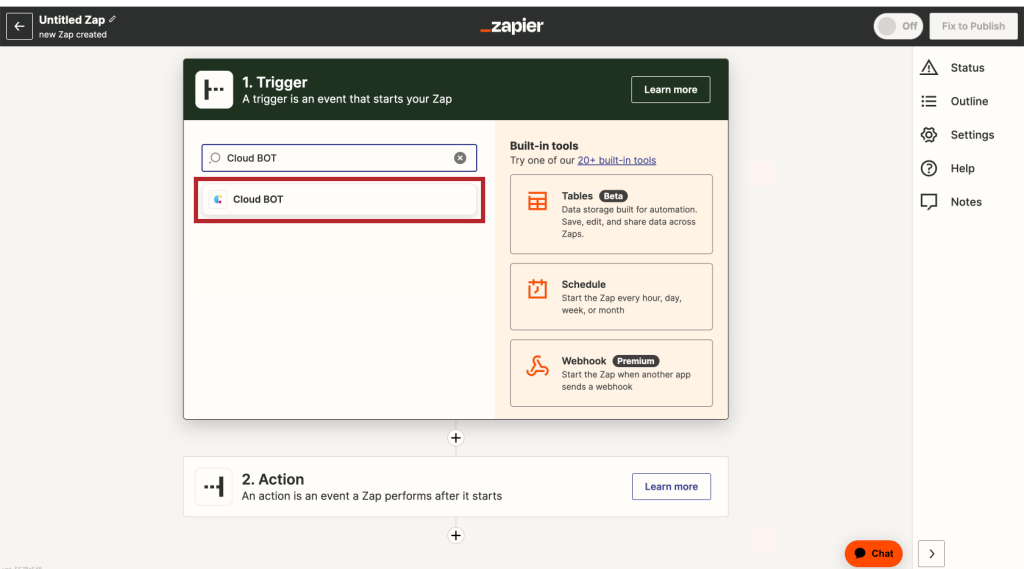
2. Search for 'Cloud BOT' in the search field of Trigger and click on the icon.
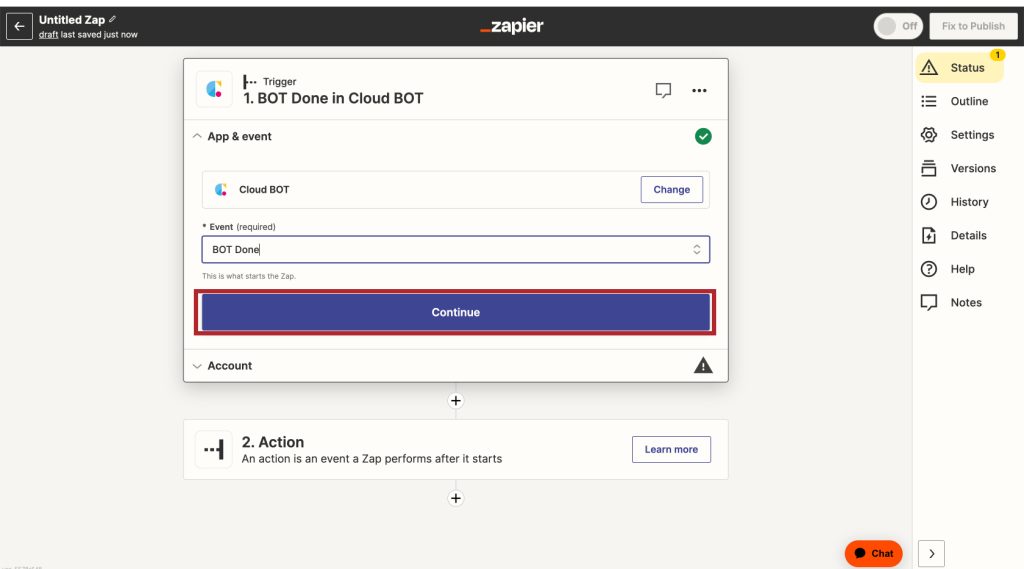
3. Select "BOT Done", and click "Continue".
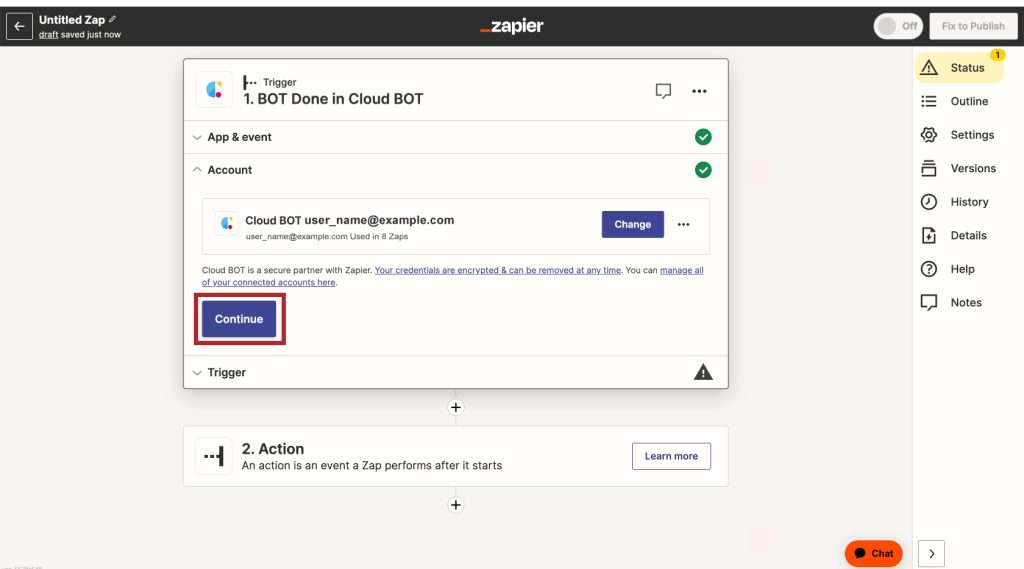
4. Set the Trigger account and click "Continue".
*Create a Connect if it does not exist. Learn more about creating a Connect here.
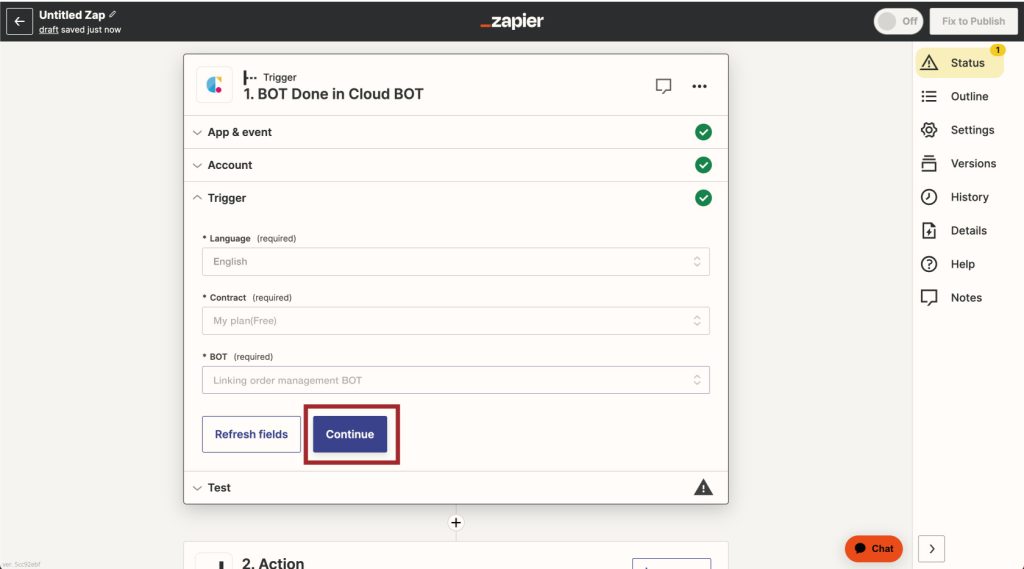
5. Set the Trigger and click "Continue". Refer to this page about setting values.
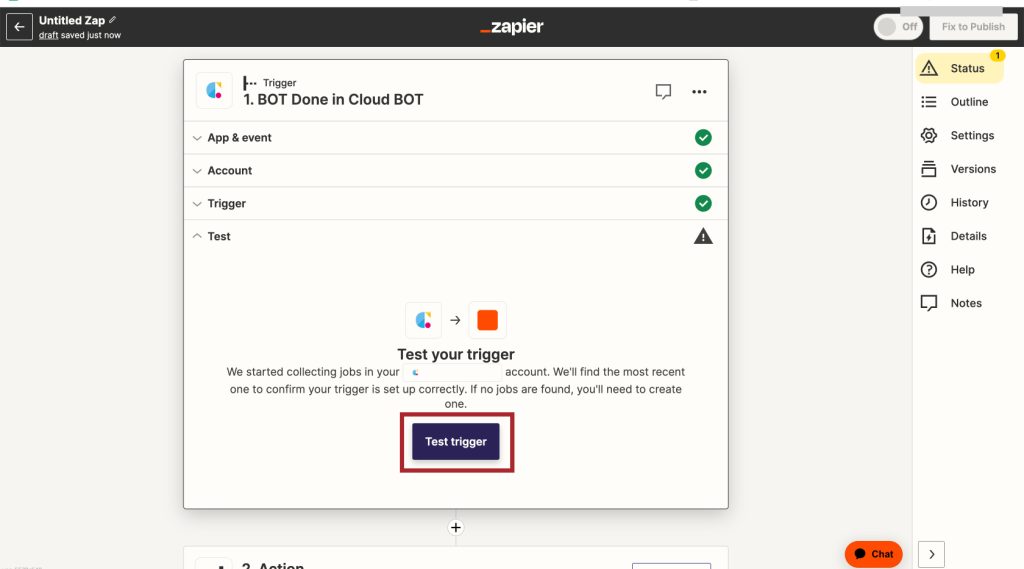
6. When the configuration is complete, click "Test trigger" to check the operation.
Setting Google sheets
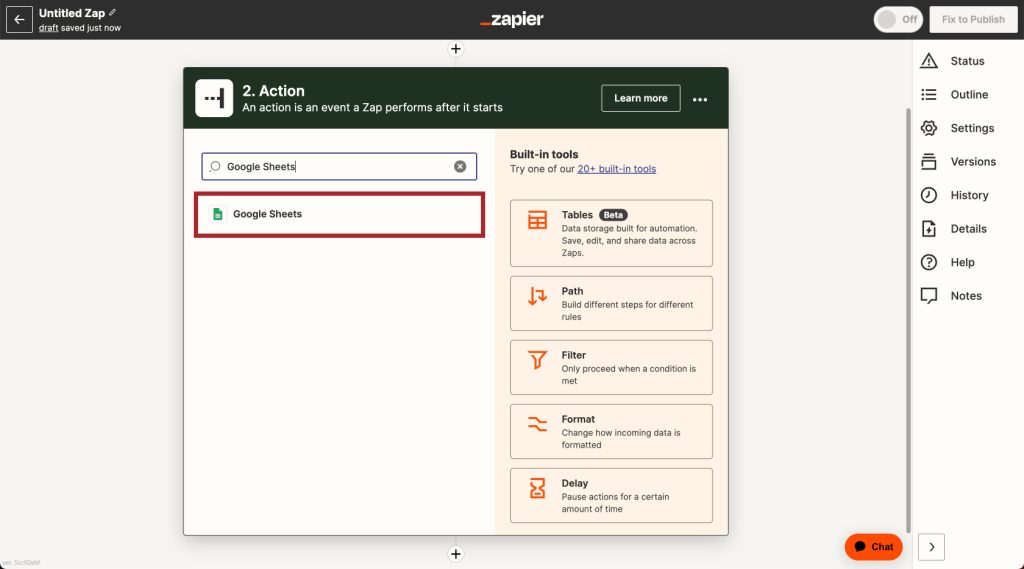
1. Search for 'Google Sheets' in the search field of Action and click on the icon.
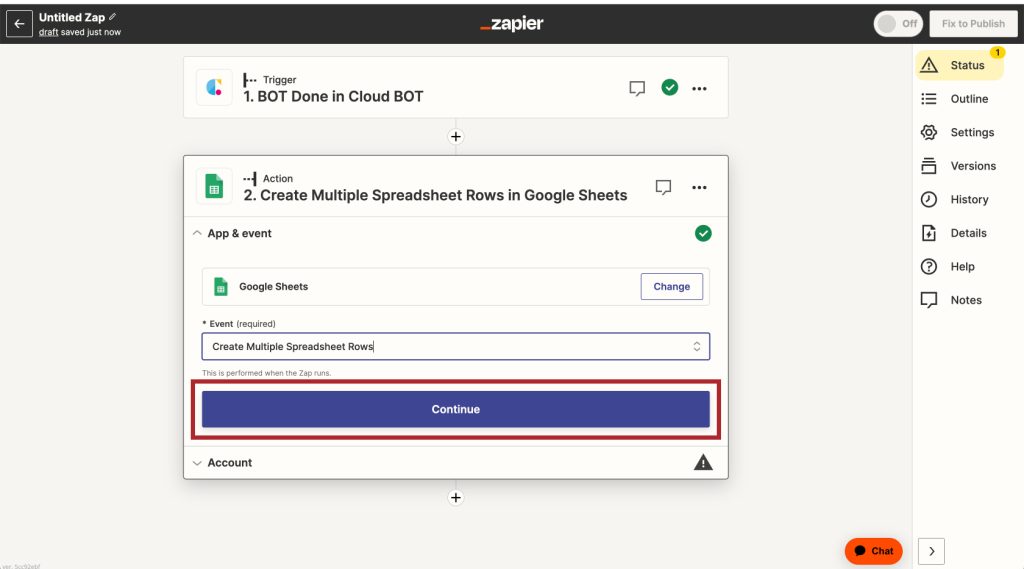
2. Select "Create Multiple Spreadsheet Rows", and click "Continue".
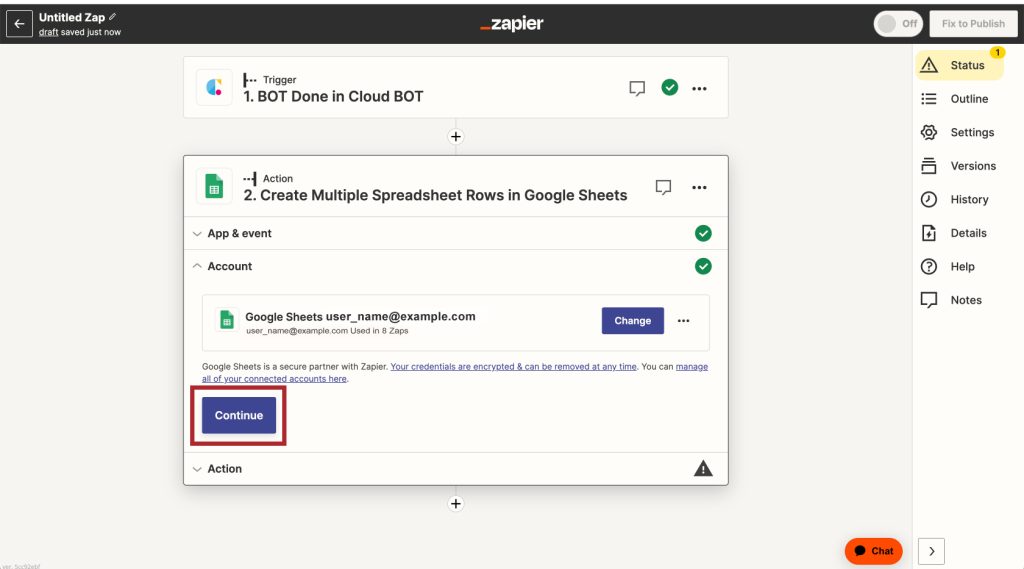
3. Set the Action account and click "Continue".
*Create a Connect if it does not exist.
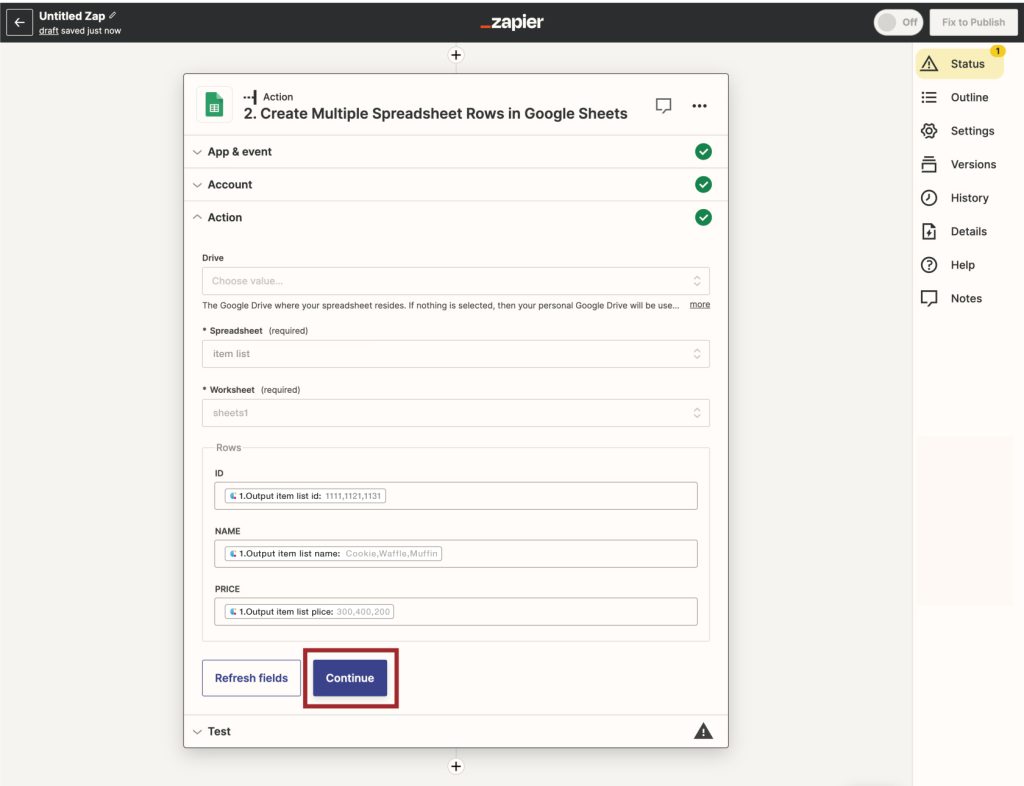
4. Set the Action and click "Continue".
In the image example, the rows of the execution results obtained from the "Execute BOT" Output are specified.
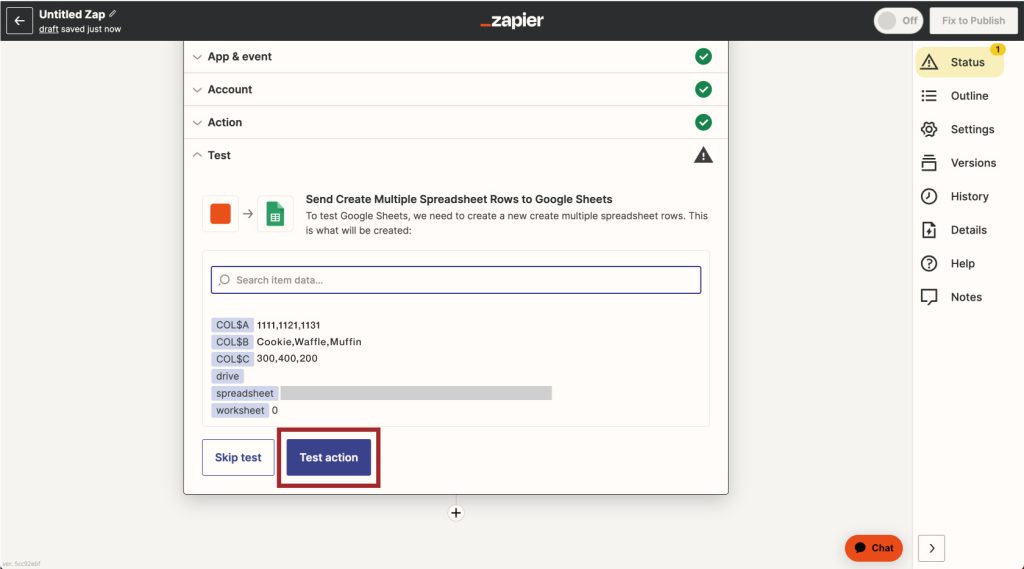
5. When the configuration is complete, click "Test action" to check the operation.
If you actually check the spreadsheet, it will be written as follows.
