Adding group data obtained by BOT to a Data base

Home > Connect > Yoom > Adding group data obtained by BOT to a Data base
Japanese may be displayed on some pages.
フローボット作成
クラウドBOT内で取得した一覧データを使用し、データベースへの書き込み処理を順次実行するフローボットを作成します。
クラウドBOT(ボットの実行が完了したら)
BOT実行が完了した際にBOT実行結果を取得します。
クラウドBOT(ジョブの結果を参照)
ジョブ結果を参照します。
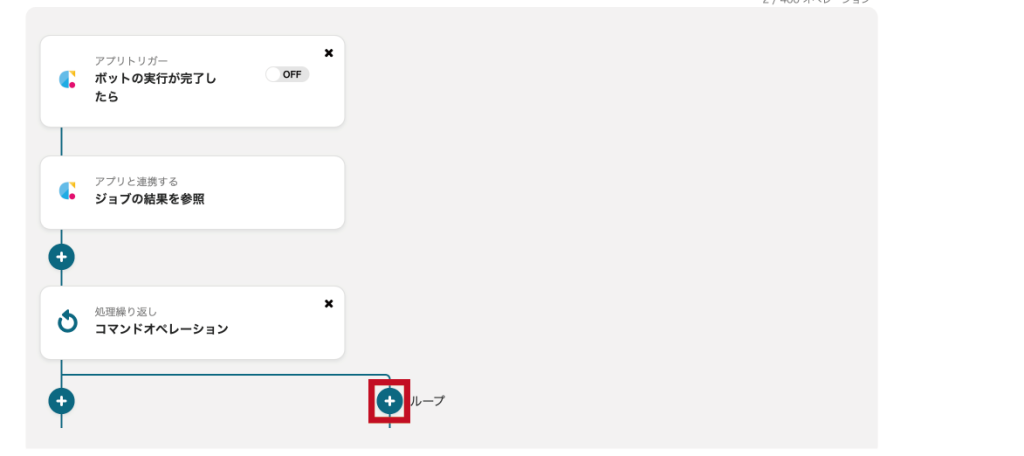
コマンドオペレーション(同じ処理を繰り返す)
トリガーで取得したグループデータの行数分、以降のアクションを順次実行します。
データベースを操作する(レコードを追加する)
データベースにレコードを追加します。
クラウドBOT(ボットの実行が完了したら)を設定する
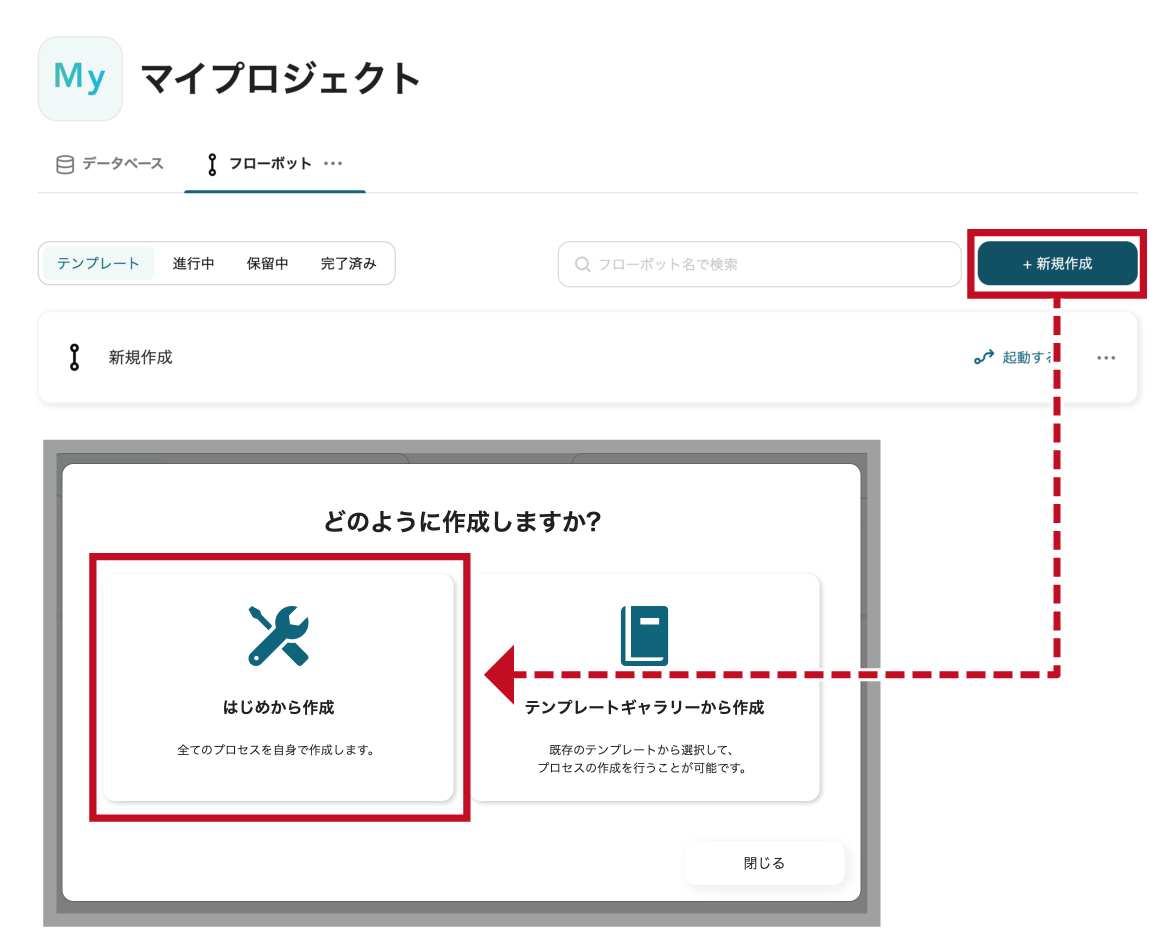
1. "新規作成"をクリックし、"はじめから作成"をクリックします。
2. フローボットを起動する条件として"特定のアプリイベントが発生したとき"をクリックします。
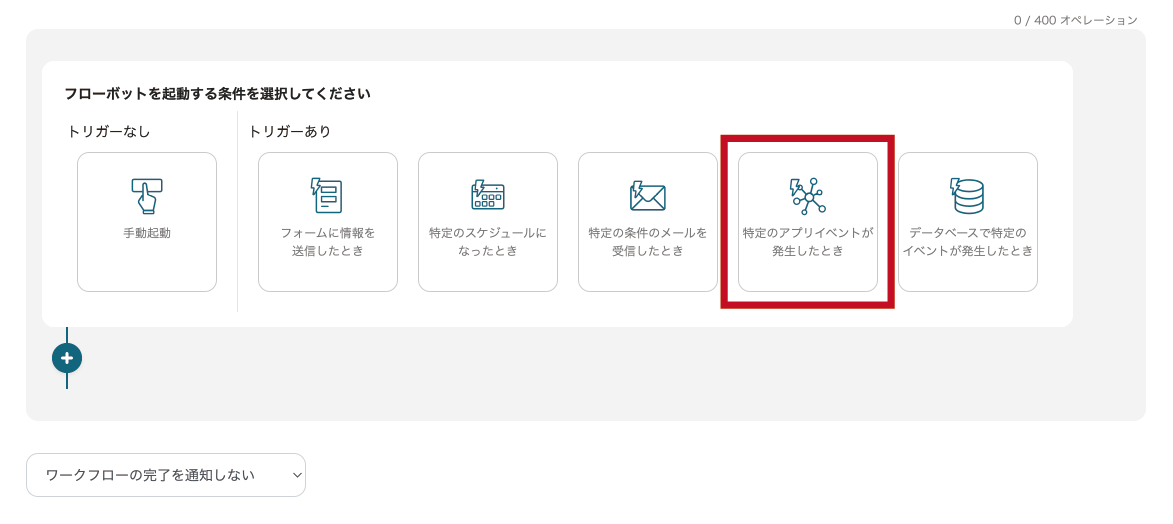
3. "アプリを連携する"の検索欄で"クラウドBOT"と検索し、アイコンをクリックします。

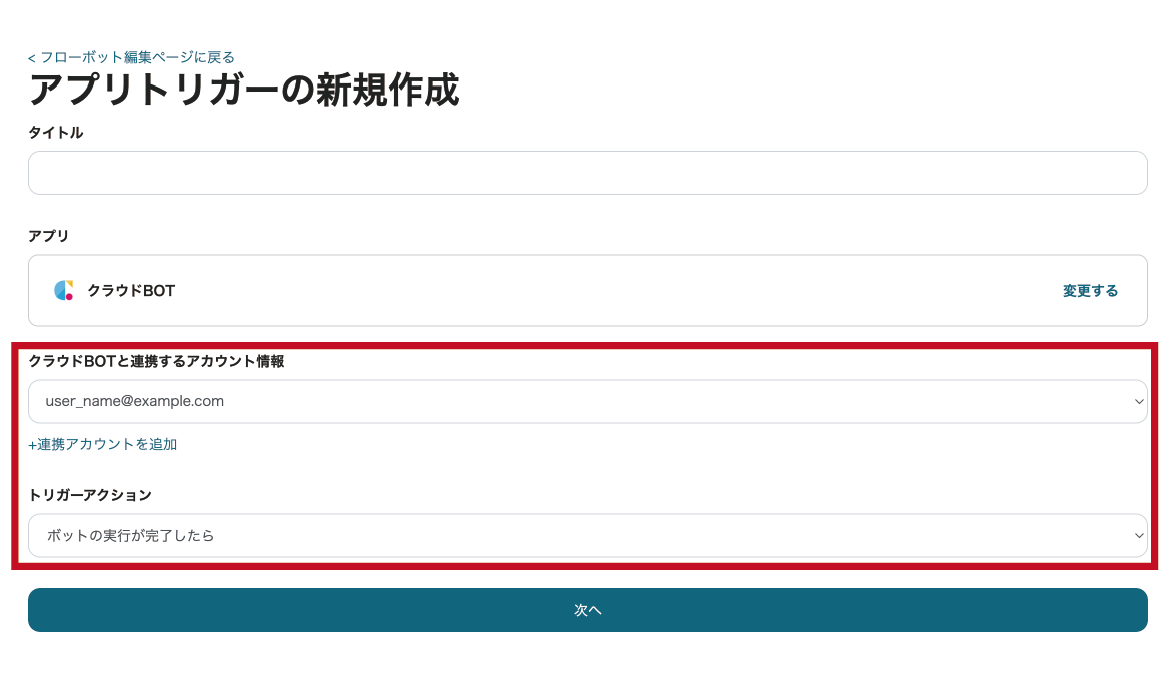
4. クラウドBOTと連携するアカウント情報、トリガーアクションを設定し、 "次へ"をクリックします。
画像の例では、トリガーアクションとして"ボットの実行が完了したら"を選択しています。
*接続がない場合は接続を作成します。接続の作成についてはこちら。
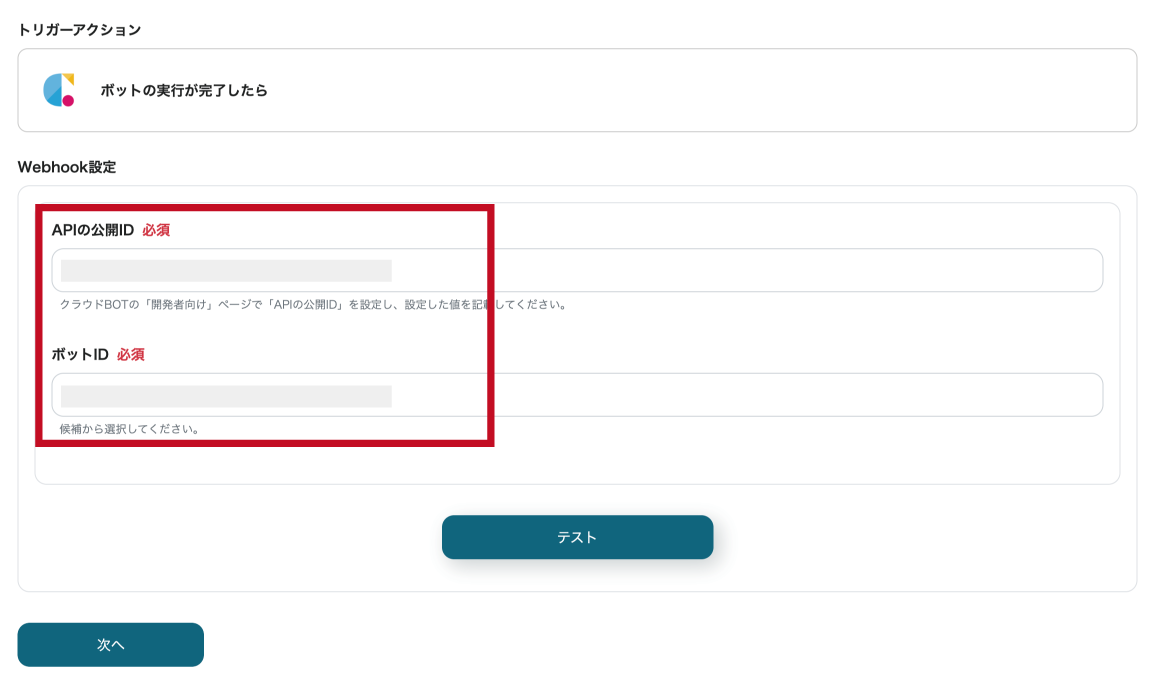
5. Webhookを設定します。設定値についてはこちら。
"テスト"を実施し、"次へ"をクリックします。
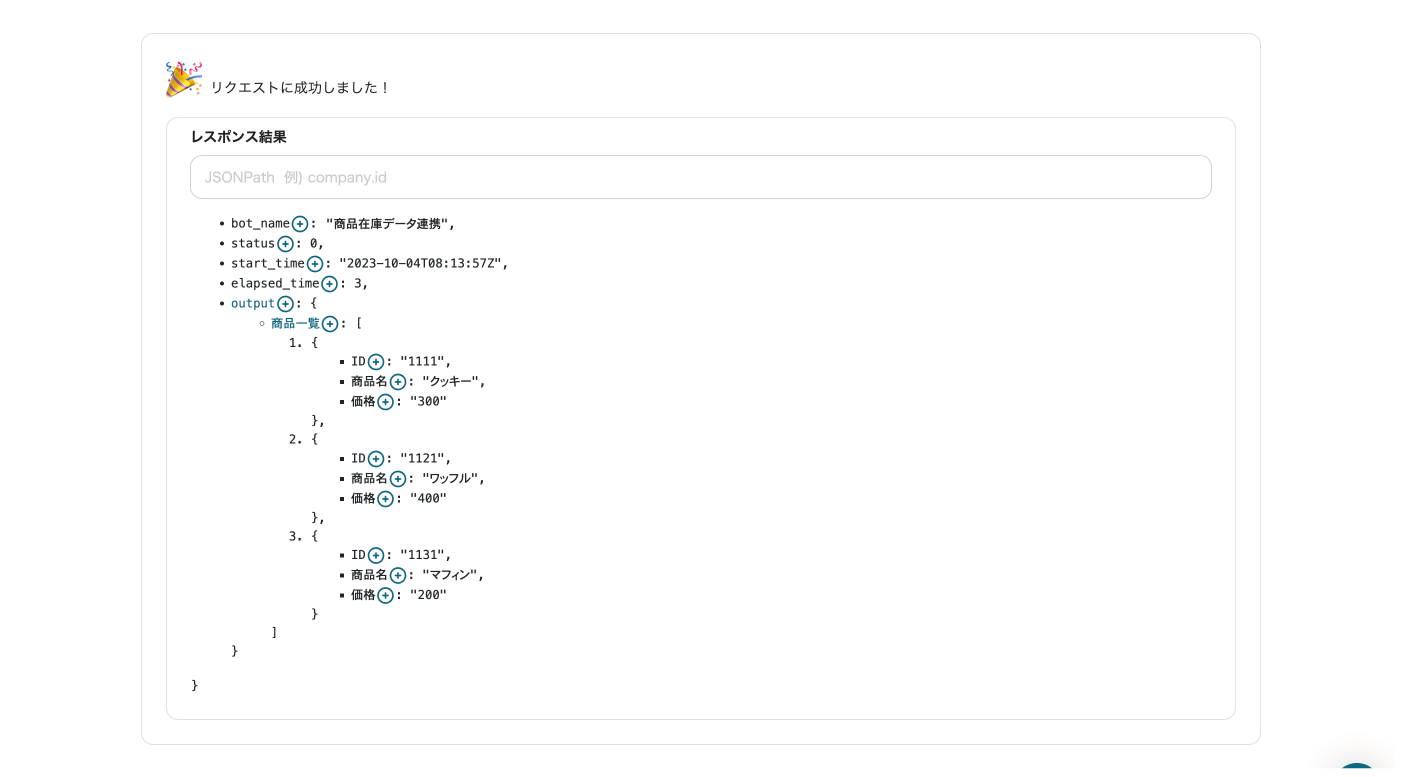
6. 設定したBOTをクラウドBOT上で実行します。
Webhookイベントの"テスト"をクリックし、実行結果をプレビュー表示します。
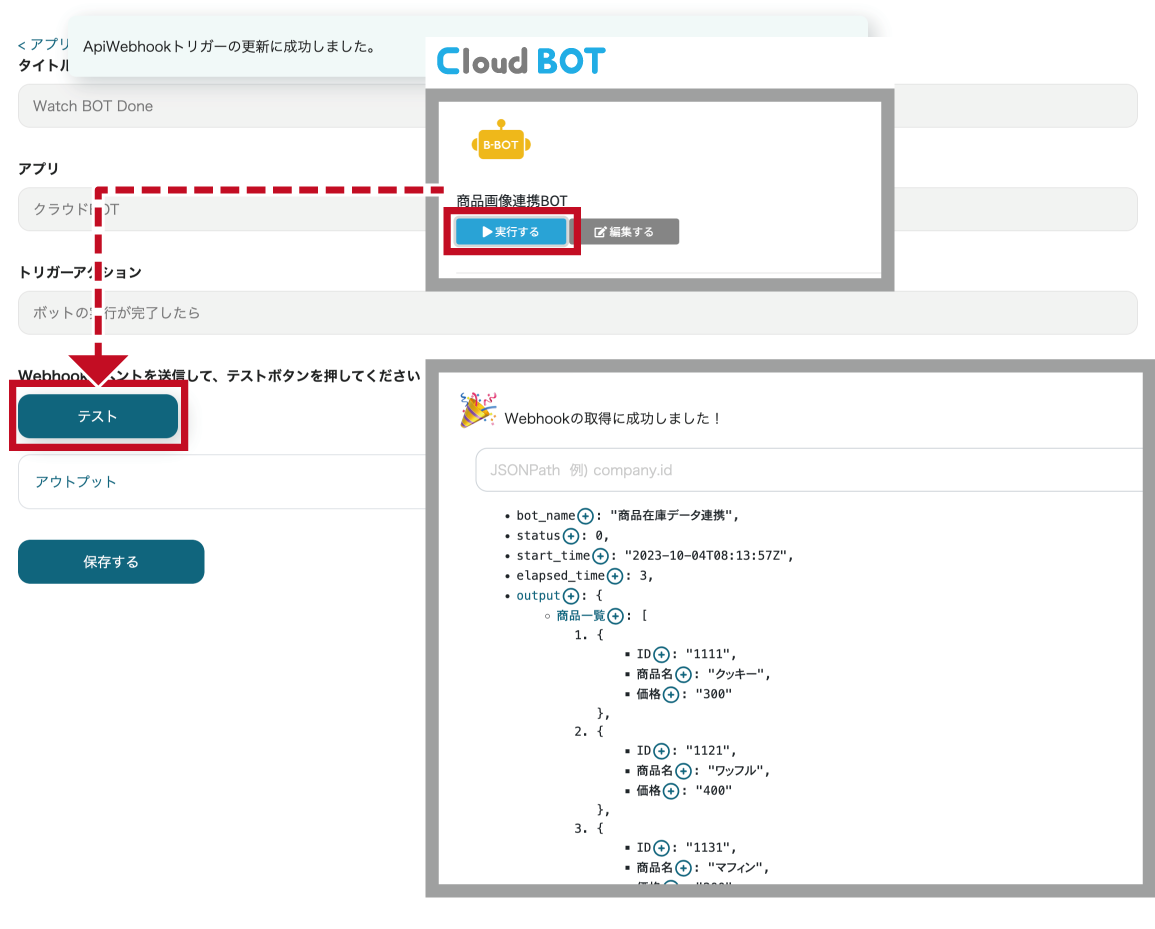
結果が表示されたら"保存する"をクリックします。
クラウドBOT(ジョブの結果を参照)を設定する
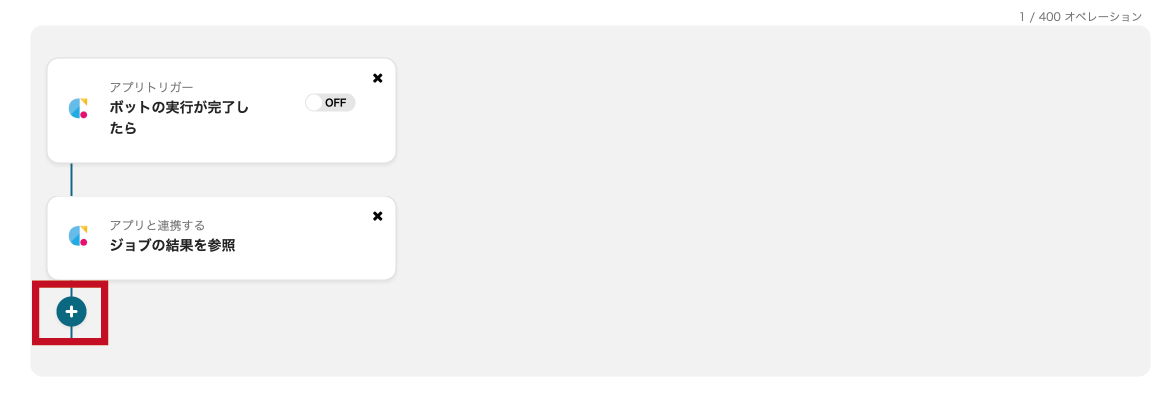
1. "プラス"ボタンをクリックし、オペレーションを追加します。
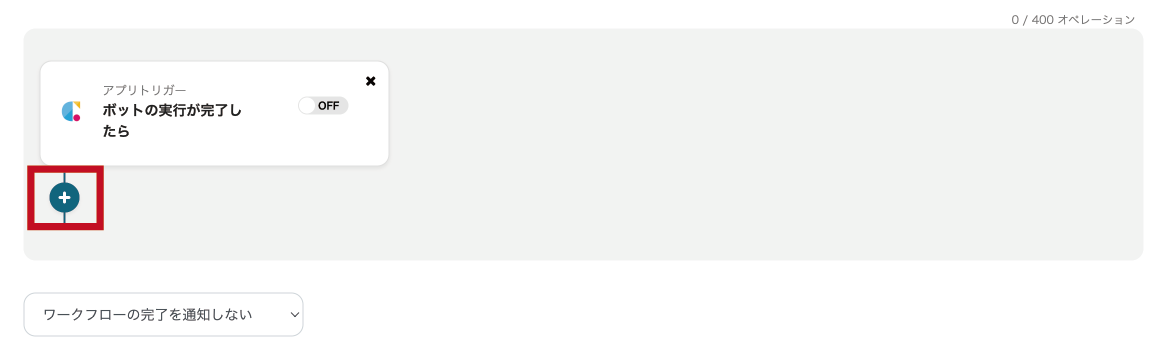
2. "アプリと連携する" をクリックします。検索欄で"クラウドBOT"と検索し、アイコンをクリックします。
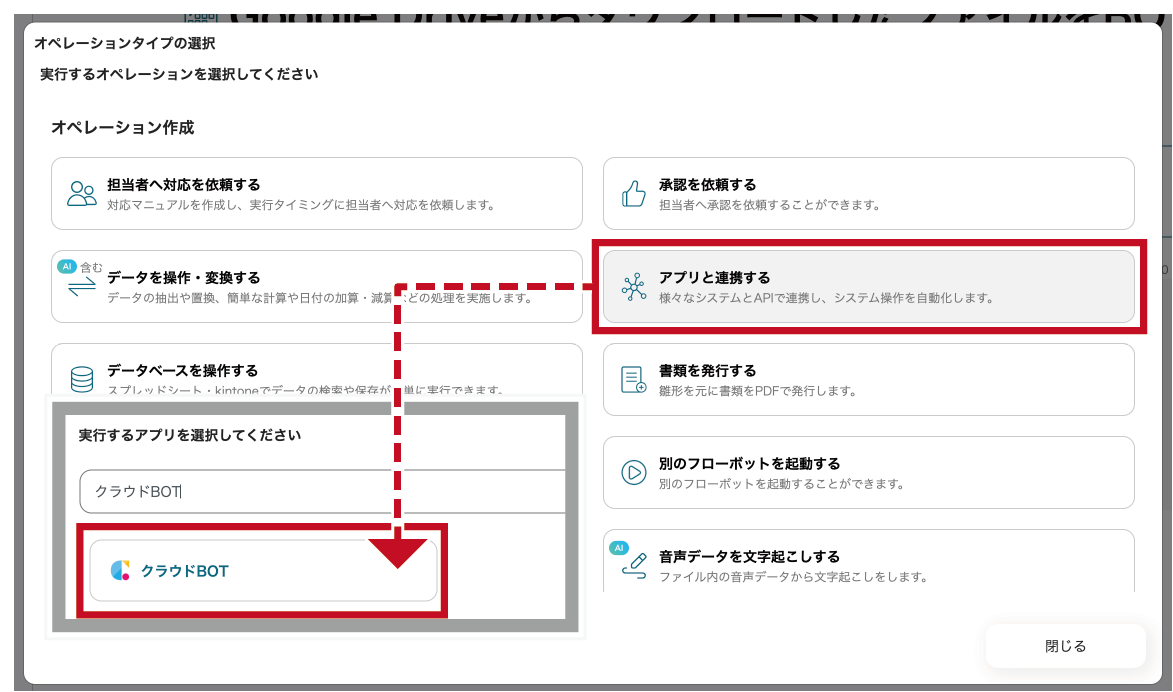
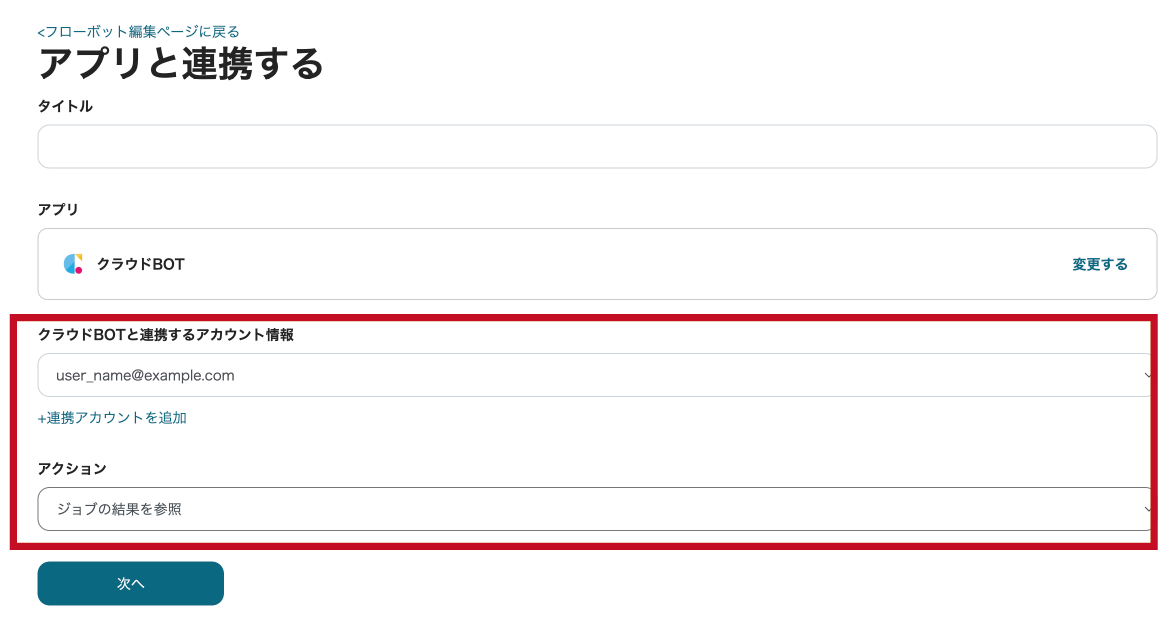
3.クラウドBOTと連携するアカウント情報、アクションを設定し、 "次へ"をクリックします。
画像の例では、アクションとして"ジョブの結果を参照"を選択しています。
*接続がない場合は接続を作成します。 接続の作成についてはこちら。
4. "ジョブの結果を参照"アクションを設定します。 設定値についてはこちら。
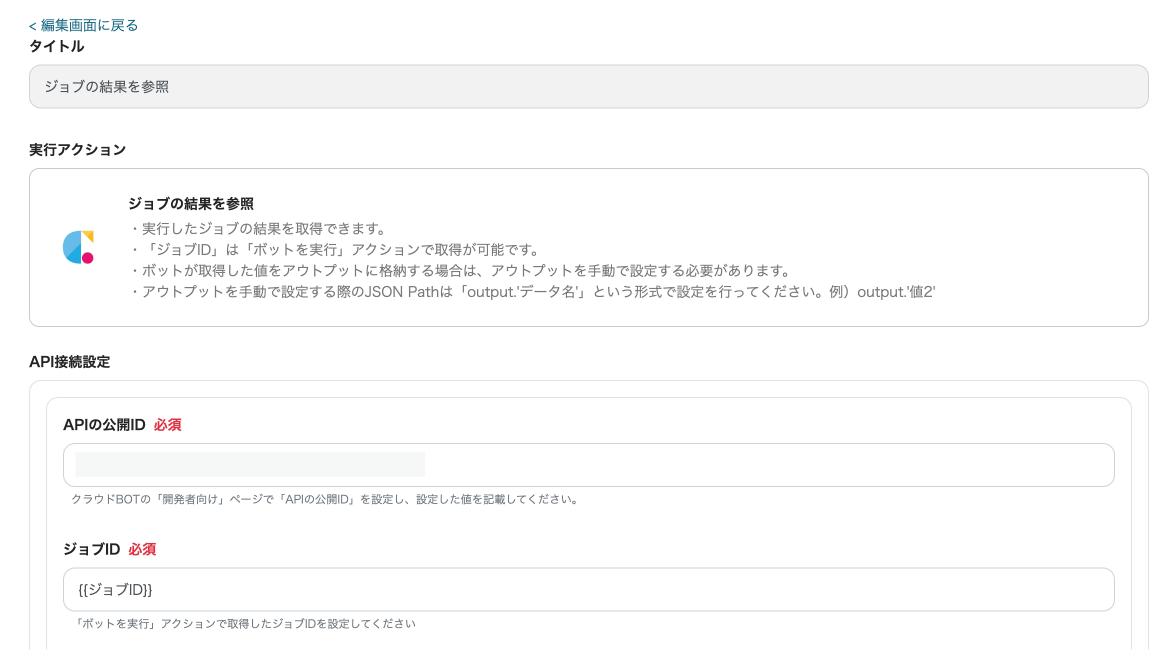
設定が完了したら"テスト"をクリックし、動作確認を行います。
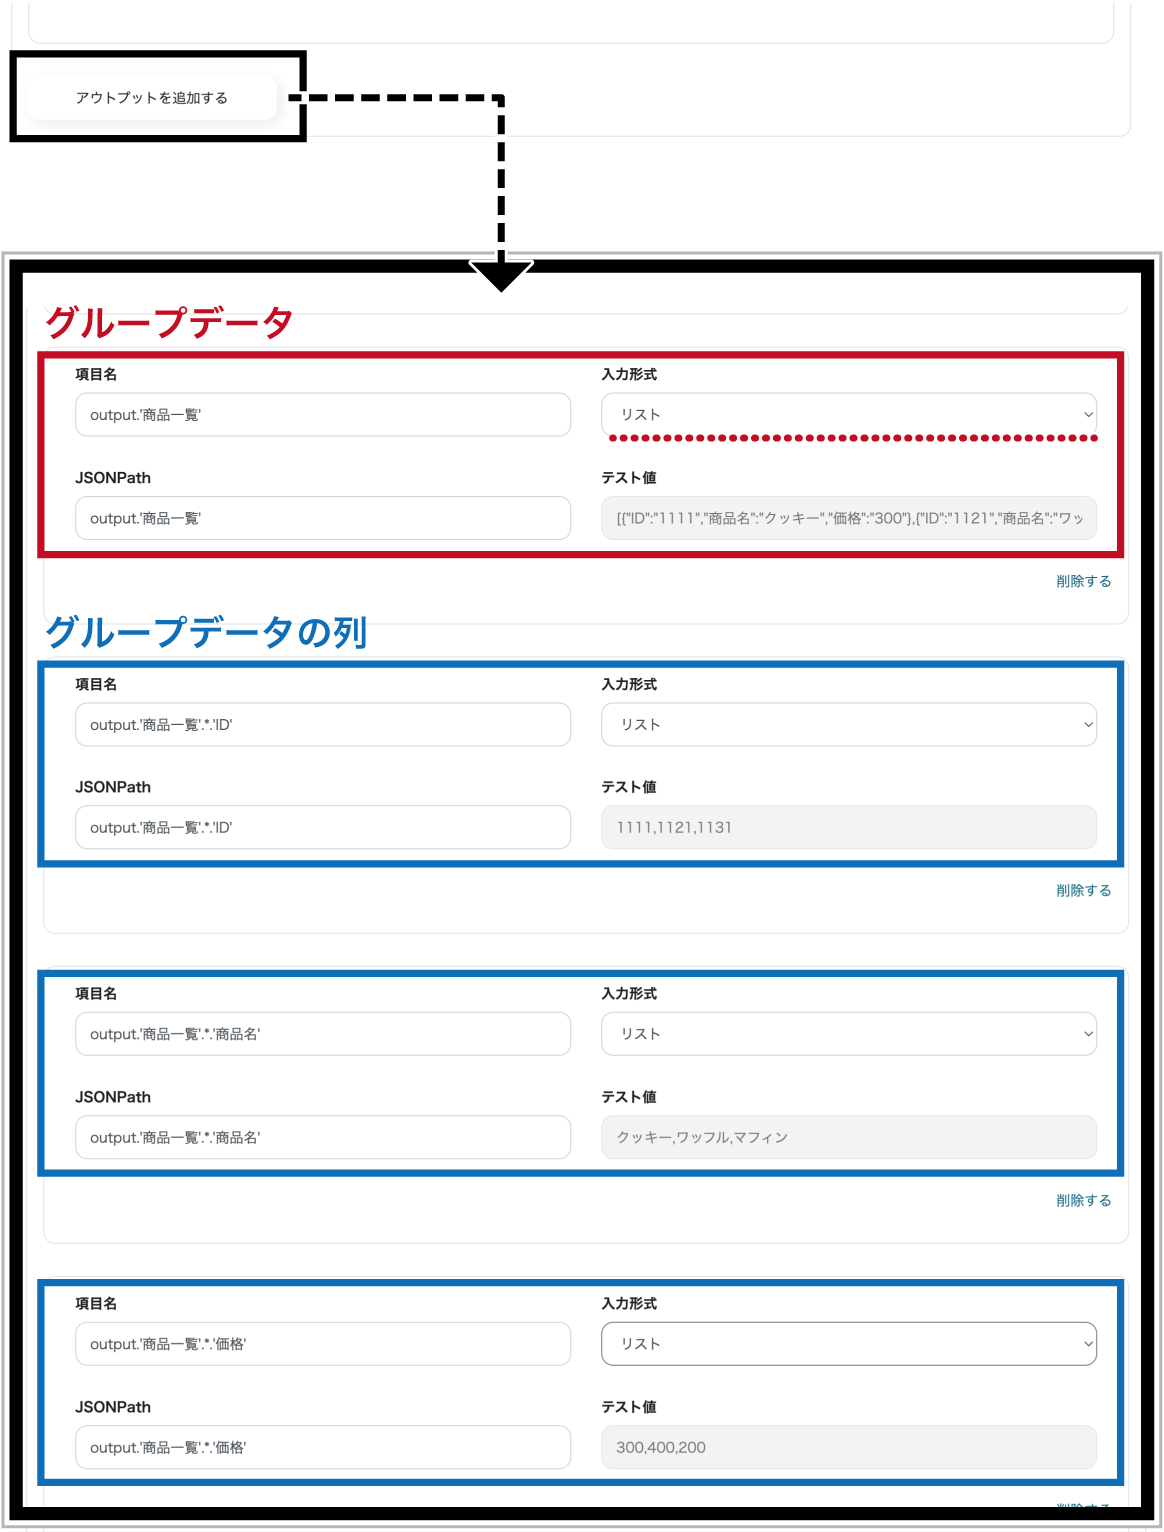
グループデータを順次処理するために、列をリスト形式で抽出します。
"アウトプットを追加する"をクリックし、ジョブの結果のグループデータ、グループデータの列をリスト形式で追加します。
JSON PATHによる登録方法はこちら(Yoom公式)をご覧ください。
別ページへ遷移します。
Yoom公式ヘルプ:https://intercom.help/yoom/ja/
5. 実行結果が確認できたら"保存する"をクリックします。
コマンドオペレーションを設定する
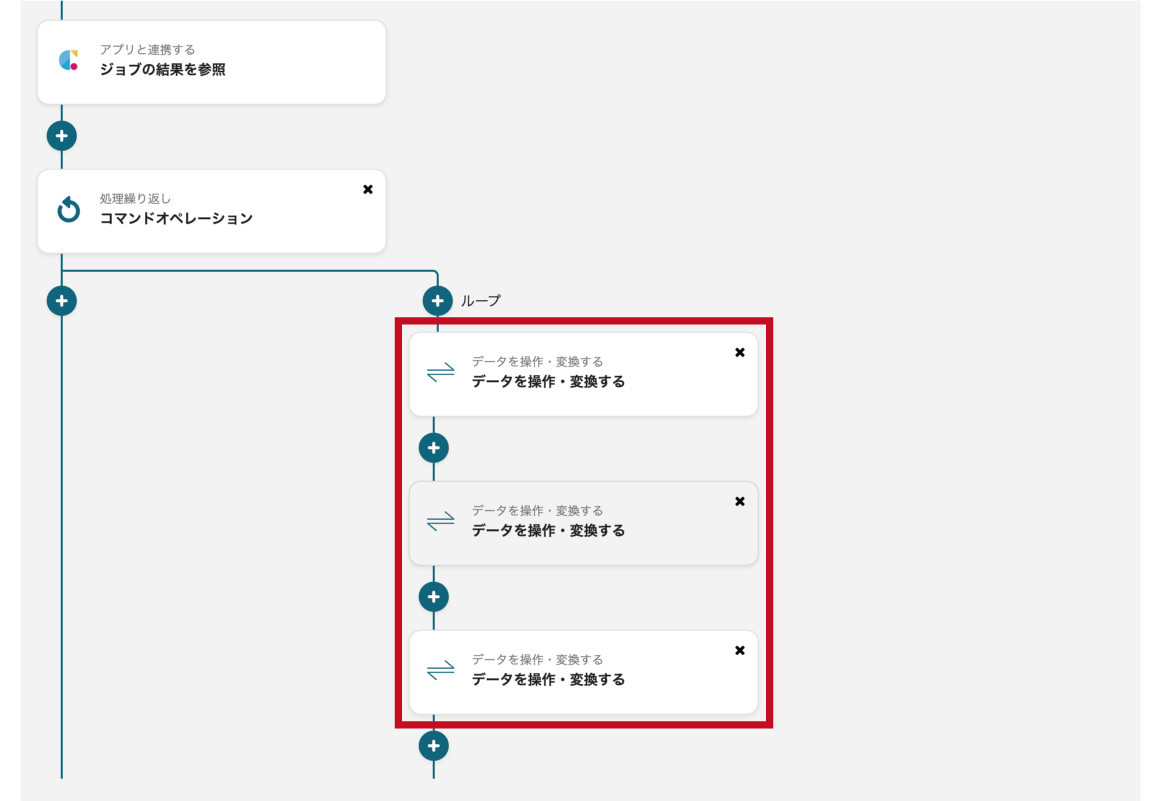
行を順次参照するために、"同じ処理を繰り返す"のアウトプットを作成します。また、"ジョブの結果を参照"から取得したリスト形式のアウトプット(グループデータの列)を"データを操作・変換する"で個々のアウトプットに分割します。
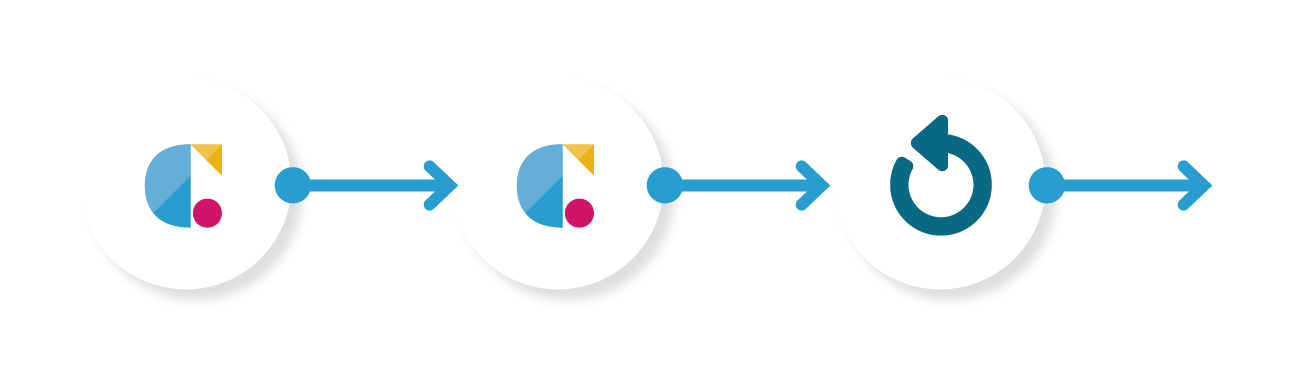
以下の流れでフローボットを作成します。
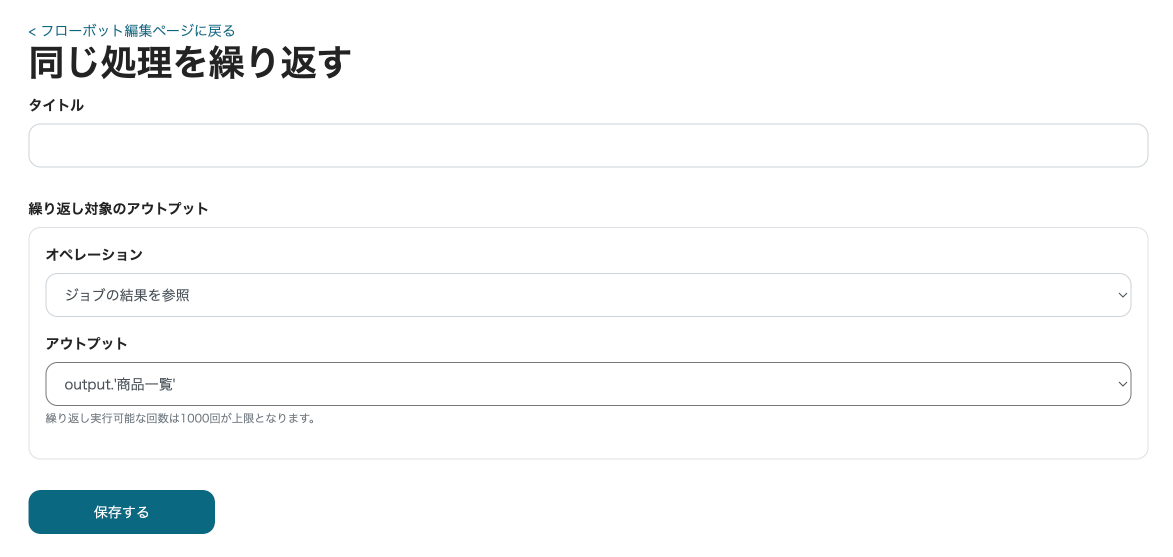
同じ処理を繰り返す(コマンドオペレーション)を設定する
1. "プラス"ボタンをクリックし、オペレーションを追加します。
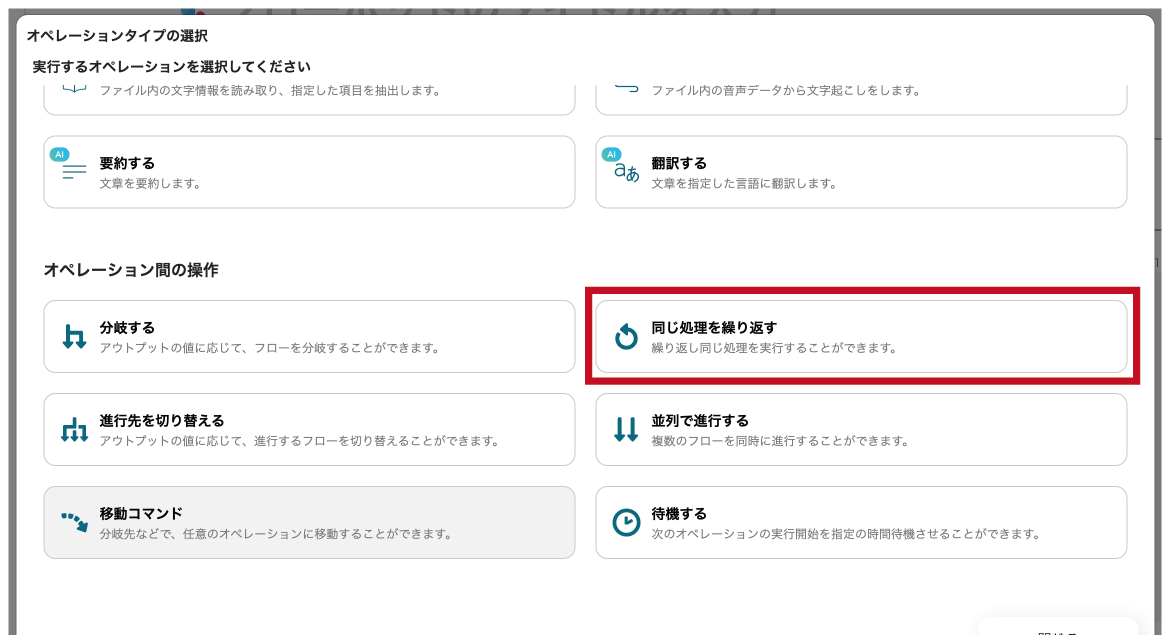
2. "同じ処理を繰り返す" をクリックします。
3. オペレーションとアウトプットを指定します。
画像の例では、"商品一覧"を指定しています。
これにより、グループの行数分の繰り返し処理をするための"同じ処理を繰り返す"のアウトプットが作成されます。
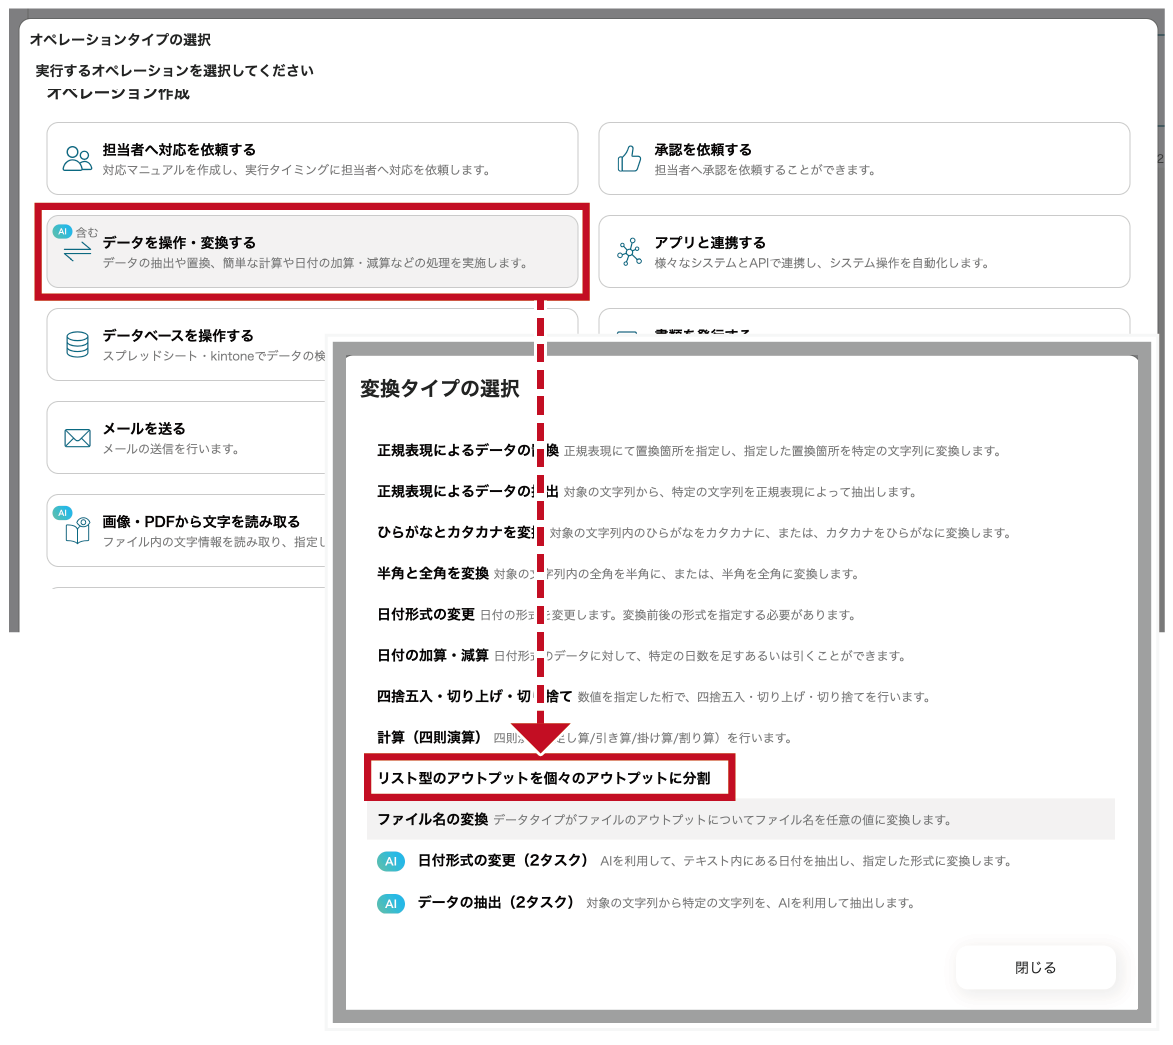
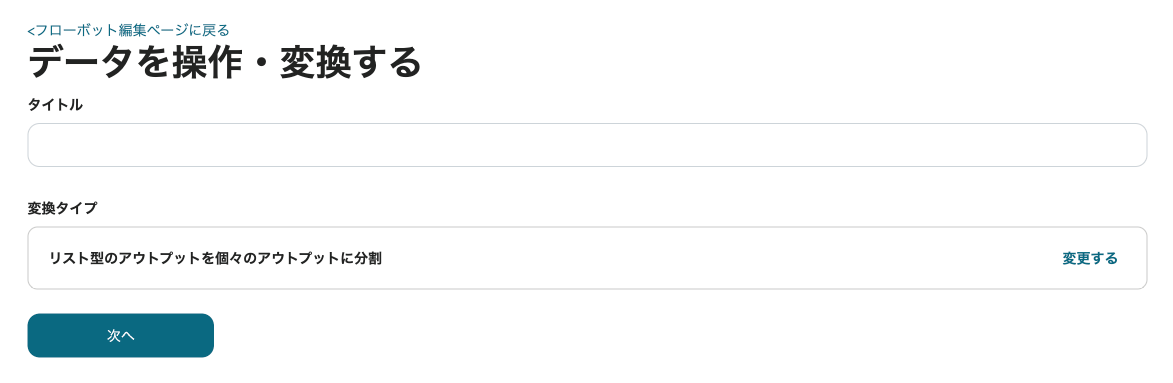
データを操作・変換する(リスト型のアウトプットを個々のアウトプットに分割)を設定する
1. "プラス"ボタンをクリックし、オペレーションを追加します。
2. "データを操作・変換する"をクリックします。
変換タイプでは"リスト型のアウトプットを個々のアウトプットに分割"を選択します。
3. "次へ"ボタンをクリックします。
4. 対象のアウトプットに"ジョブの結果を参照"のリスト形式のアウトプット(グループデータの列)を選択します。
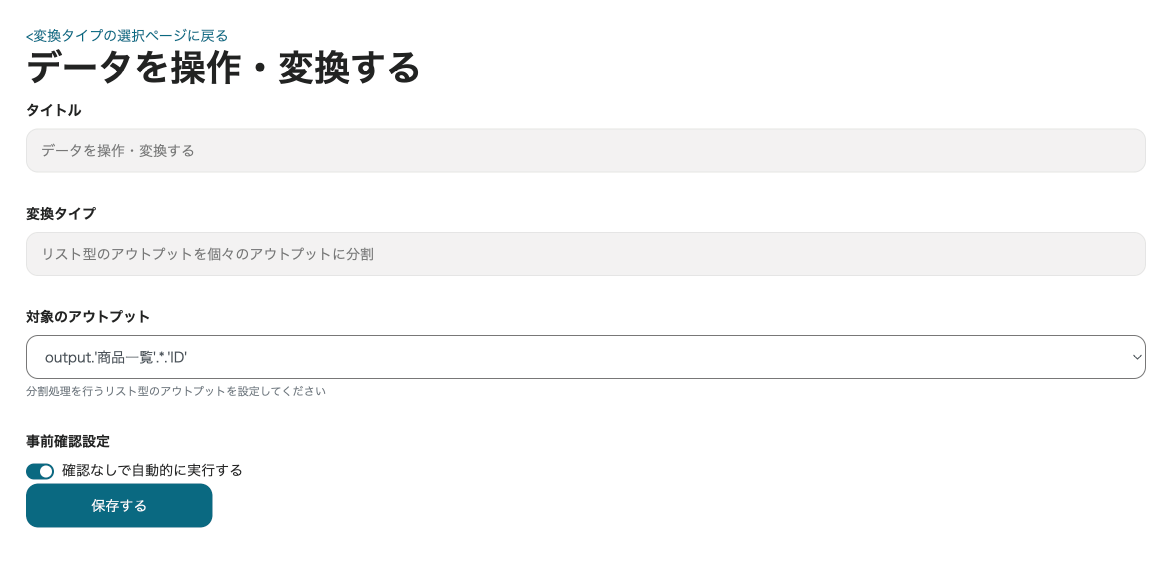
5. グループデータの列数分、オペレーションを追加します。


データベース(レコードを追加する)を設定する
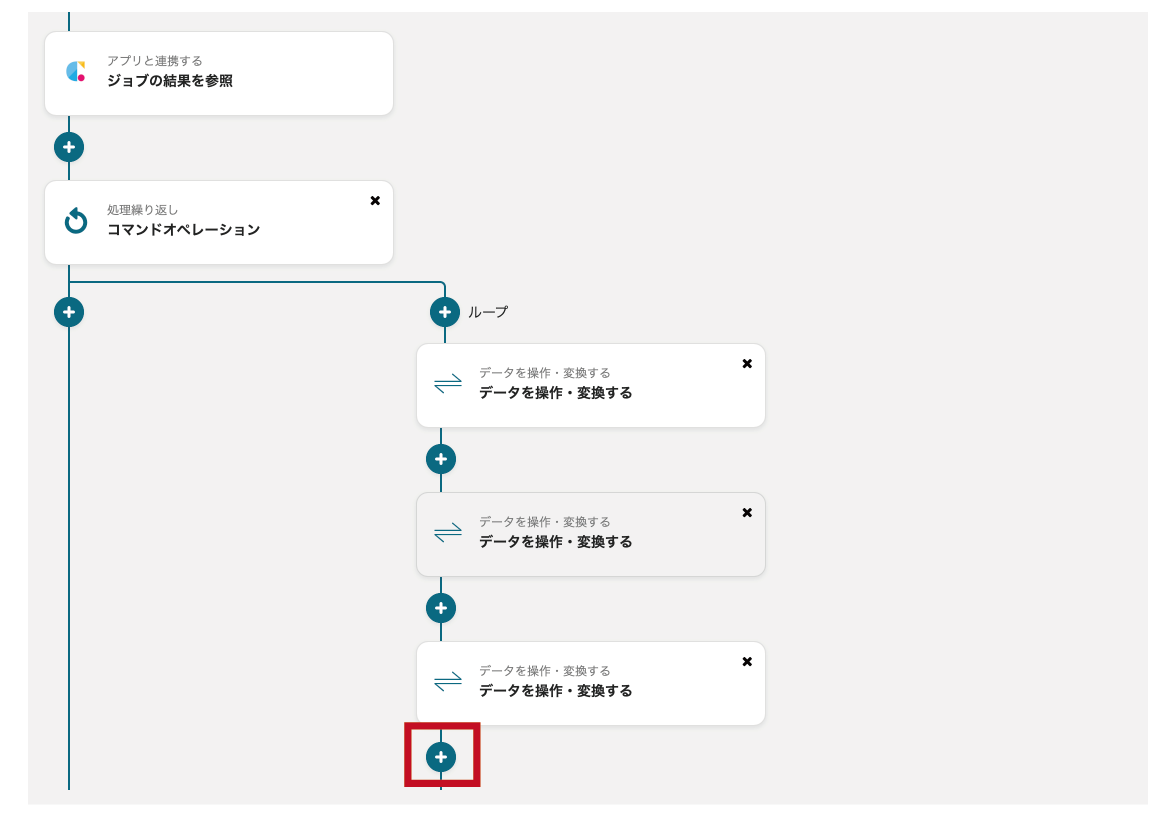
1. "プラス"ボタンをクリックし、オペレーションを追加します。
2. "データベースを操作する"をクリックします。"Yoom"のアイコンをクリックします。

3. データベースのアクションを設定し、 "次へ"をクリックします。
画像の例では、プロジェクト、データベース、テーブルを指定し、実行アクションとして"レコードを追加する"を選択しています。
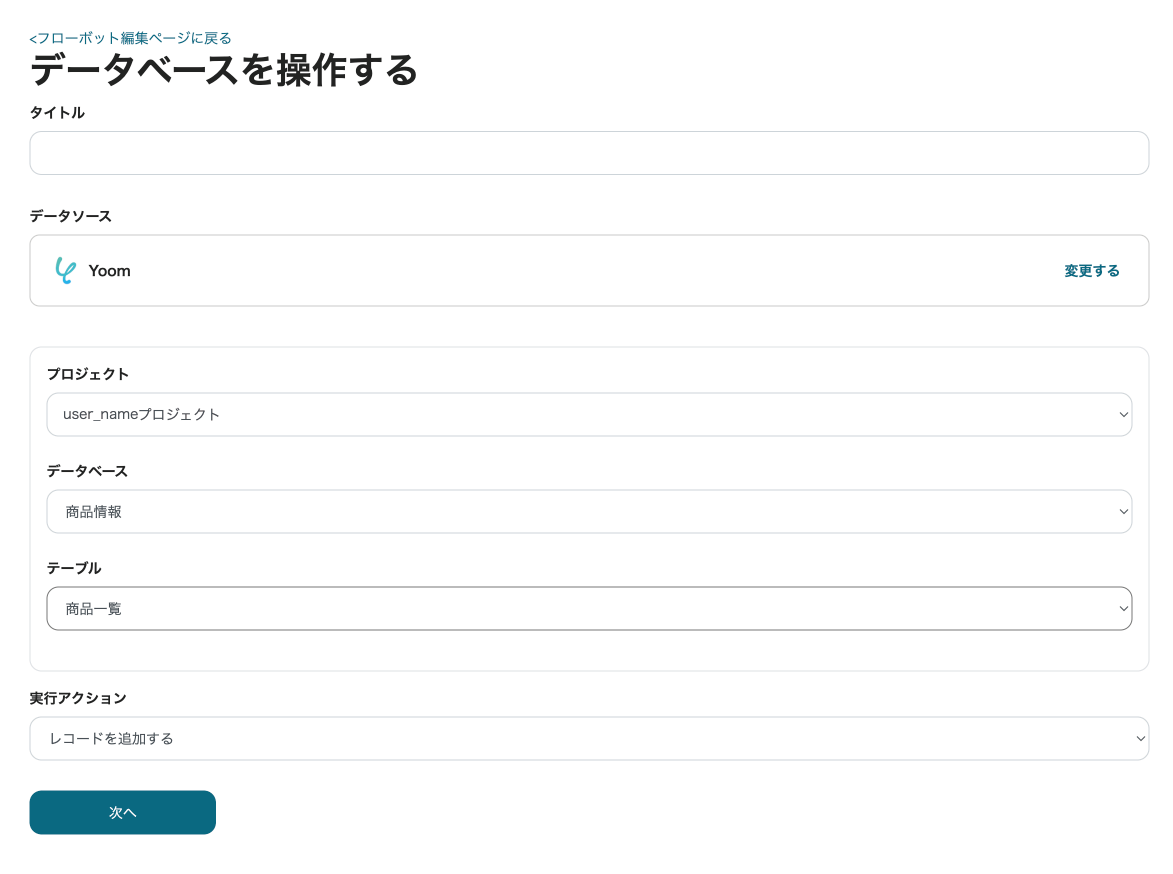
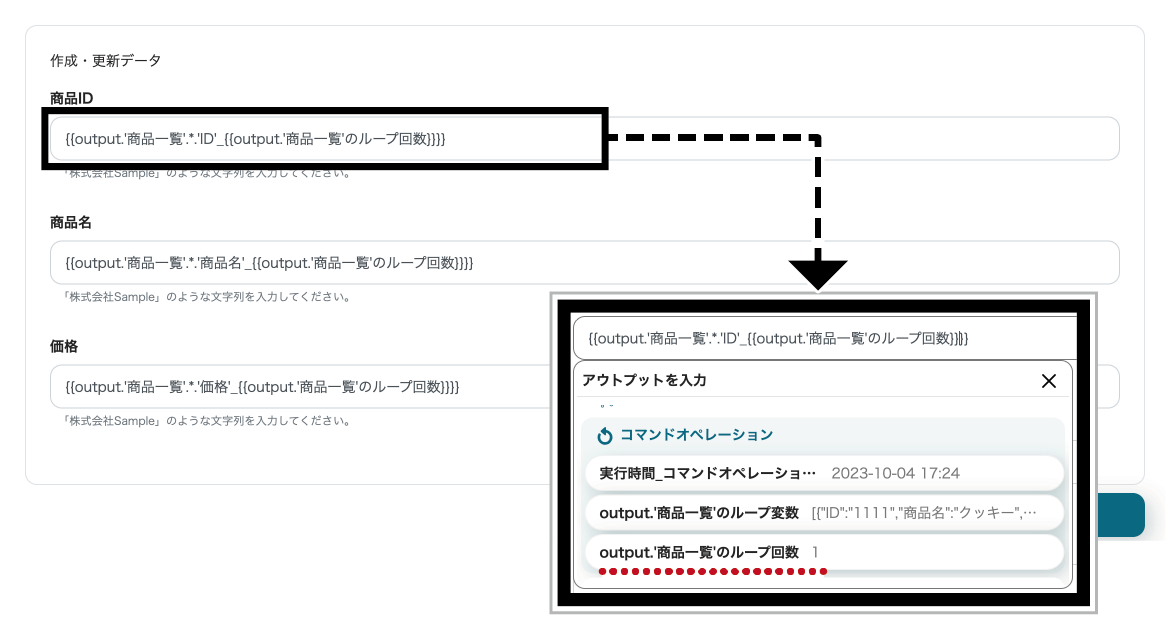
4. 作成・更新データの設定をします。
画像の例では、"データを操作・変換する"で作成したリスト形式のアウトプットを指定し、"同じ処理を繰り返す"のアウトプットで行を指定します。
5. 設定が完了したら"テスト"をクリックし、動作確認を行います。
実行結果が確認できたら"保存する"をクリックします。 これでフローボットの作成は完了です。

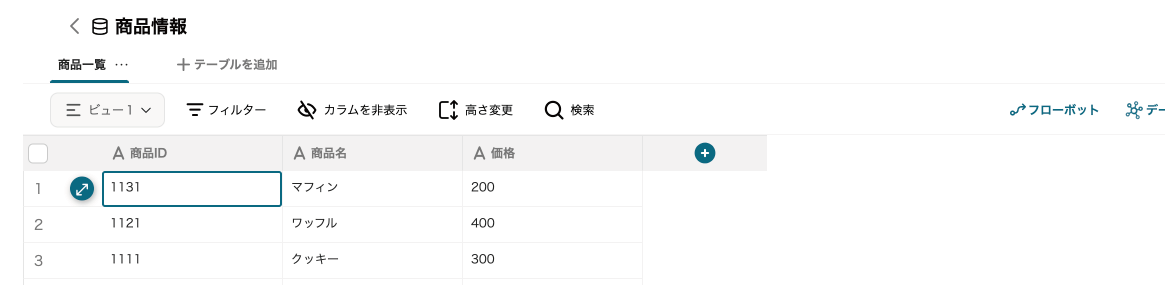
実際にデータベースを確認すると、下記のように書き込みされています。