Upload the file downloaded by BOT to Google Drive

Home > Connect > Yoom > Upload the file downloaded by BOT to Google Drive
Japanese may be displayed on some pages.
フローボット作成
クラウドBOTでダウンロードしたファイルをGoogle Driveでアップロードするフローボットを作成します。
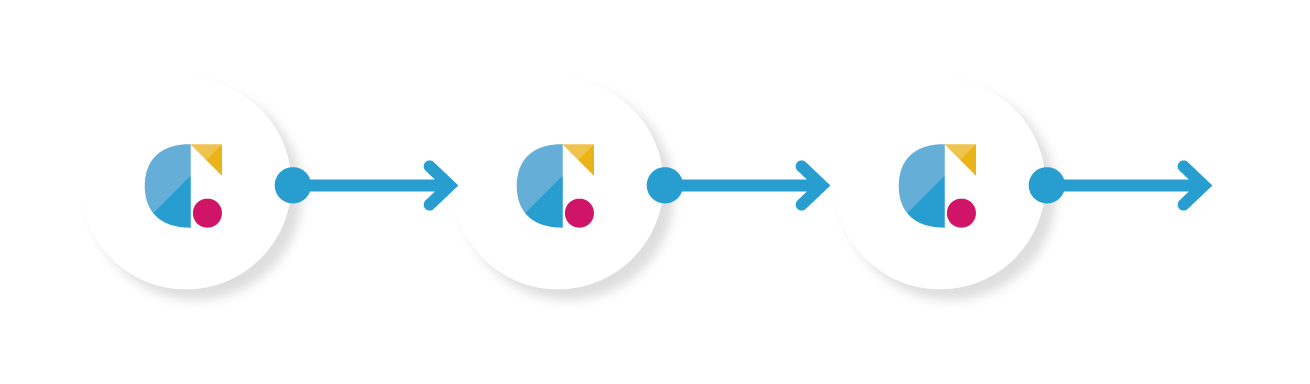
クラウドBOT(ボットの実行が完了したら)
BOT実行が完了した際にBOT実行結果を取得します。
クラウドBOT[WSトークンを発行(ファイルのダウンロード用)]
クラウドBOTのWSトークンを取得します。
クラウドBOT(ファイルをダウンロード)
クラウドBOTへファイルを転送します。
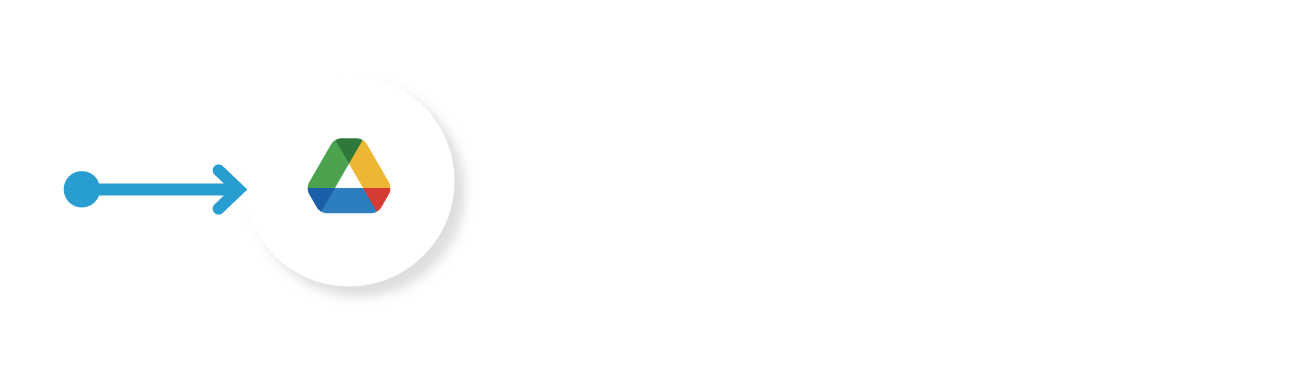
Google Drive(ファイルをアップロードする)
ファイルをGoogle Driveにアップロードします。
クラウドBOT(ボットの実行が完了したら)を設定する
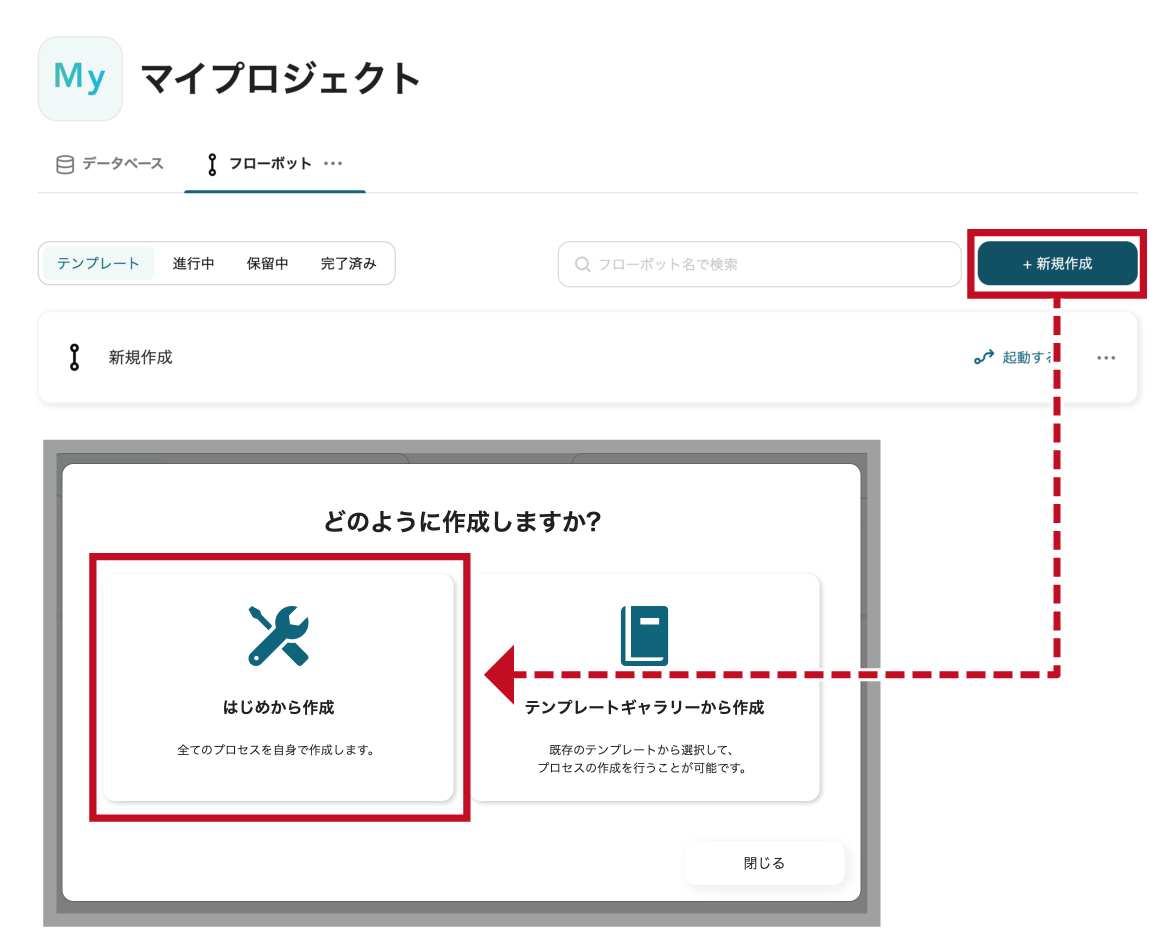
1. "新規作成"をクリックし、"はじめから作成"をクリックします。
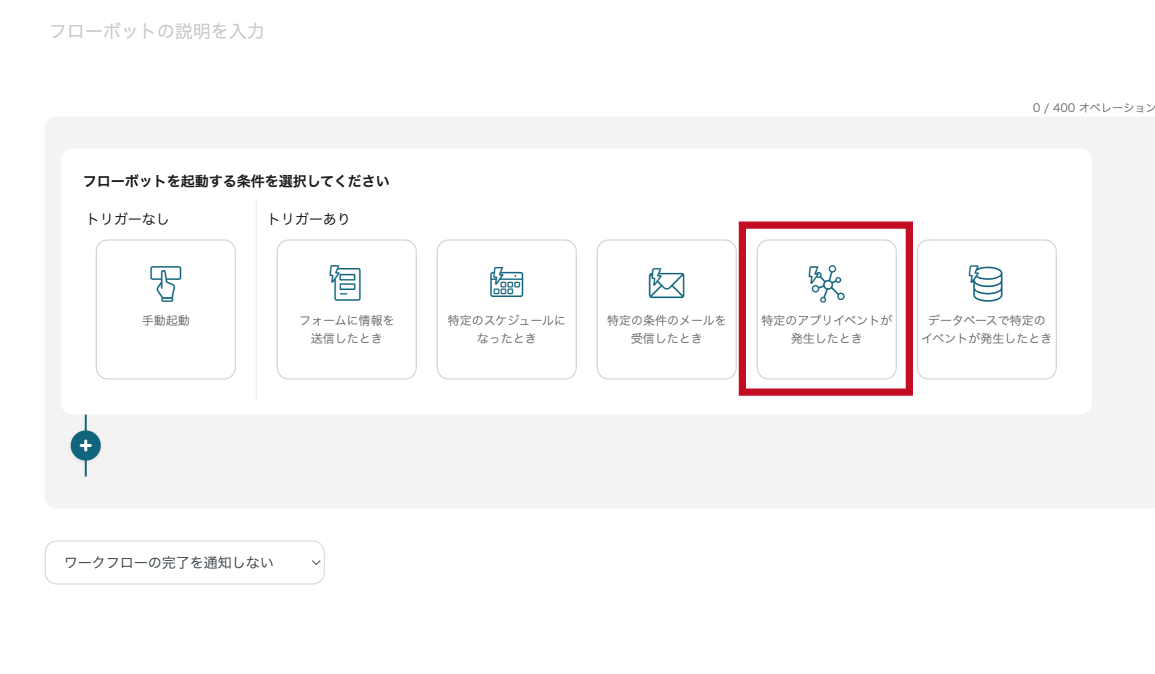
2. フローボットを起動する条件として"特定のアプリイベントが発生したとき"をクリックします。
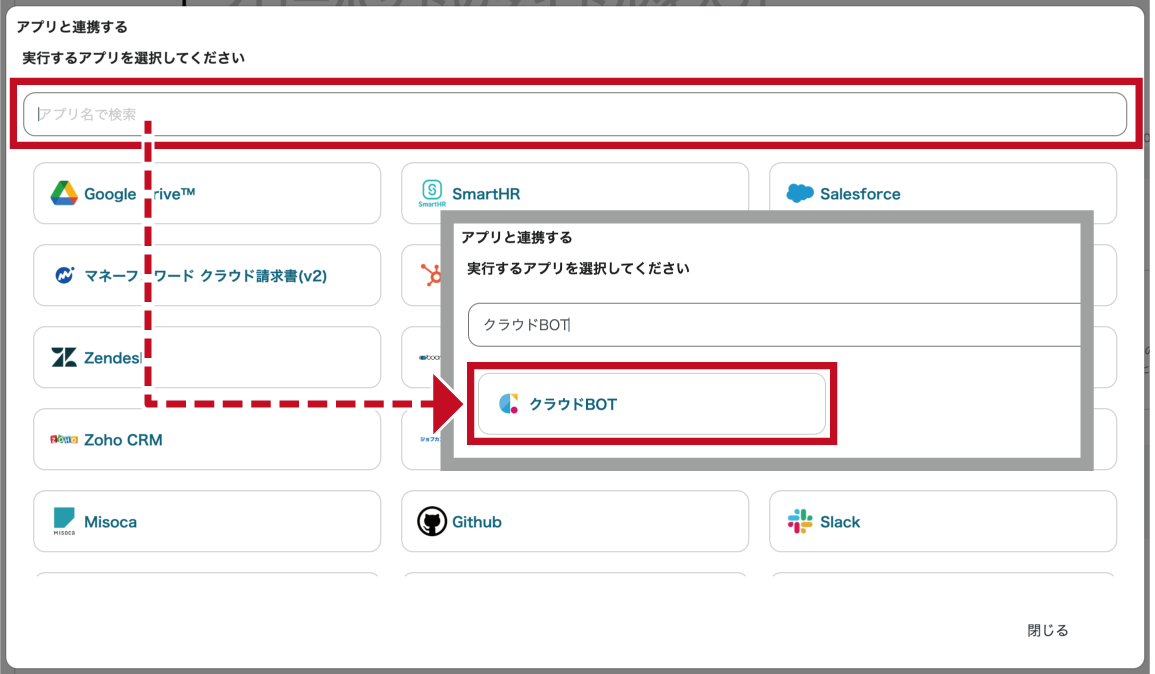
3. "アプリを連携する"の検索欄で"クラウドBOT"と検索し、アイコンをクリックします。
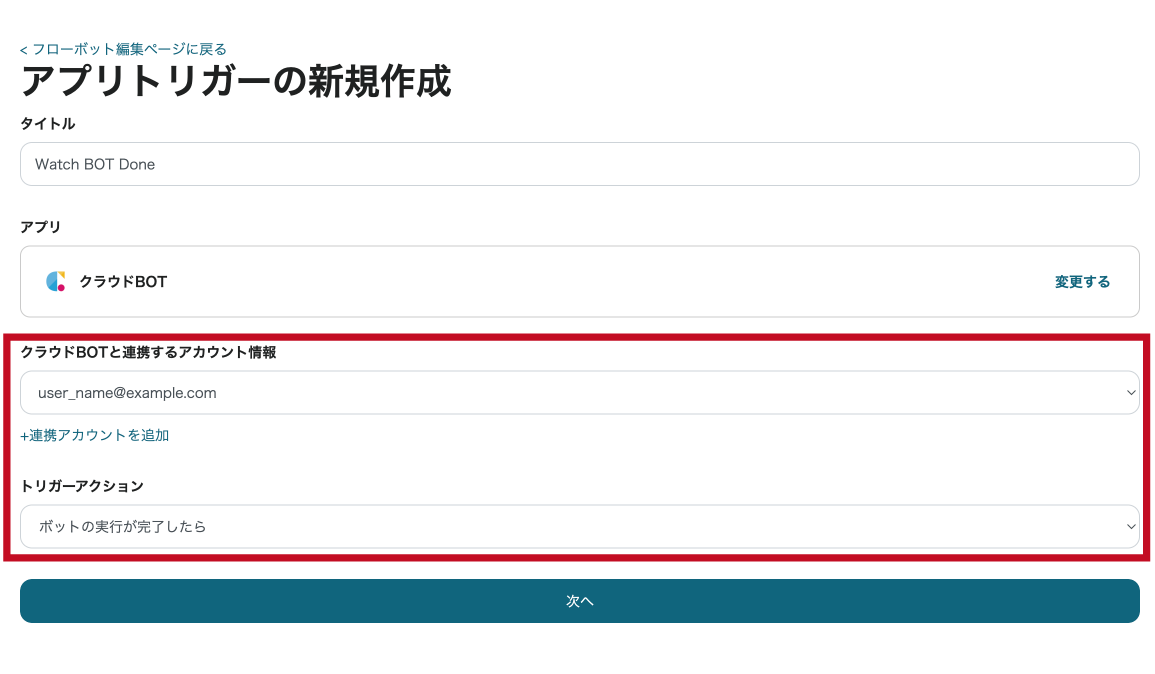
4.クラウドBOTと連携するアカウント情報、トリガーアクションを設定し、"次へ"をクリックします。
画像の例では、トリガーアクションとして"ボットの実行が完了したら"を選択しています。
*接続がない場合は接続を作成します。接続の作成についてはこちら。
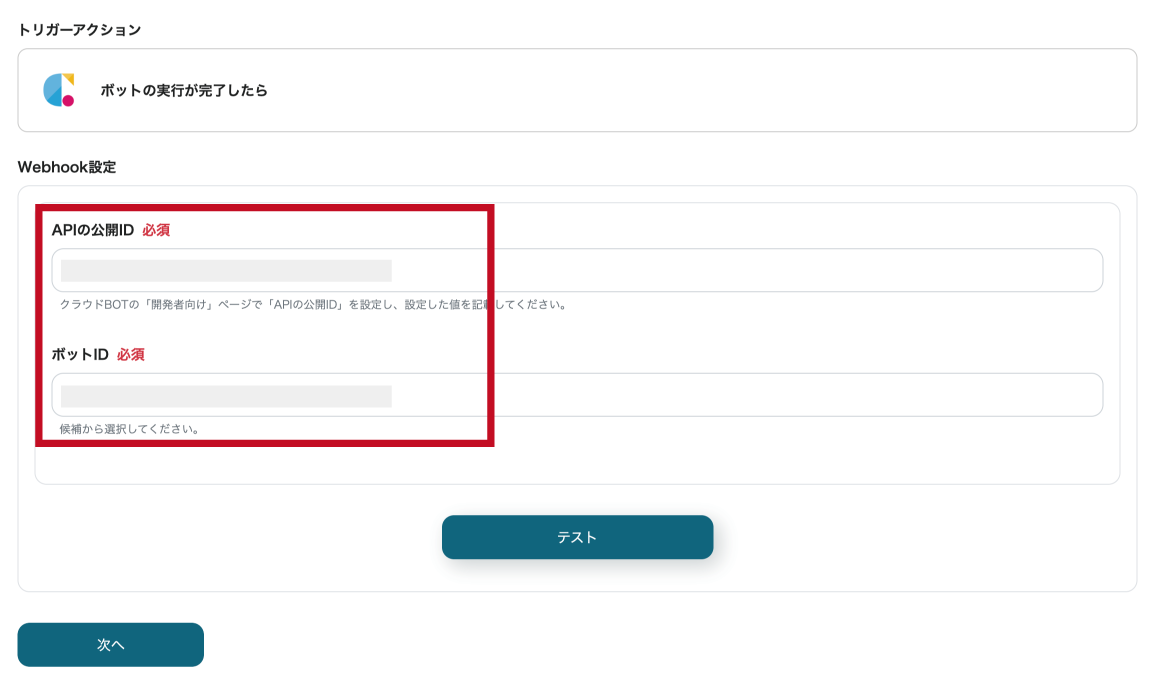
5. Webhookを設定します。設定値についてはこちら。
"テスト"を実施し、"次へ"をクリックします。
6. 設定したBOTをクラウドBOT上で実行します。
Webhookイベントの"テスト"をクリックし、実行結果をプレビュー表示します。
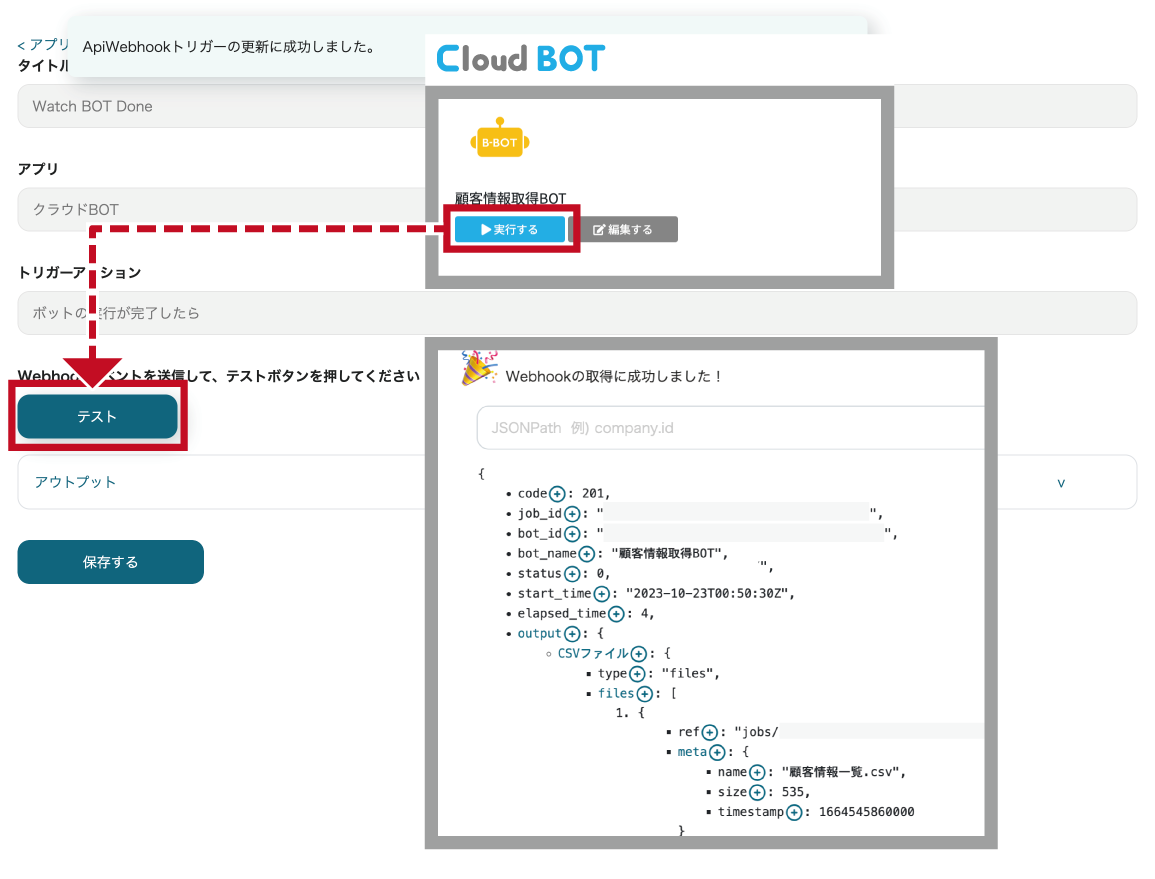
結果が表示されたら"保存する"をクリックします。
クラウドBOT[WSトークンを発行(ファイルのダウンロード用)]を設定する
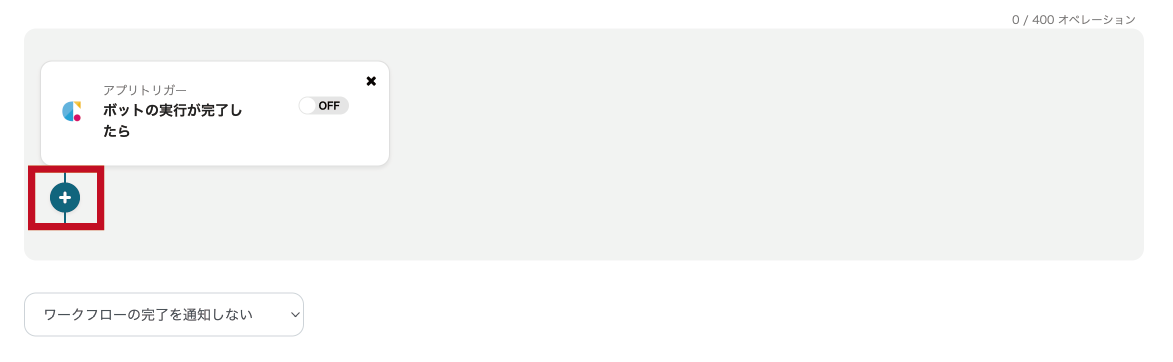
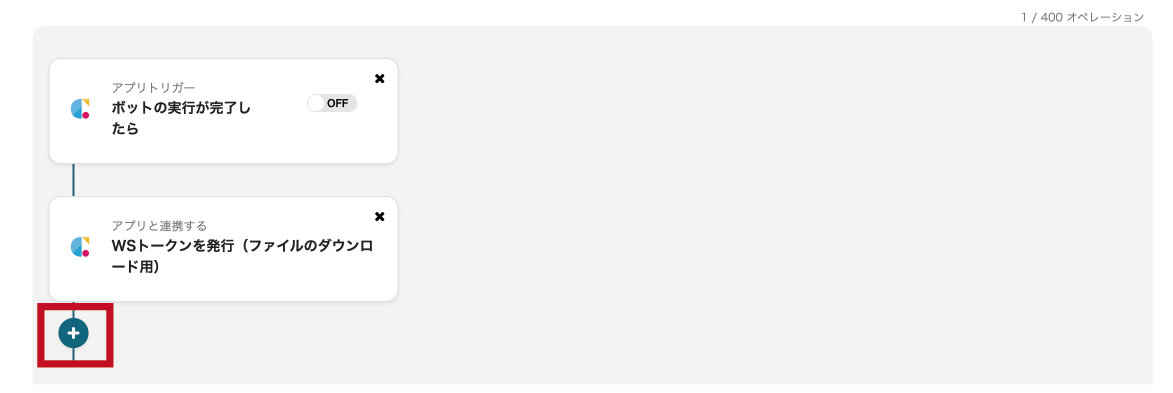
1. "プラス"ボタンをクリックし、オペレーションを追加します。
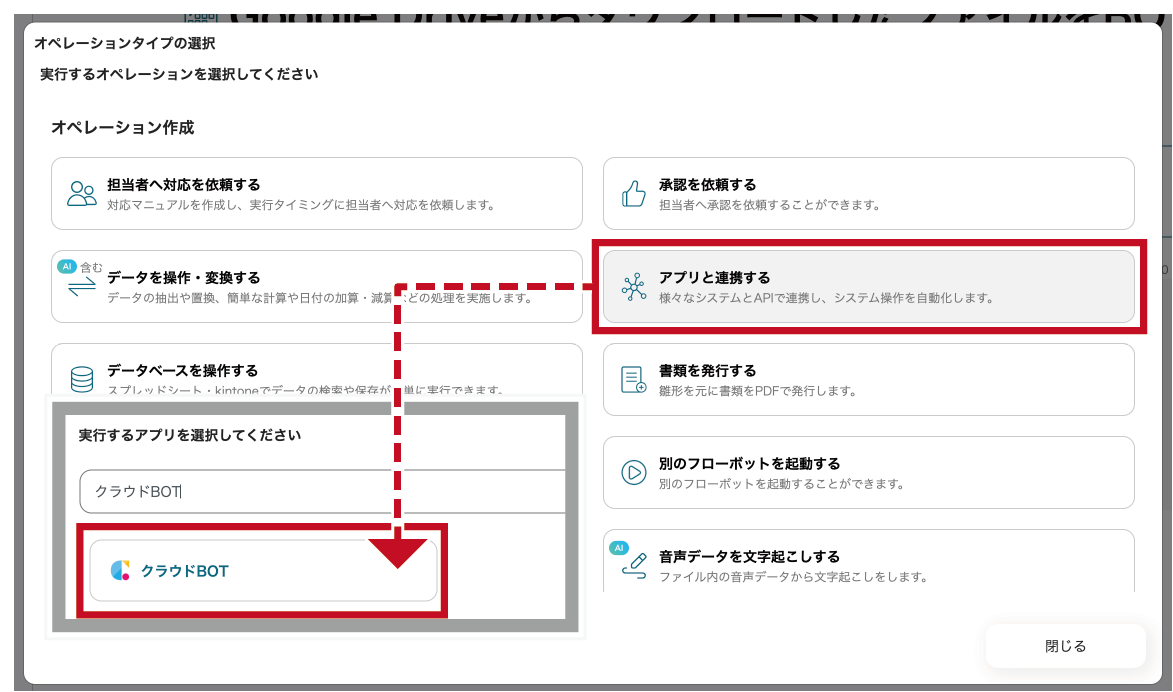
2. "アプリと連携する" をクリックします。検索欄で"クラウドBOT"と検索し、アイコンをクリックします。
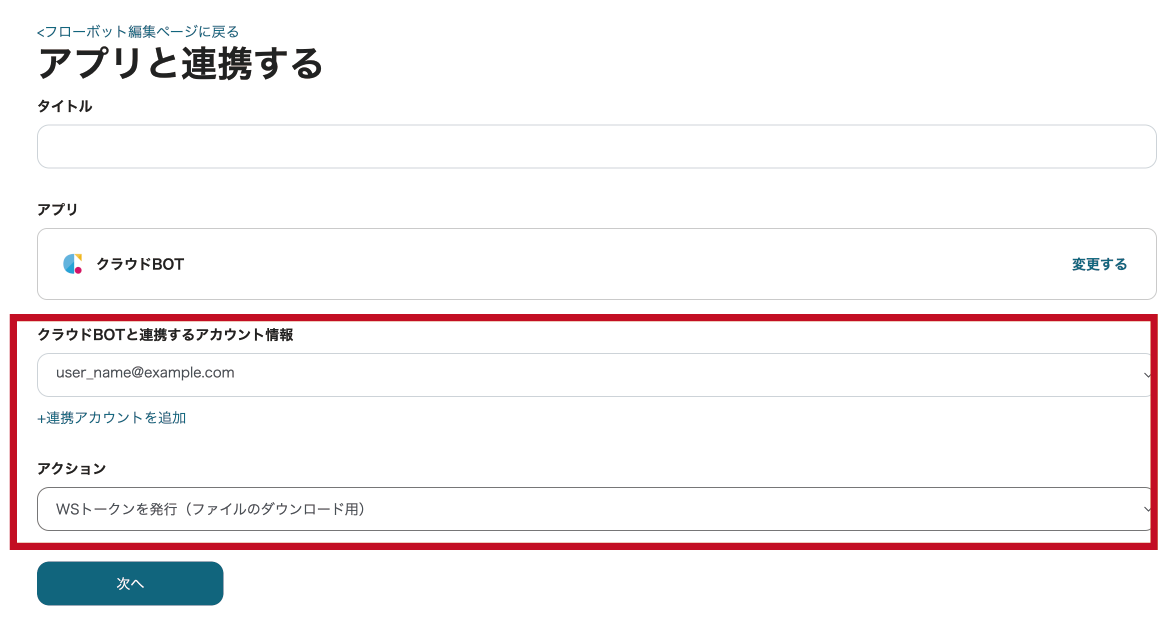
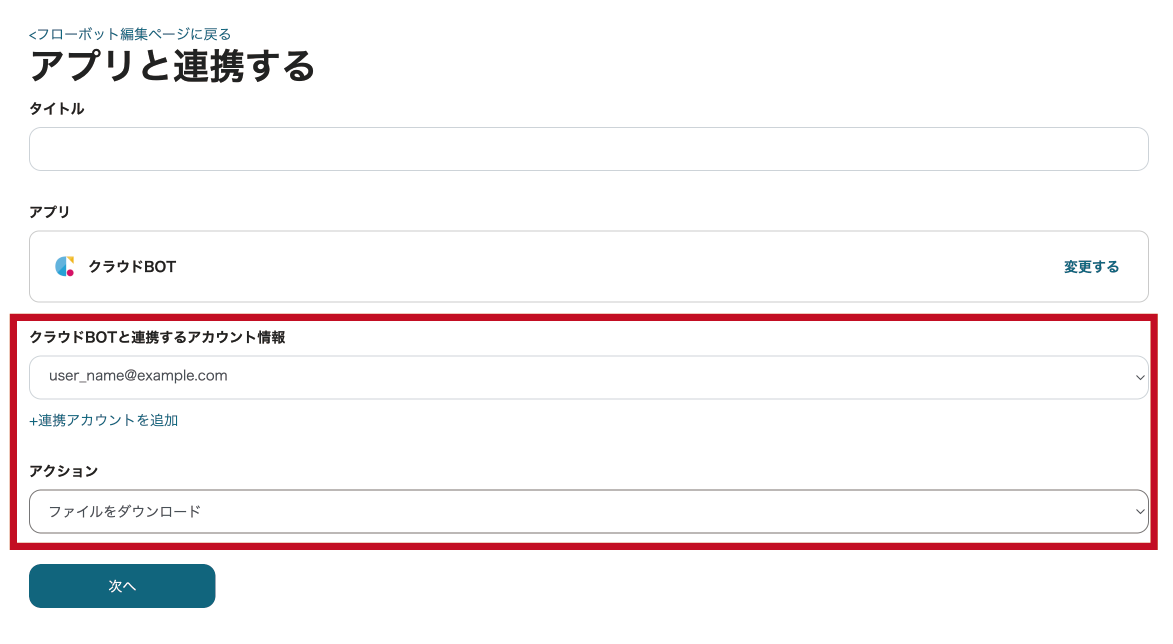
3. クラウドBOTと連携するアカウント情報、アクションを設定し、 "次へ"をクリックします。
画像の例では、アクションとして"WSトークンを発行(ファイルのダウンロード用)"を選択しています。
*接続がない場合は接続を作成します。接続の作成についてはこちら。
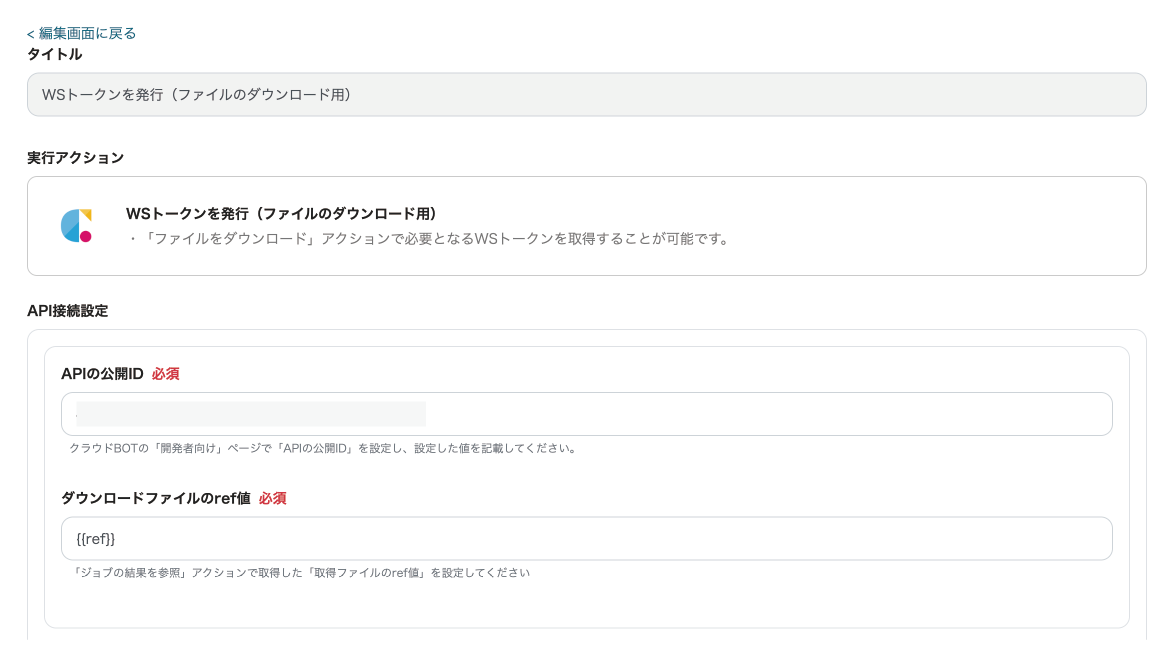
4. "WSトークンを発行(ファイルのダウンロード用)"アクションを設定します。設定値についてはこちら。
5. 設定が完了したら"テスト"をクリックし、動作確認を行います。

実行結果が確認できたら"保存する"をクリックします。
クラウドBOT(ファイルをダウンロード)を設定する
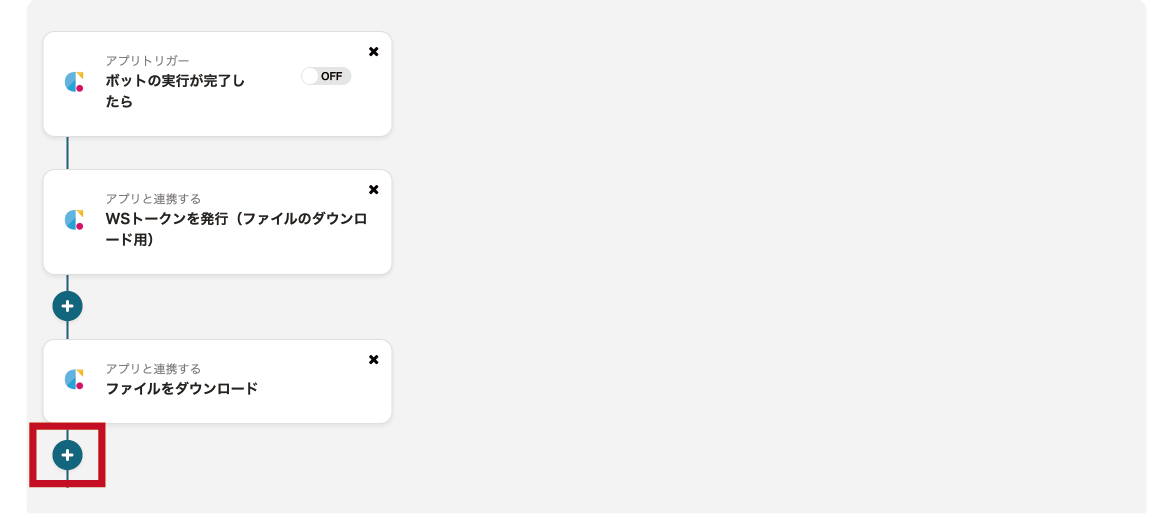
1. "プラス"ボタンをクリックし、オペレーションを追加します。
2. "アプリと連携する" をクリックします。検索欄で"クラウドBOT"と検索し、アイコンをクリックします。
3. クラウドBOTと連携するアカウント情報、アクションを設定し、"次へ"をクリックします。
画像の例では、アクションとして"ファイルをダウンロード"を選択しています。
*接続がない場合は接続を作成します。接続の作成についてはこちら。
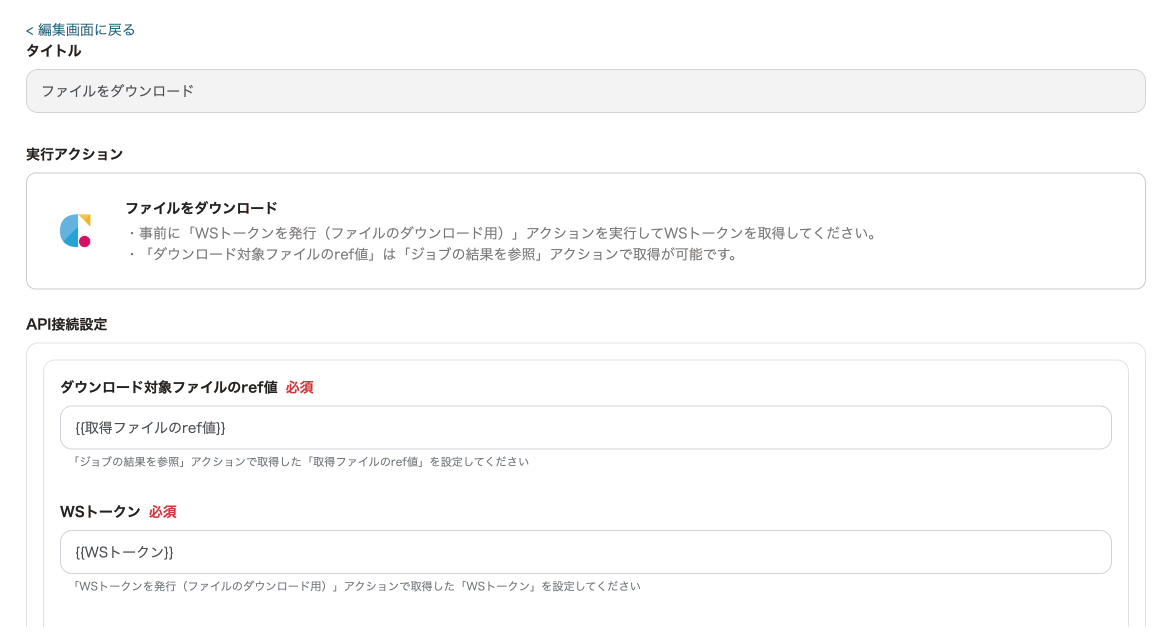
4. "ファイルをダウンロード"アクションを設定します。設定値についてはこちら。
5. 設定が完了したら"テスト"をクリックし、動作確認を行います。
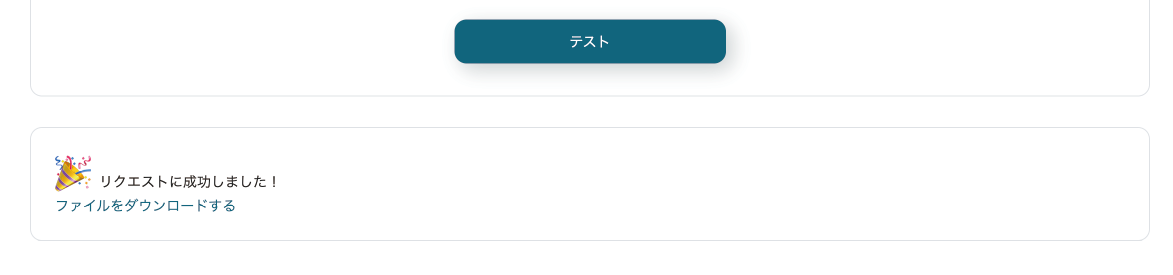
実行結果が確認できたら"保存する"をクリックします。
Google Drive(ファイルをアップロードする)を設定する
1. "プラス"ボタンをクリックし、オペレーションを追加します。
2. "アプリと連携する"をクリックします。検索欄で"Google Drive"と検索し、アイコンをクリックします。
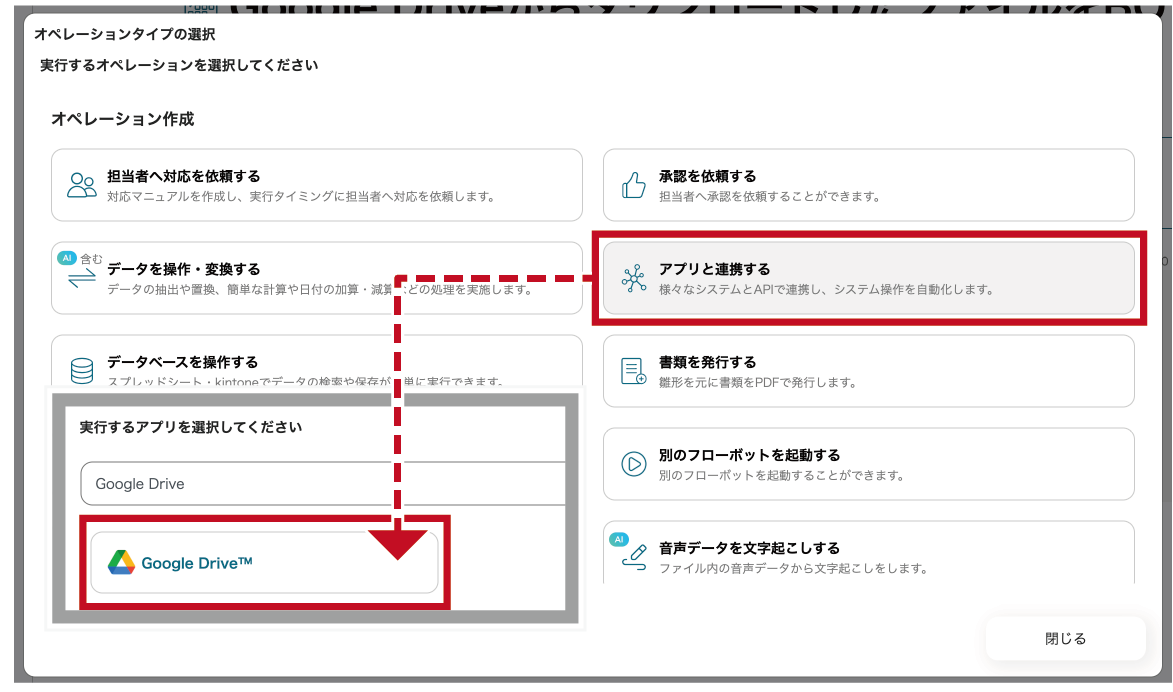
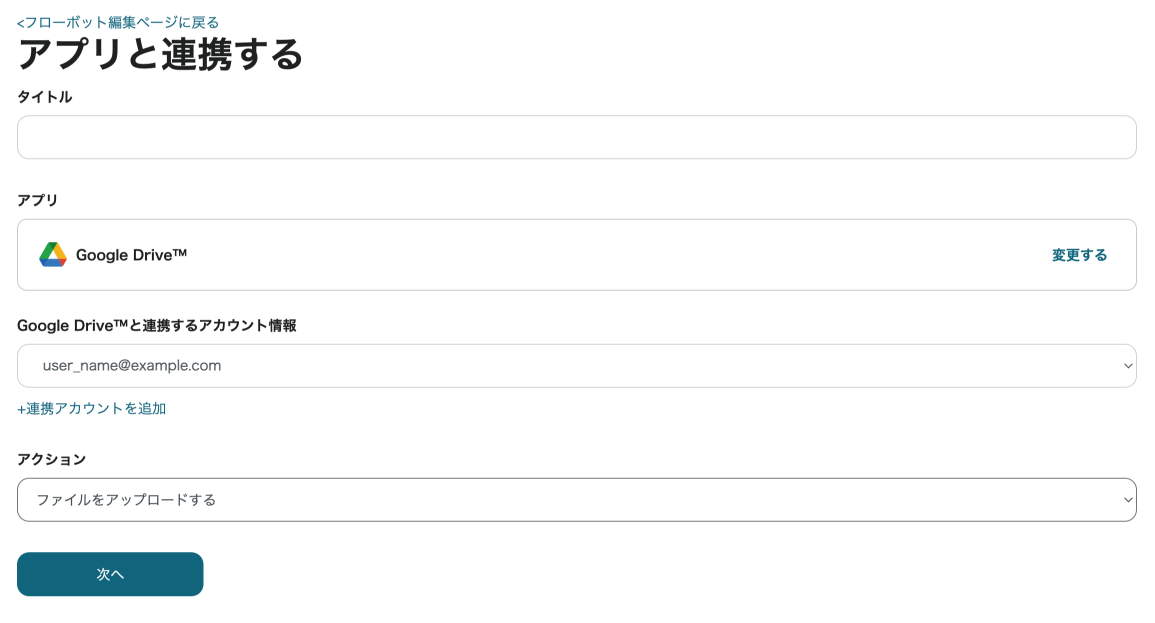
3. Google Driveと連携するアカウント情報、アクションを設定し、"次へ"をクリックします。
画像の例では、"ファイルをアップロードする"を選択しています。
*接続がない場合は接続を作成します。
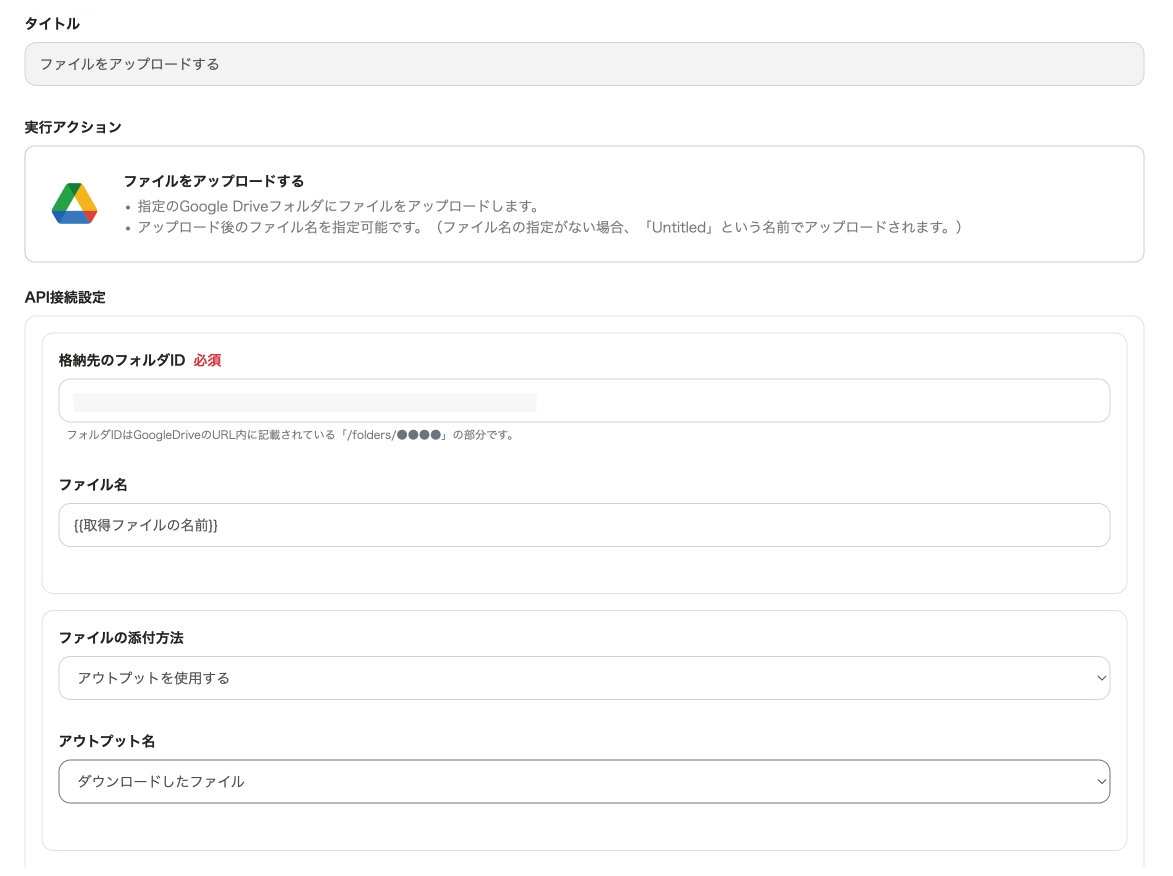
4. "ファイルをアップロードする"アクションを設定します。格納先のフォルダID、ファイル名、ファイルの取得方法などを指定します。
5. 設定が完了したら"テスト"をクリックし、動作確認を行います。
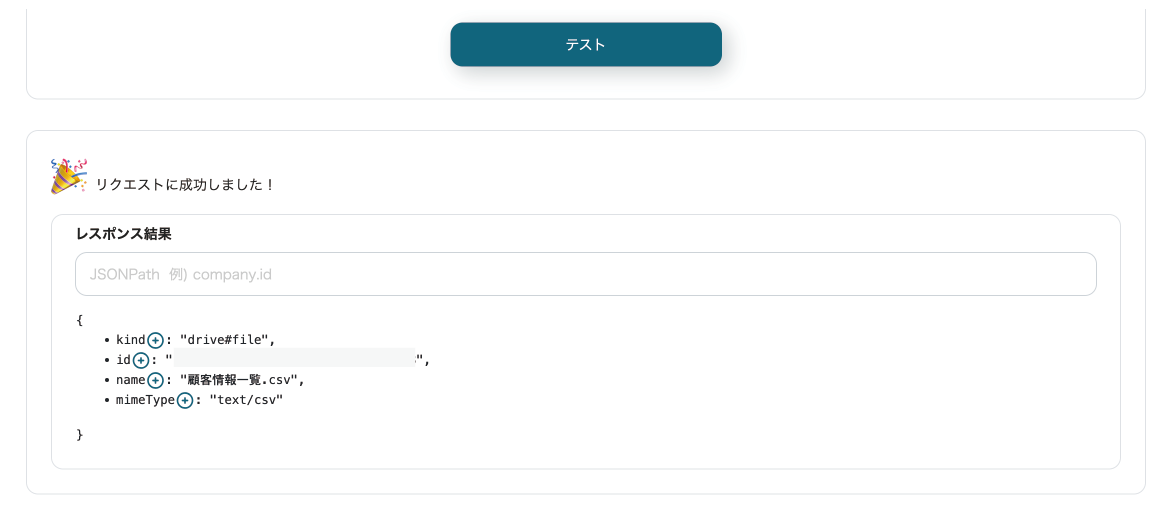
実行結果が確認できたら"保存する"をクリックします。これでフローボットの作成は完了です。