Notifying by Gmail when BOT execution ends

Home > Connect > IFTTT > Notifying by Gmail when BOT execution ends
Creating a applet
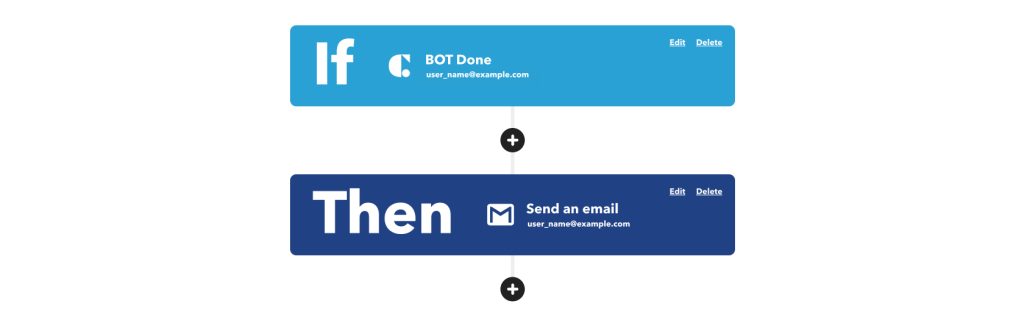
Create a scenario that uses the BOT execution of the Cloud BOT as a trigger and notifies the execution status by Gmail when the BOT execution ends.

Cloud BOT(BOT Done)
Retrieves the BOT execution result when a BOT has executed completely.
Gmail(Send an email)
Email the BOT execution status.
Setting Cloud BOT
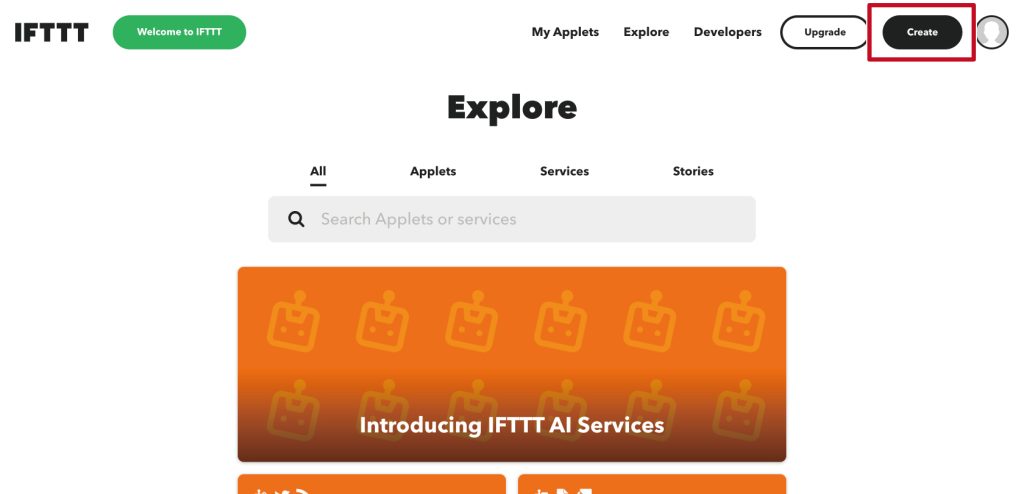
1. Click "Create" from the menu.
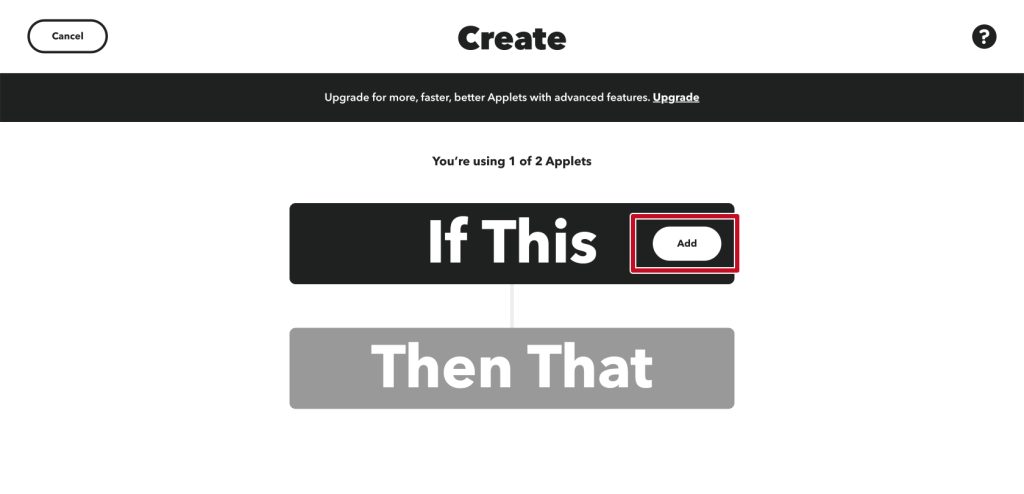
2. After moving to the applet creation screen, click "Add" under "If This".
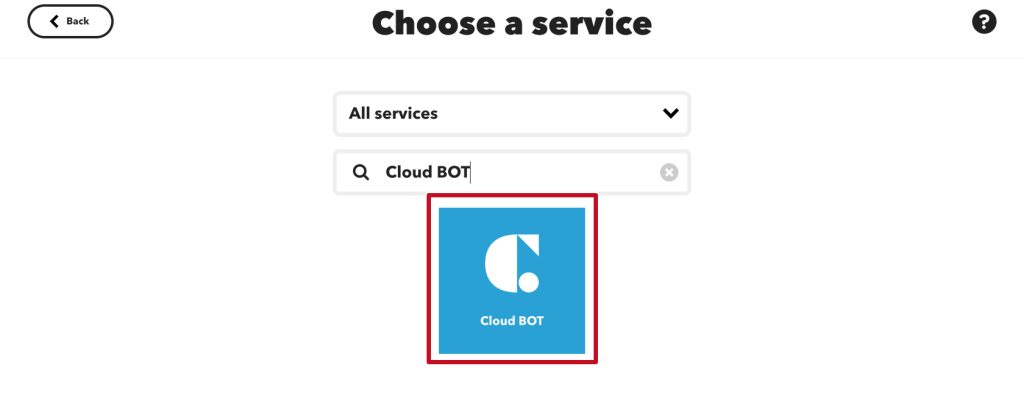
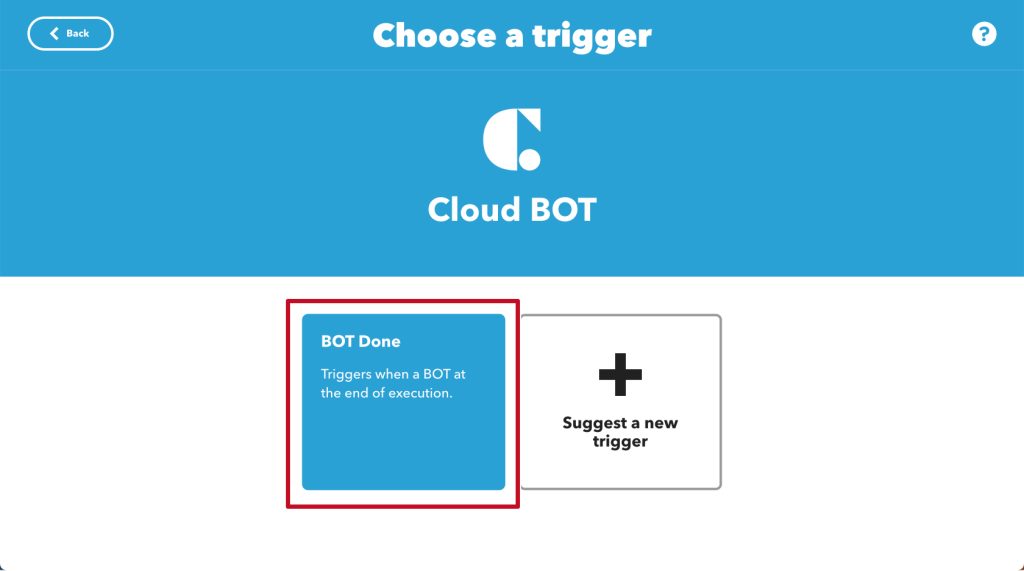
3. Search for "Cloud BOT", and click the icon.
4. Click "BOT Done".
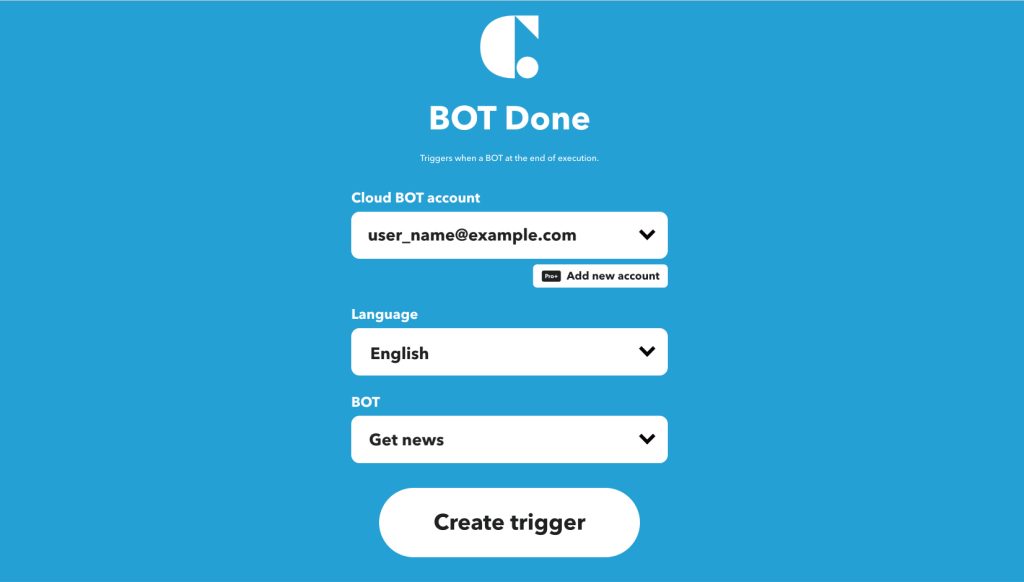
5. Set the trigger. Refer to this page about setting values.
*Create a Connect if it does not exist. Learn more about creating a Connect here.
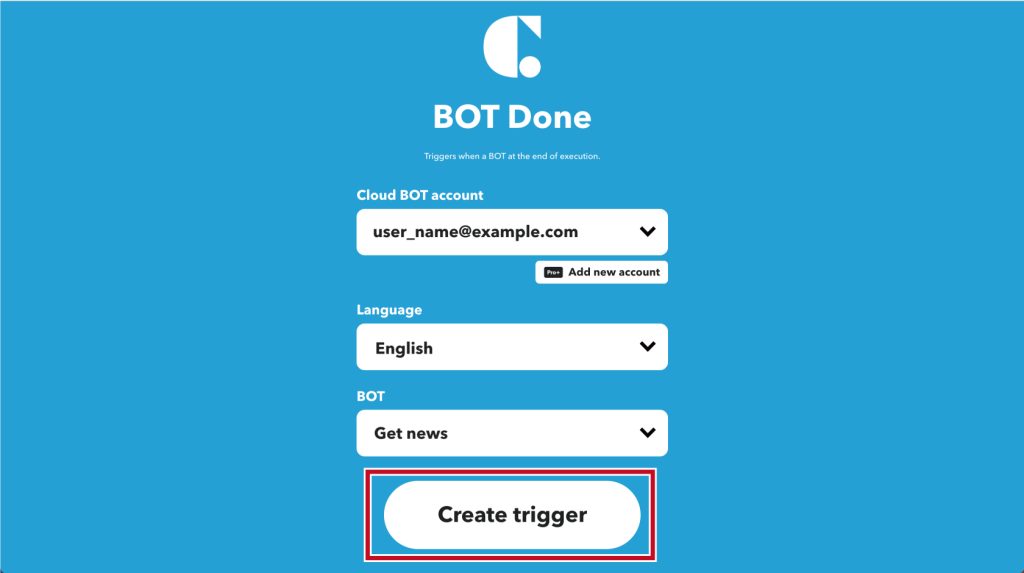
6. Click "Create trigger" after setting.
Setting Gmail
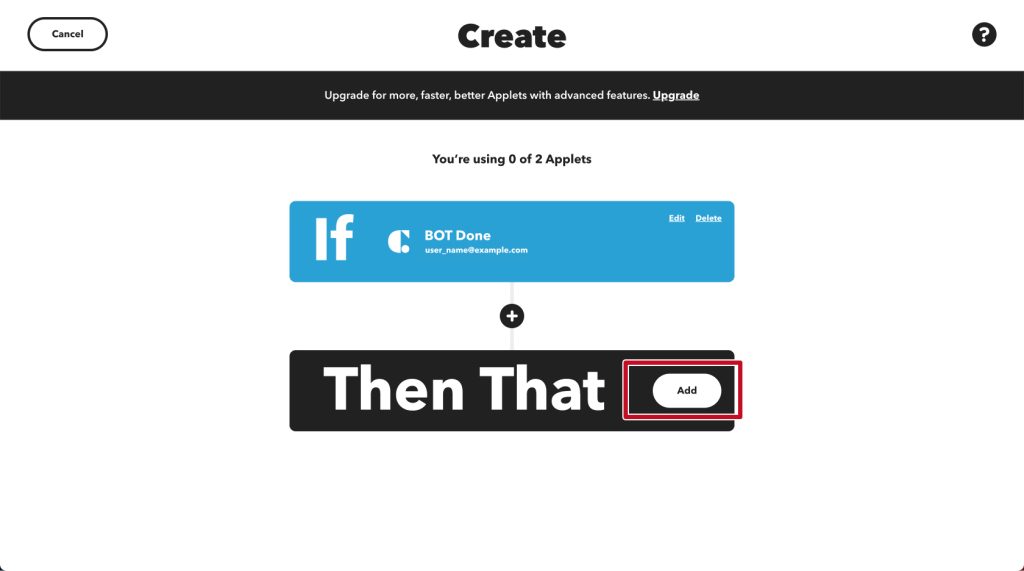
1. Click "Add" in "Then That" on the screen after setting the trigger.
2. Search for"Gmail" and click the icon.
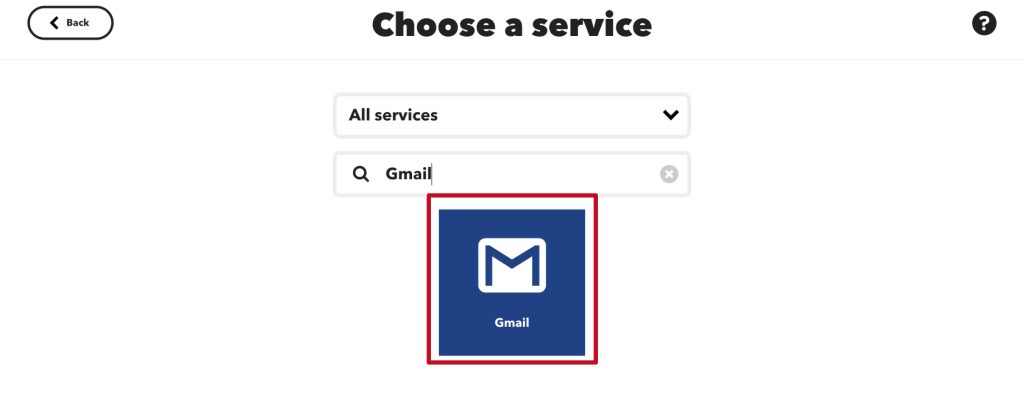
3. Click "Send an email".

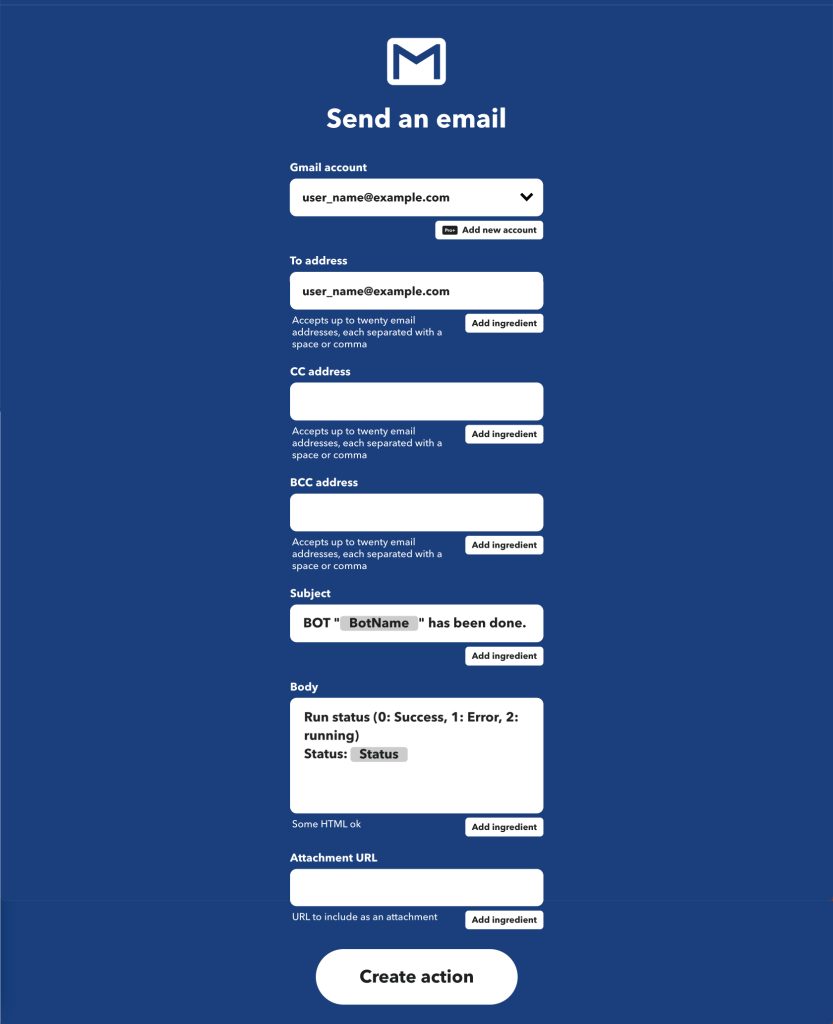
4. Set up the action. Set the subject and body.
*You need to create a connection when the connection is not created.
5. Click "Create action" after setting.

6. Click "Continue" button.

7. Set your notifications and click "Finish".

An applet has been created.
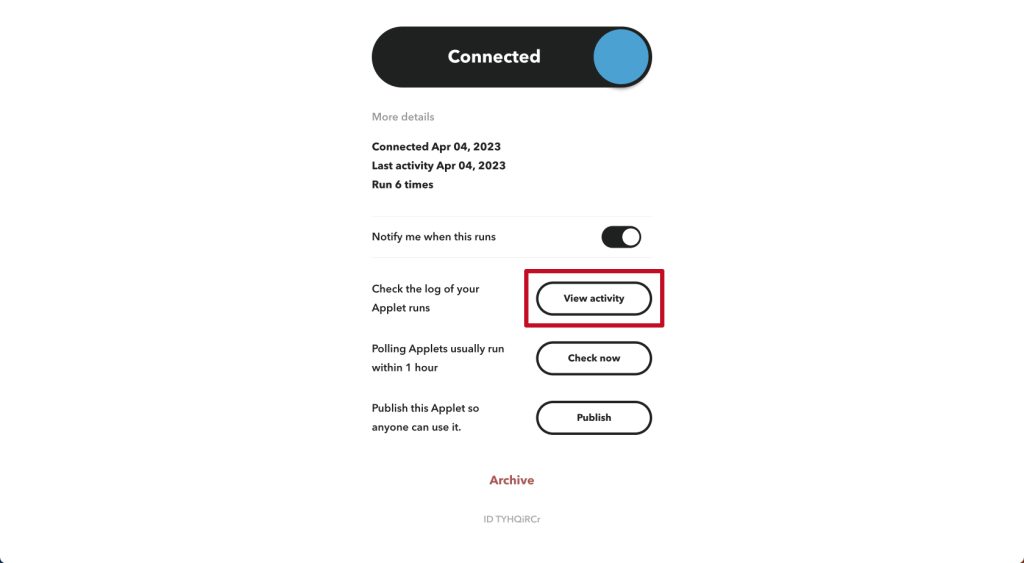
Check the actual operation. You can check the execution result by ”Check the log of your Applet runs "view activity"".