Schedules

Home > User guide > Trrigers > schedules
Introduction
The schedule feature is available with a paid plan of Single Office or higher.
About Schedule
You can specify a schedule to automatically execute the BOT.
Schedule triggers list
Go to “Schedule” under “Trigger” in the global menu.
A list of registered schedule triggers will be displayed.
Schedule name, BOT name, description about the schedules, executor are displayed.


This screen has following features.
Add Schedule triggers
You can create a schedule trigger by clicking the [Add schedule] button on the Schedule Trigger List or the BOT details screen.
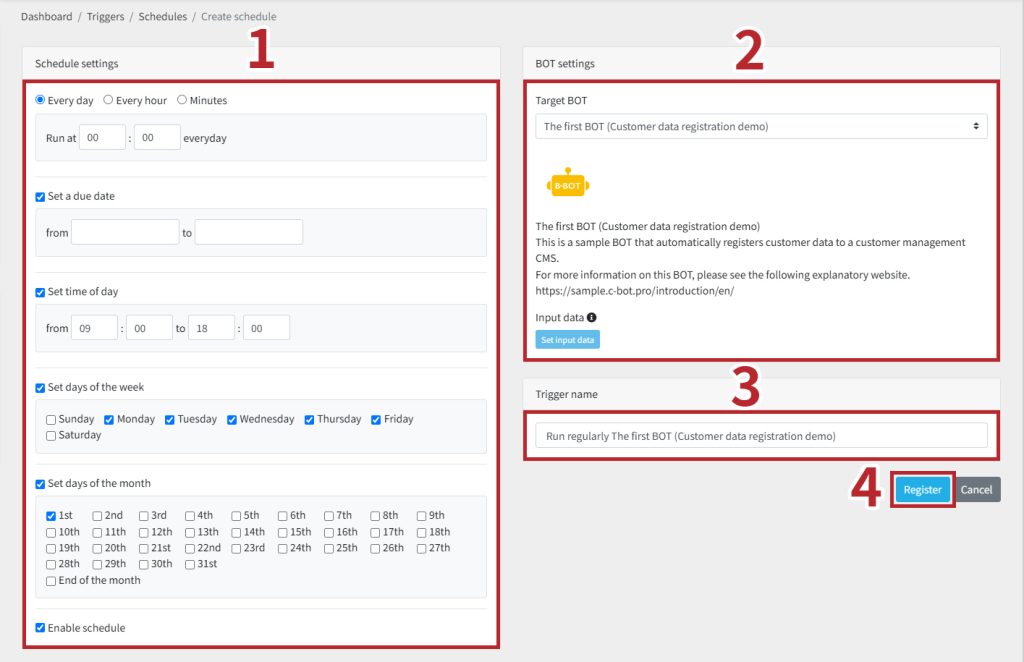
The following operations are available from this screen.
- Schedules Settings
- BOT settings
- Trigger Name
- Confirm Settings
All settings are saved with the [Register] button.
Schedules Settings
Intervals Settings
Set the interval of execution. Select one of the following. (* Must be selected)
[Every day]: BOT runs once a day. In the box that appears when you select it, set the execution time in 24-hour notation.
[Every hour]: BOT runs once an hour. In the box that appears when you select it, set the execution time.
[Minutes]: In the box that appears when you select it, set how often the BOT runs.
*The execution timing by "Minutes" is based on the 0 minute of the target time, not the time since the schedule was saved.
For example, if the "Minutes" is set to 10 minutes, the execution time will be 0, 10, 20, 30, 40, and 50 minutes every hour.
Period Settings
Set this when limiting the timing when BOT is executed. Select the check box to set. (* Multiple selections possible)
[Set a due date]: Limit the period during which BOT is executed. Select a date from the calendar.
[Set time of day]: Limit the time zone during which BOT is executed. Set the time in 24-hour notation.
[Set days of the week]: Set when executing the BOT on a fixed day of the week. Select the day of the week for which BOT is executed.
[Set days of the month]: Set when executing the BOT on a fixed day of the month. Select the date for which BOT is executed.
Enable schedule
By default, the schedule trigger is enabled. You can disable it by unchecking the checkbox.
BOT Settings
Target BOT
Select the target BOT.
Input data Settings
In the Schedules screen, check and set the data entered when executing BOT.
Initial values set here are the input values used when executing BOT. If you have set the input data in schedule, it will be executed with this value.
※* The default input data is "User Initial Value (preset)". The input value when registering the schedule is applied for each schedule.
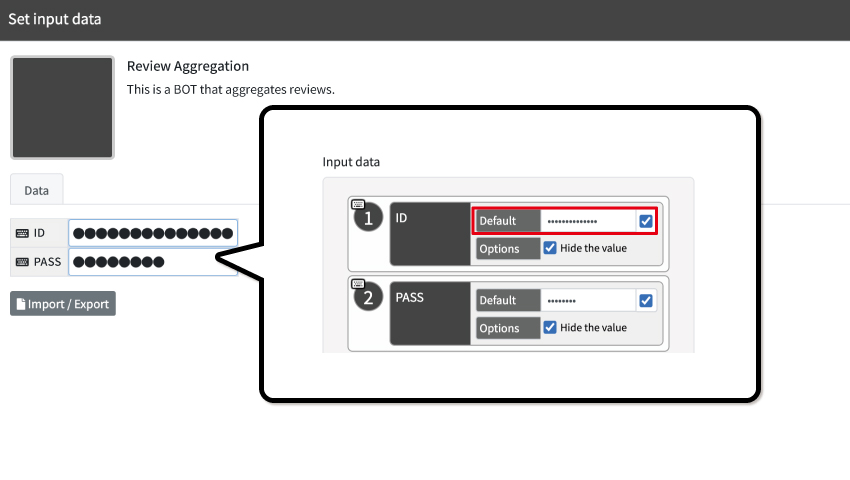
If the BOT’s initial value is "Disabled" (BOT Editor setting), it will be blank. Input data needs to be set in order to execute a BOT automatically on a schedule trriger.
Trigger Name
Set the name of the schedule trigger. If nothing is entered, the name will be in the format of "Run regularly" + BOT name.
Schedule trigger Details
You can view the schedule details
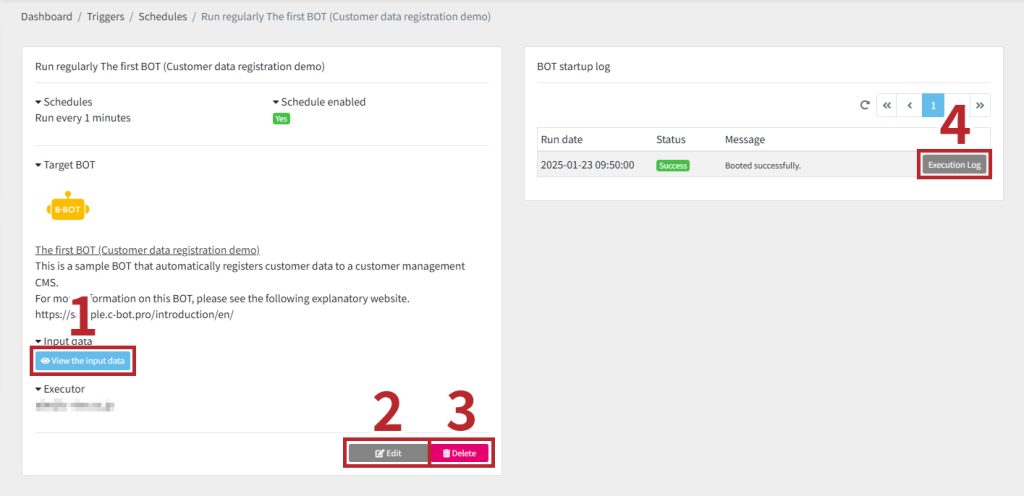
The following operations are available from this screen.
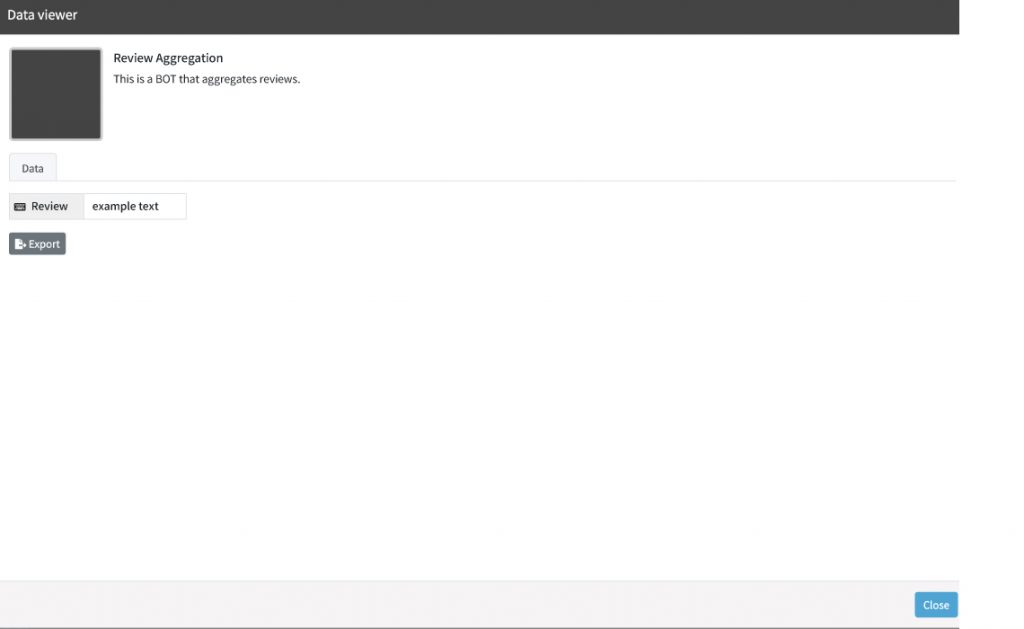
Confirm the Input Data
Click the [View the input data] button to view input data. You can also export the data.
Edit a Schedule trigger
You can edit the schedule. Refer to "Add Schedule triggers" for how to edit.
Delete a Schedule trigger
You can delete the schedule trigger.
- Click the [Delete] button.

- Click [OK]. Note that you cannot undone this deletion.
Execution Logs
Click the [Details] button to display the Details page. Refer to "Execution Logs page" for operations.