BOTでダウンロードしたファイルをGoogle Driveへアップロード

ホーム > 外部サービス連携 > Power Automate > BOTでダウンロードしたファイルをGoogle Driveへアップロード
フロー作成
クラウドBOTでダウンロードしたファイルをGoogle Driveでアップロードするフローを作成します。
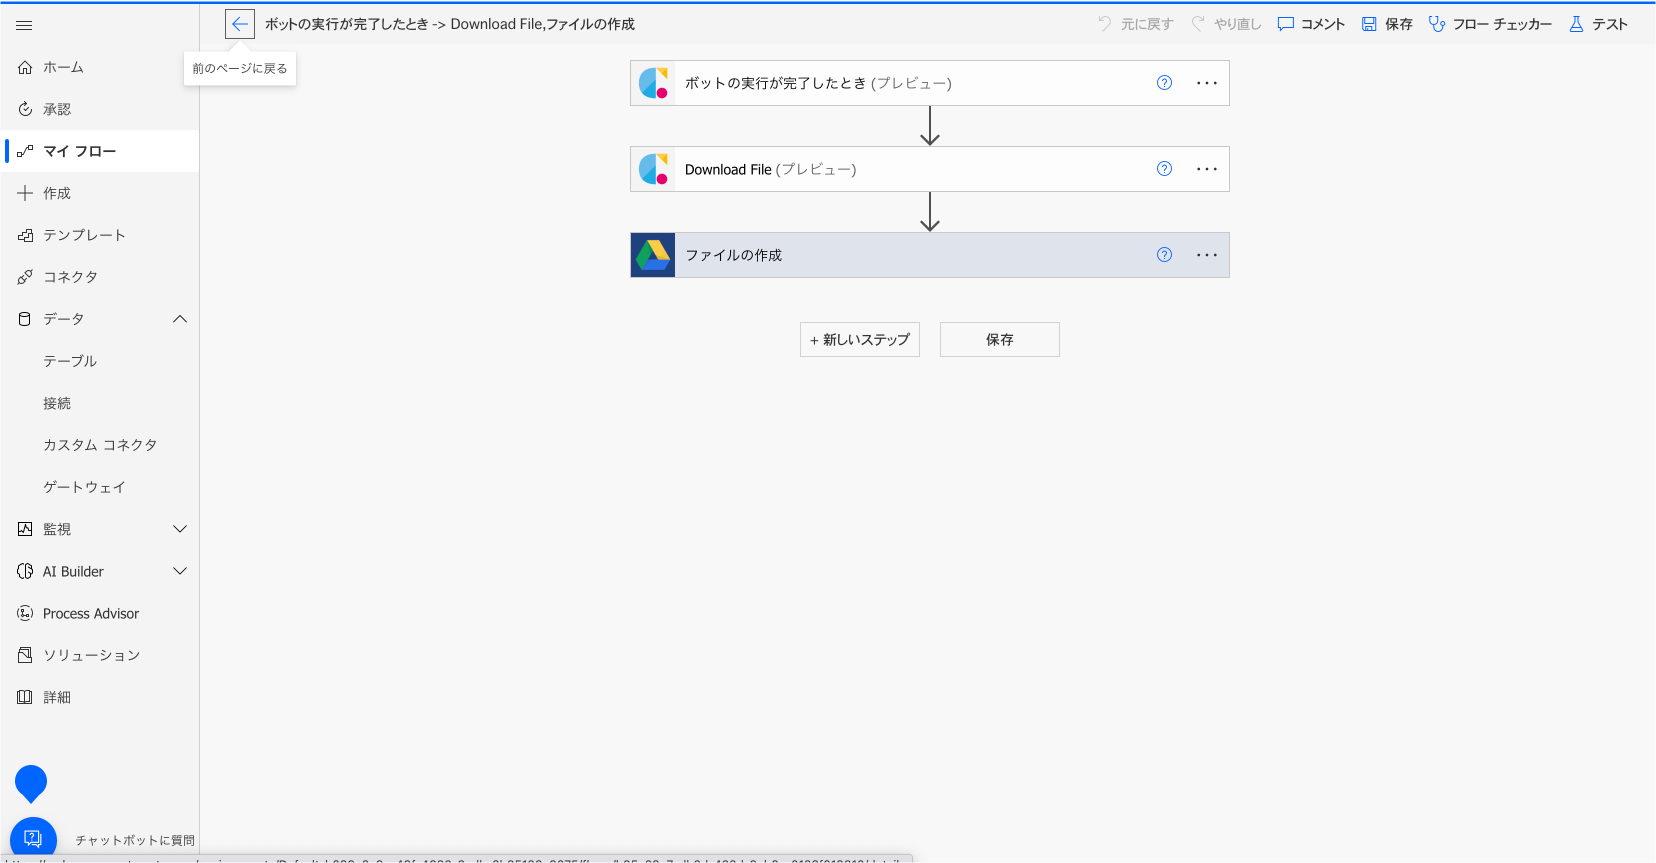
Cloud BOT(BOT の実行が完了したとき)
BOT実行が完了した際にBOT実行結果を取得します。
Cloud BOT(ファイルのダウンロード / Download File)
クラウドBOTへファイルを転送します。
Google Drive(ファイルの作成)
Google Driveへファイルを作成します。
Cloud BOT(BOTの実行が完了したとき)を設定する
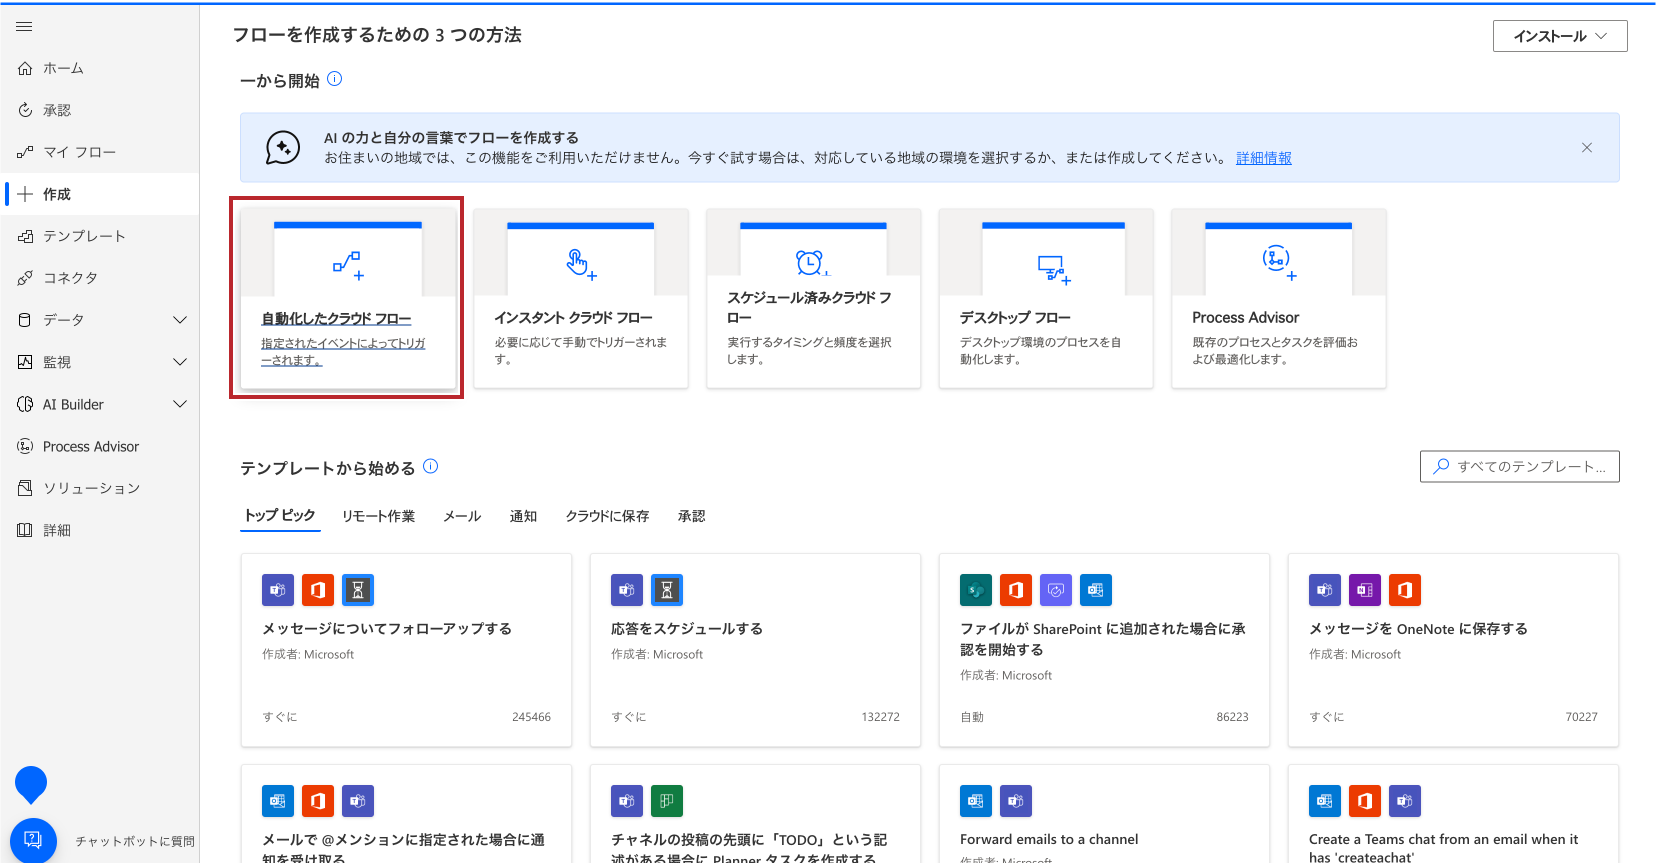
1.画面左部ナビゲーションメニューから"作成"をクリックし、"自動化したクラウドフロー"を選択します。
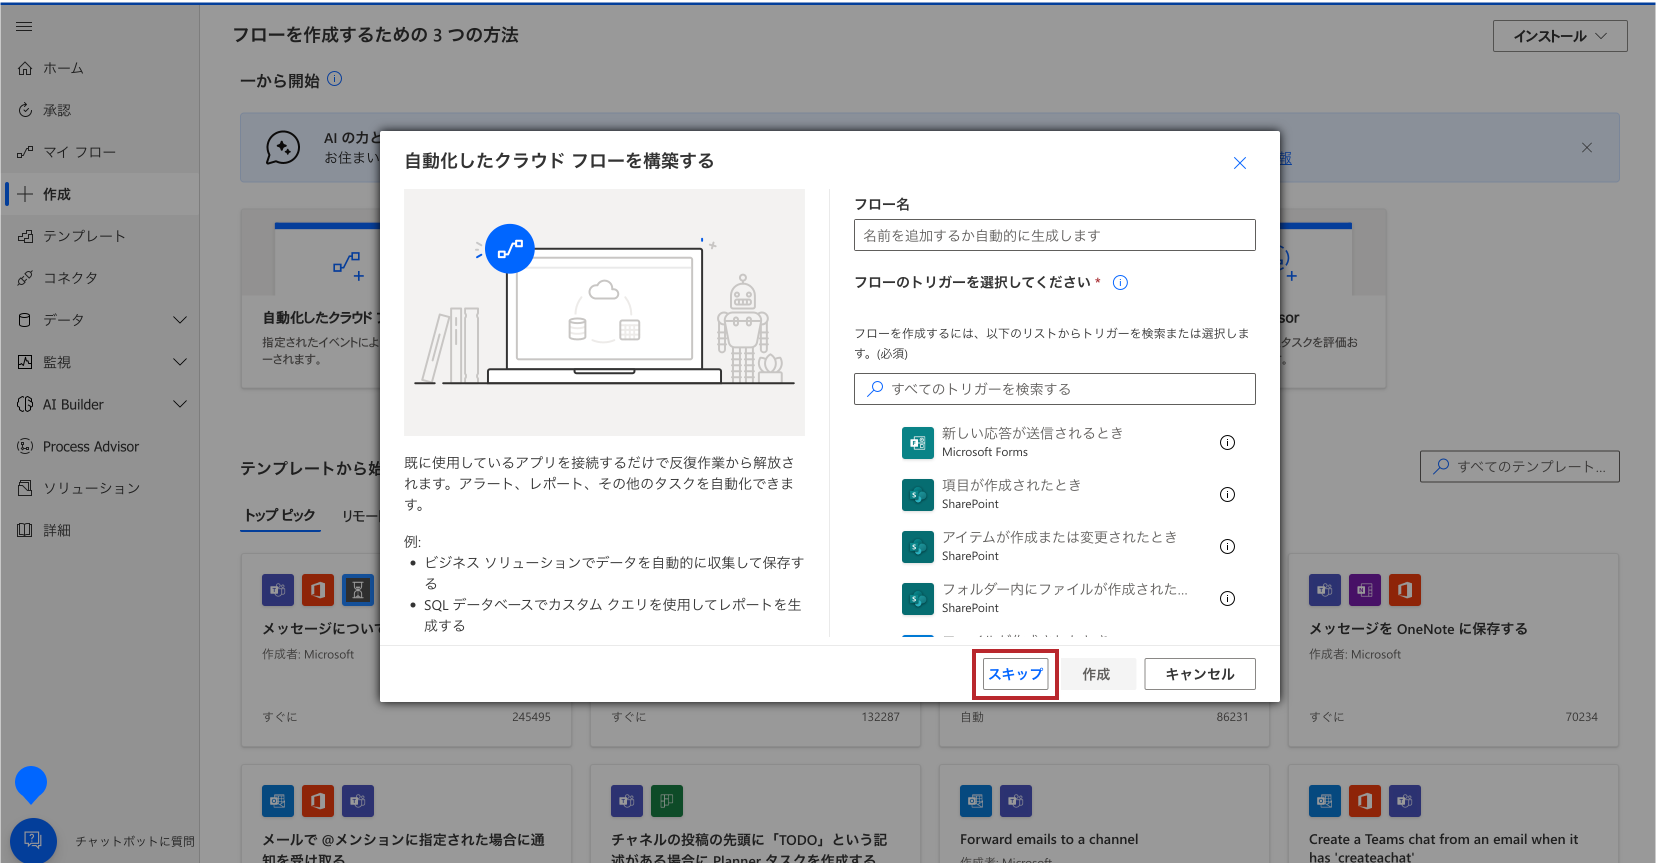
2. "自動化したクラウド フローを構築する"のモーダルウインドウが表示されますが、"スキップ"ボタンを押します。
3."Cloud BOT"と検索し、アイコンをクリックします。
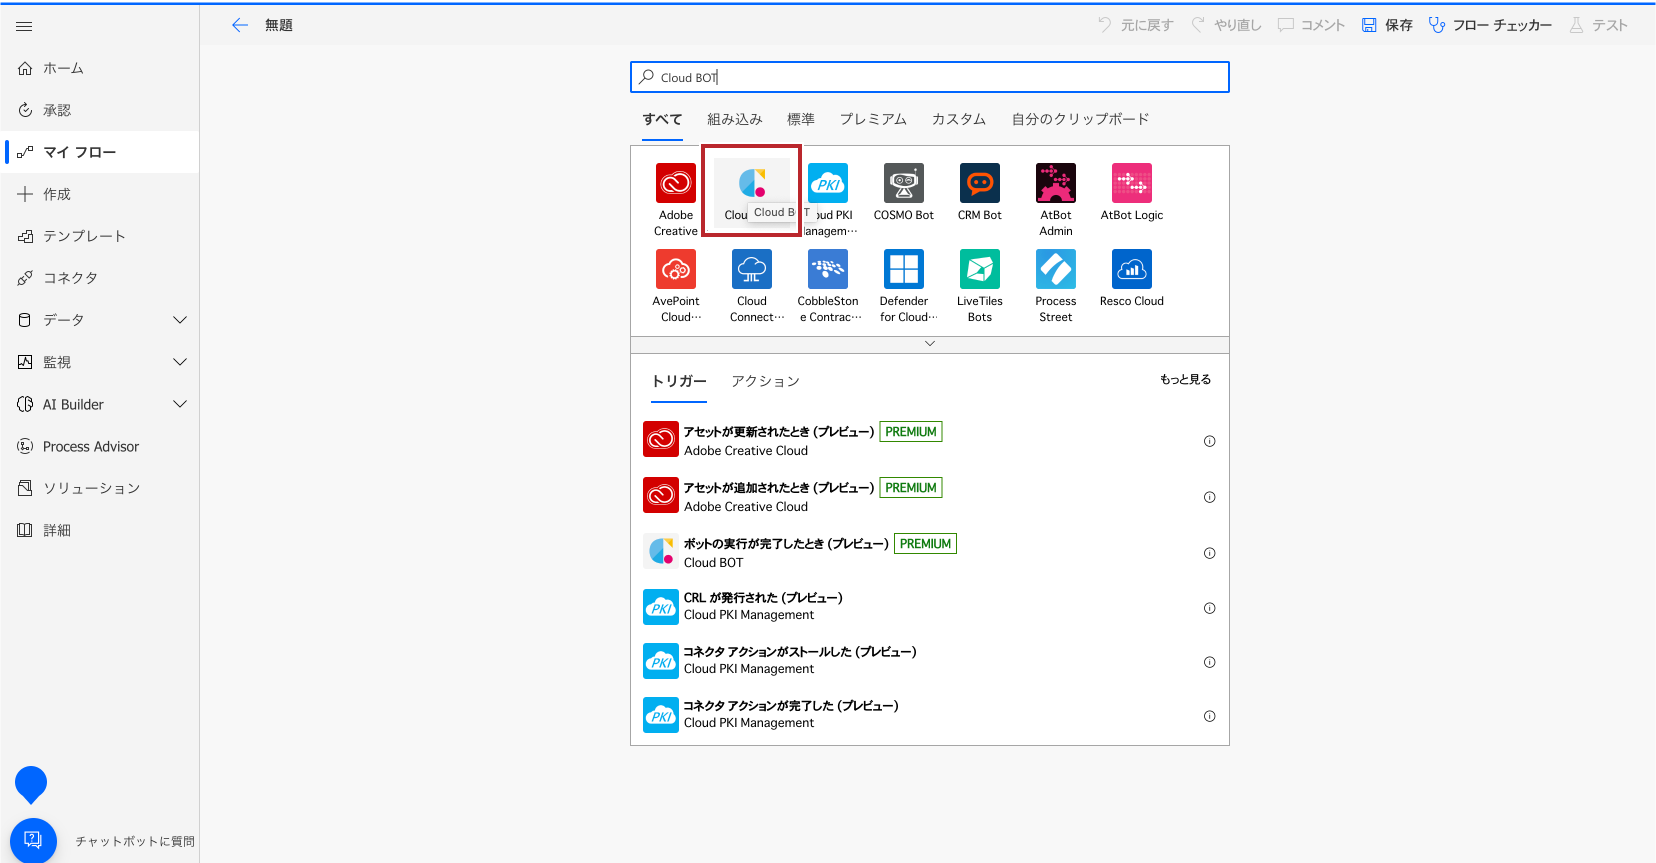
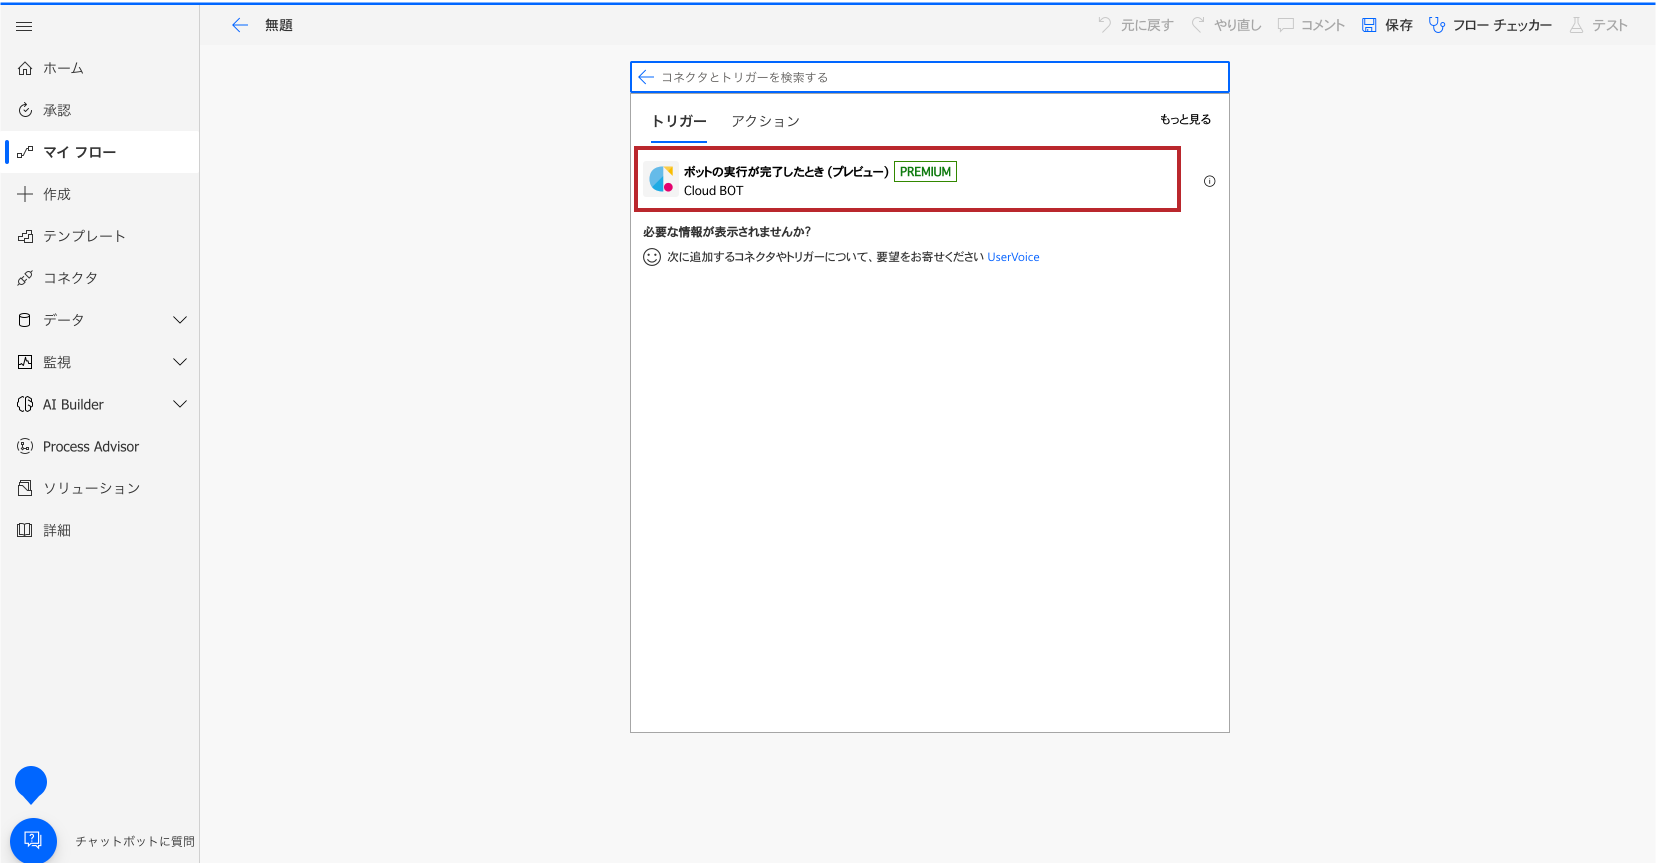
4.トリガーの"BOTの実行が完了したとき"を選択します。
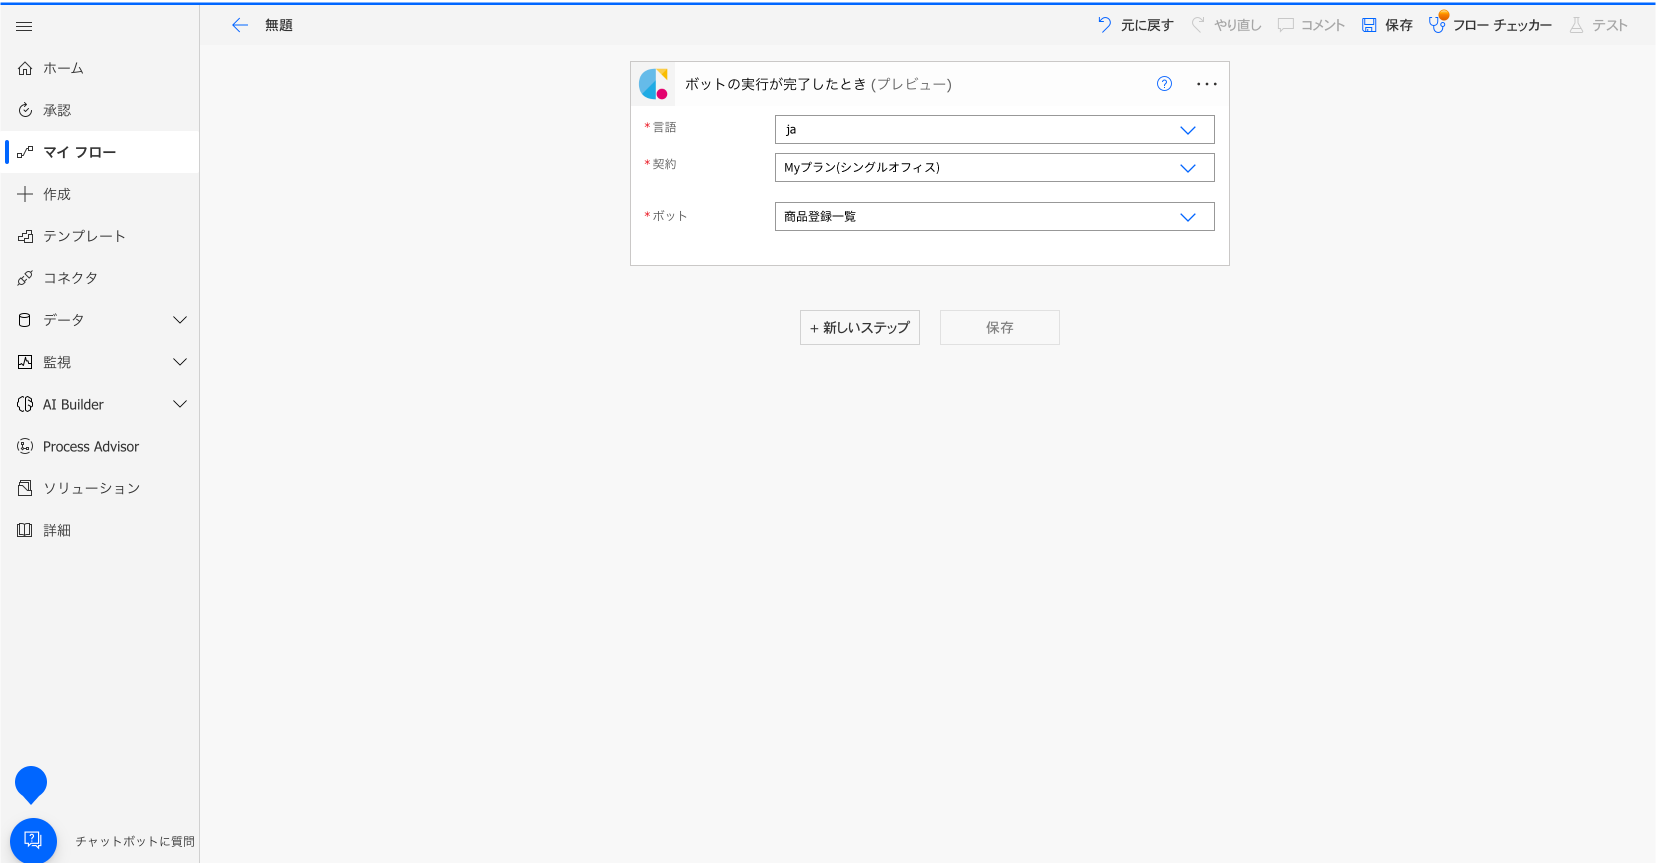
5.トリガーの設定をします。設定値についてはこちら。
*接続がない場合は接続を作成します。接続の作成についてはこちら。
Cloud BOT(ファイルのダウンロード / Download File)を設定する
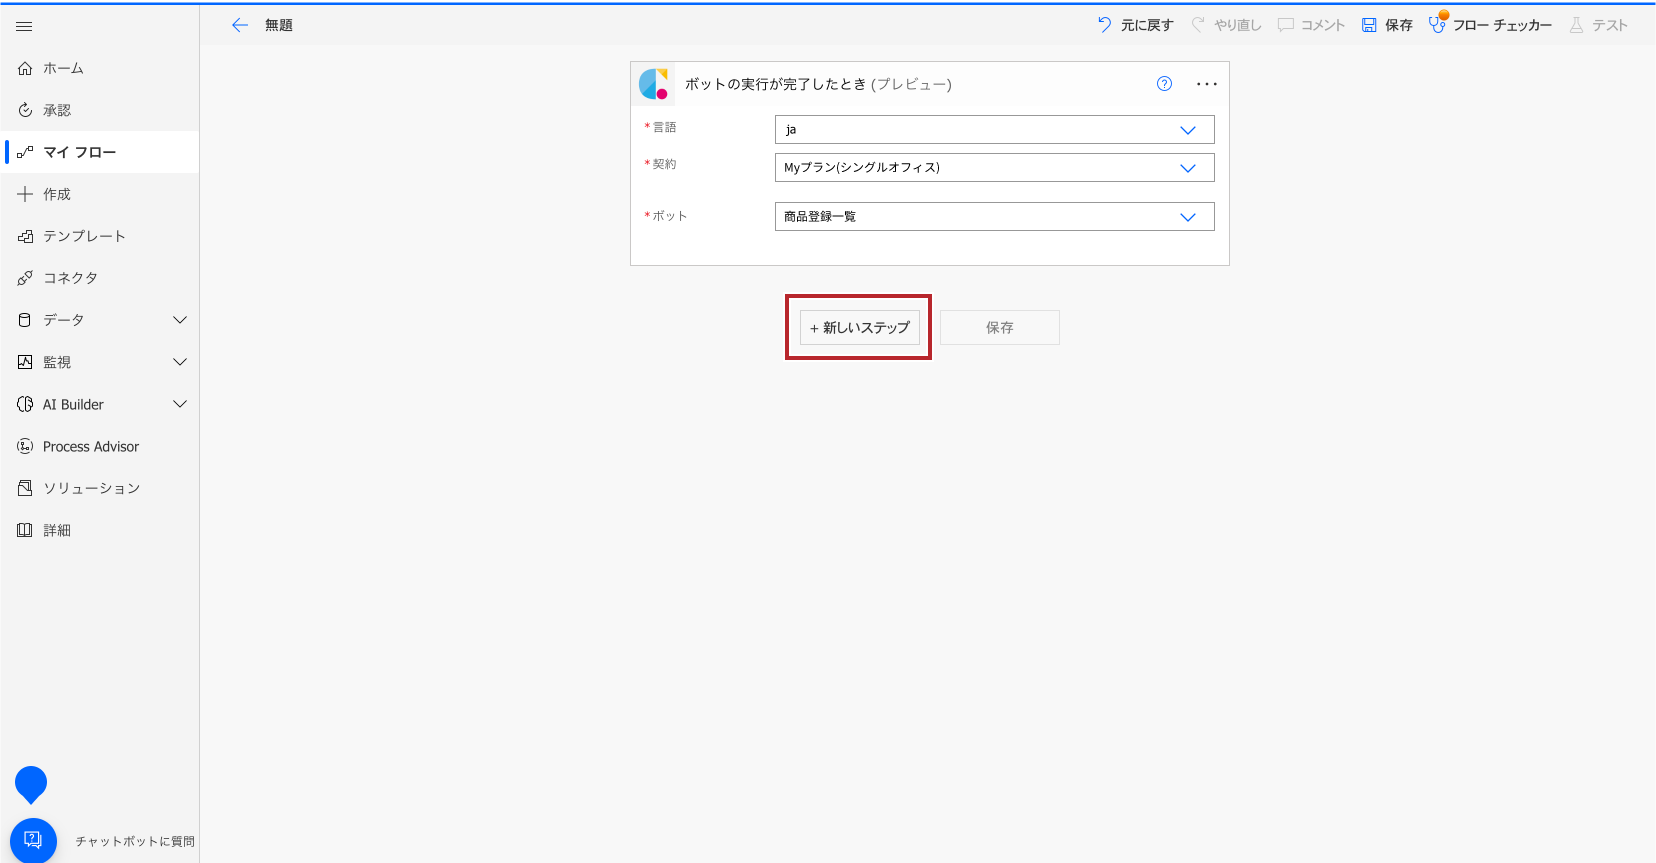
1."新しいステップ"を選択します。
2."Cloud BOT"と検索し、アイコンをクリックします。
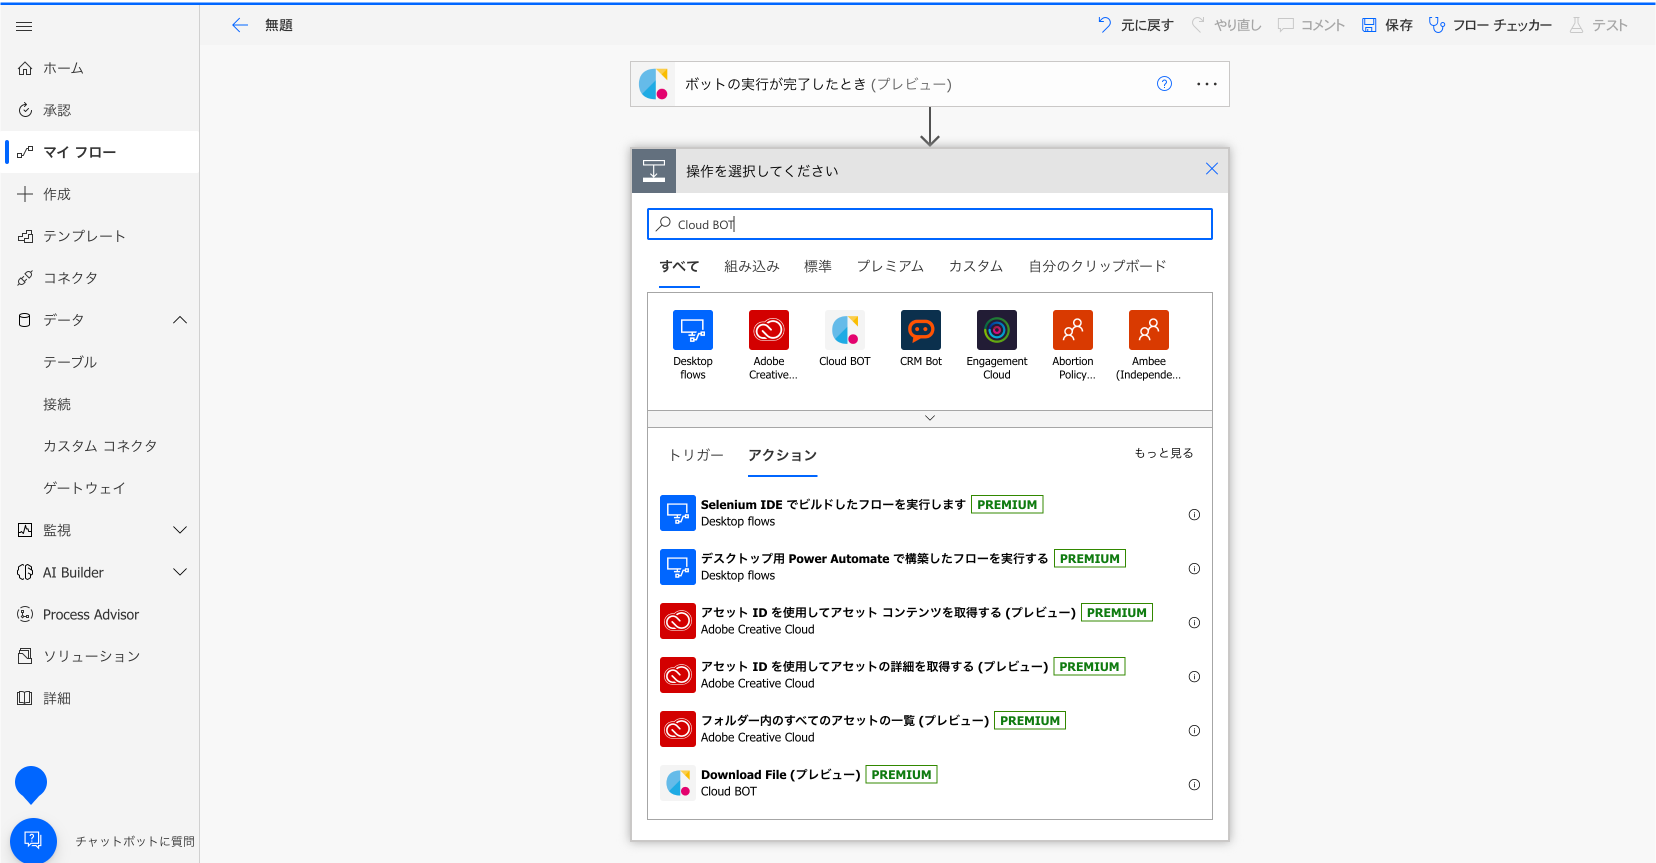
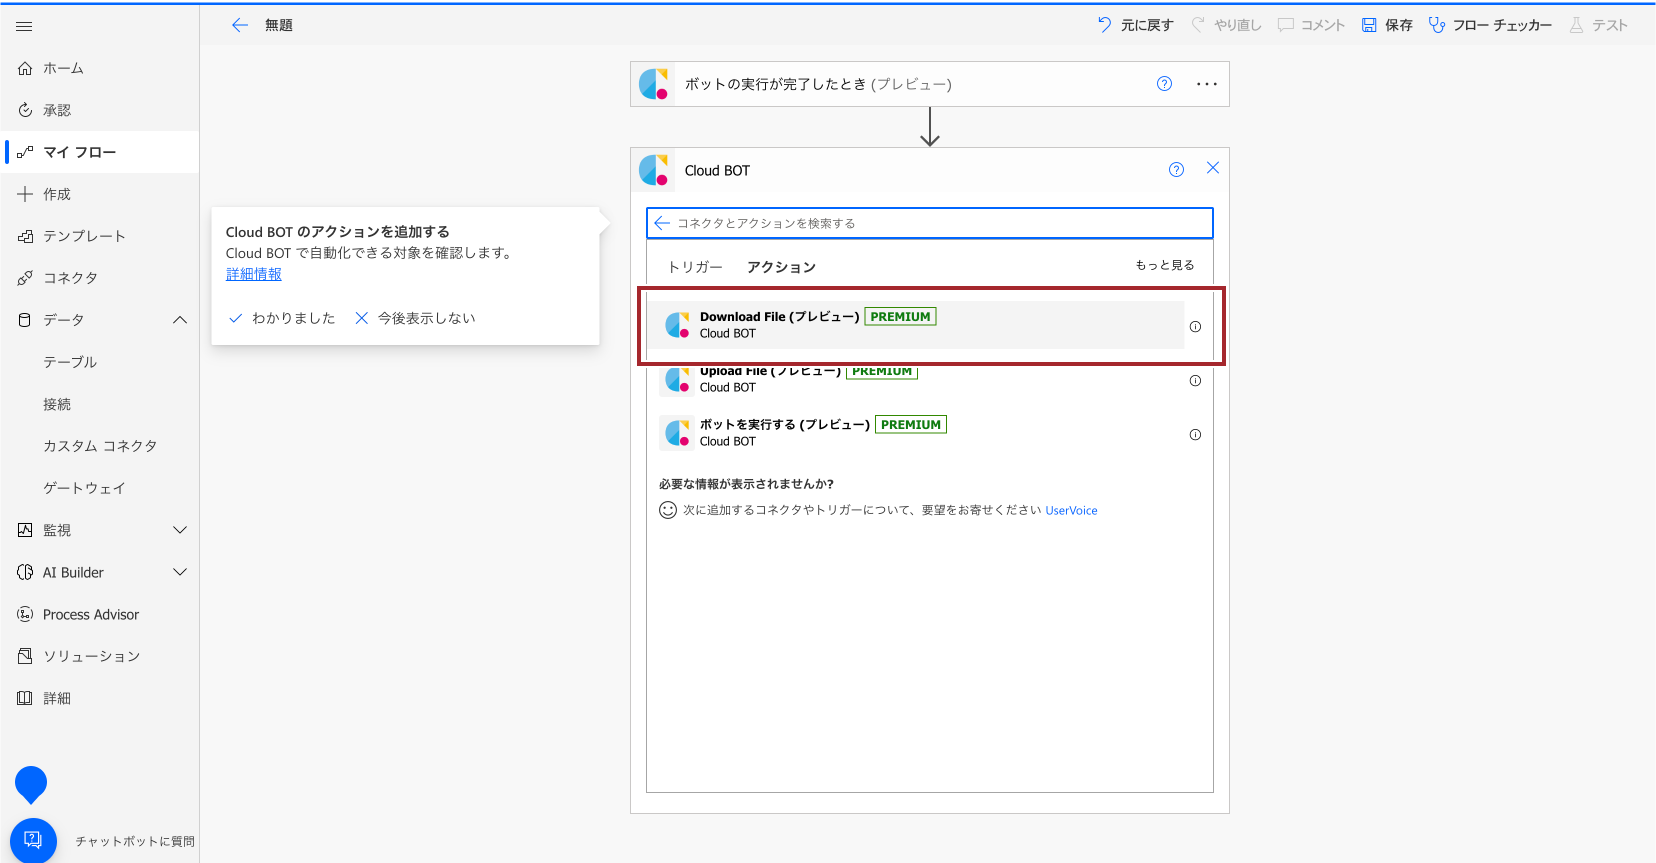
3.アクションから"ファイルのダウンロード / Download File"を選択します。
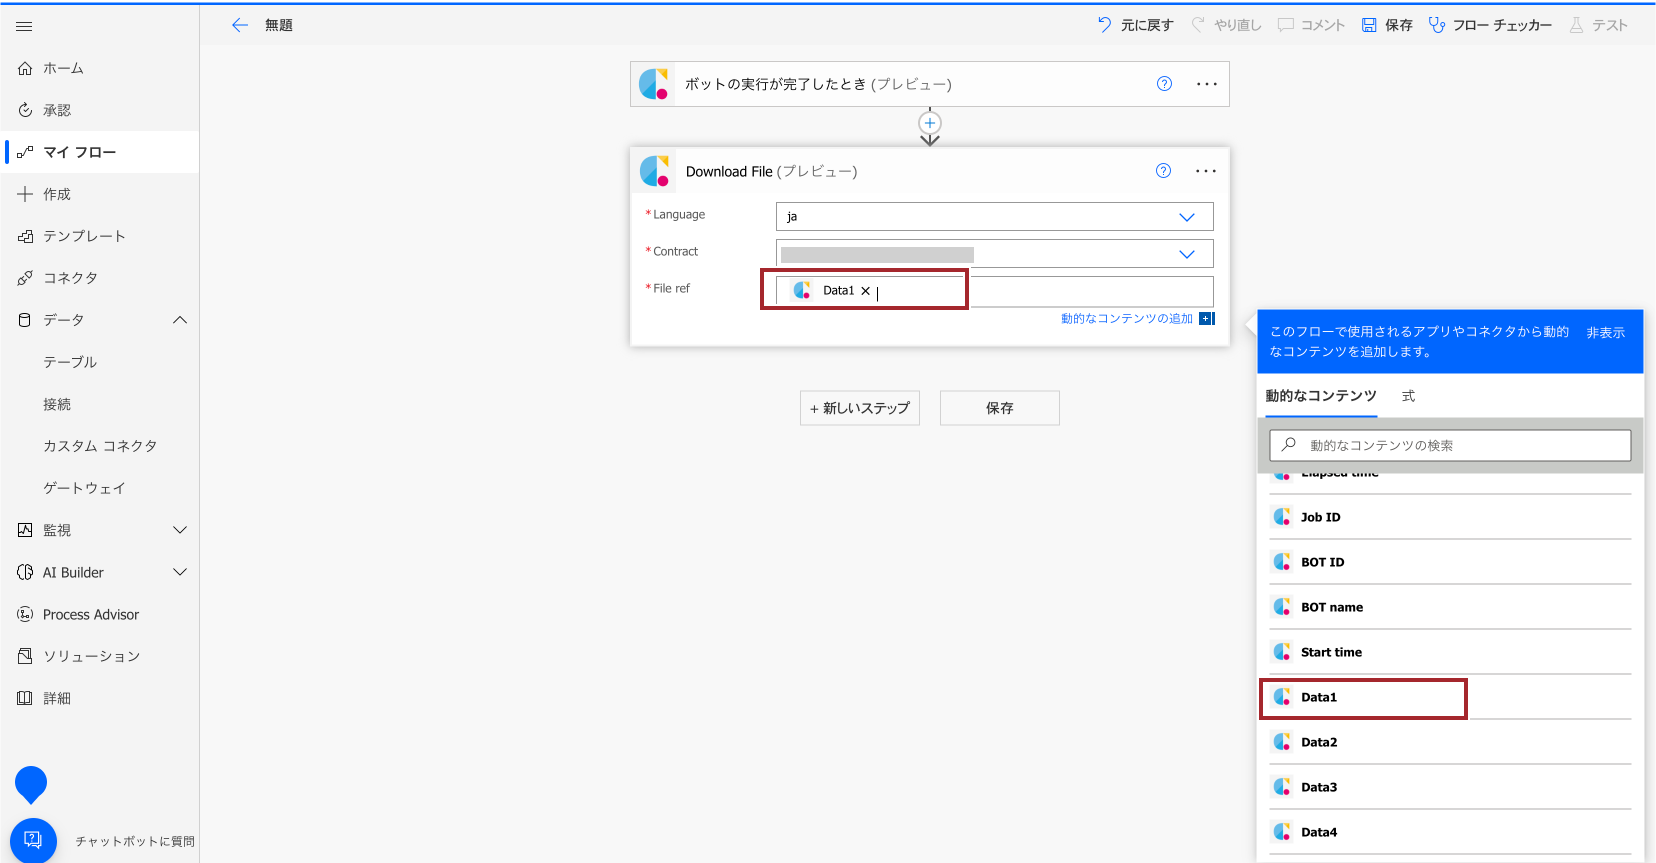
4.アクションの設定をします。前アクション(BOTの実行が完了したとき)から得たファイルデータを指定します。設定についてはこちら。
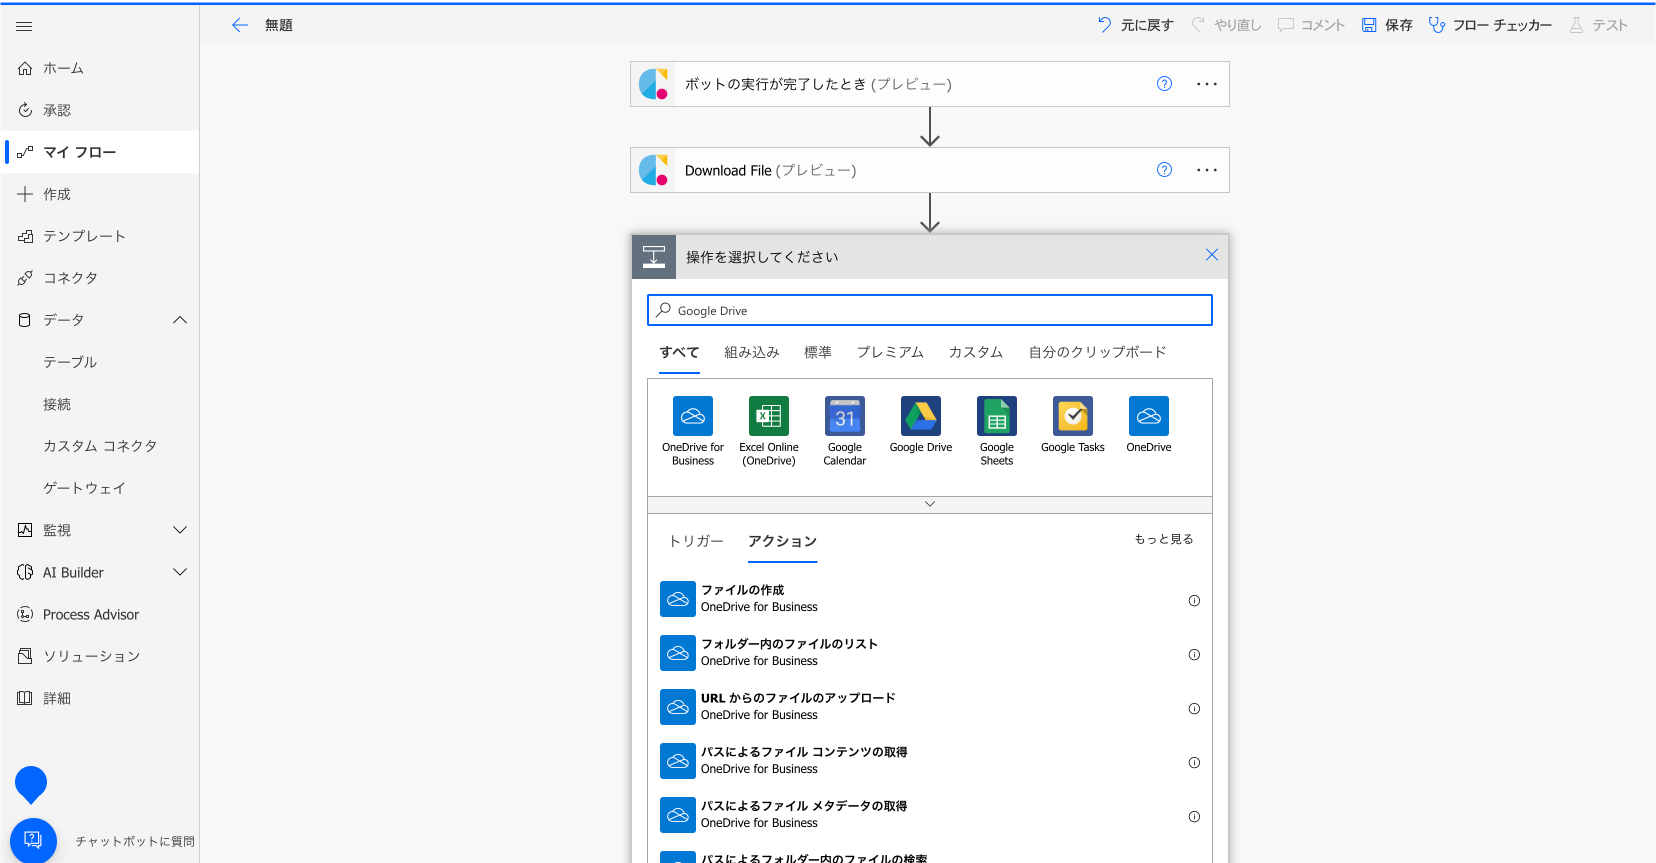
Google Driveを設定する
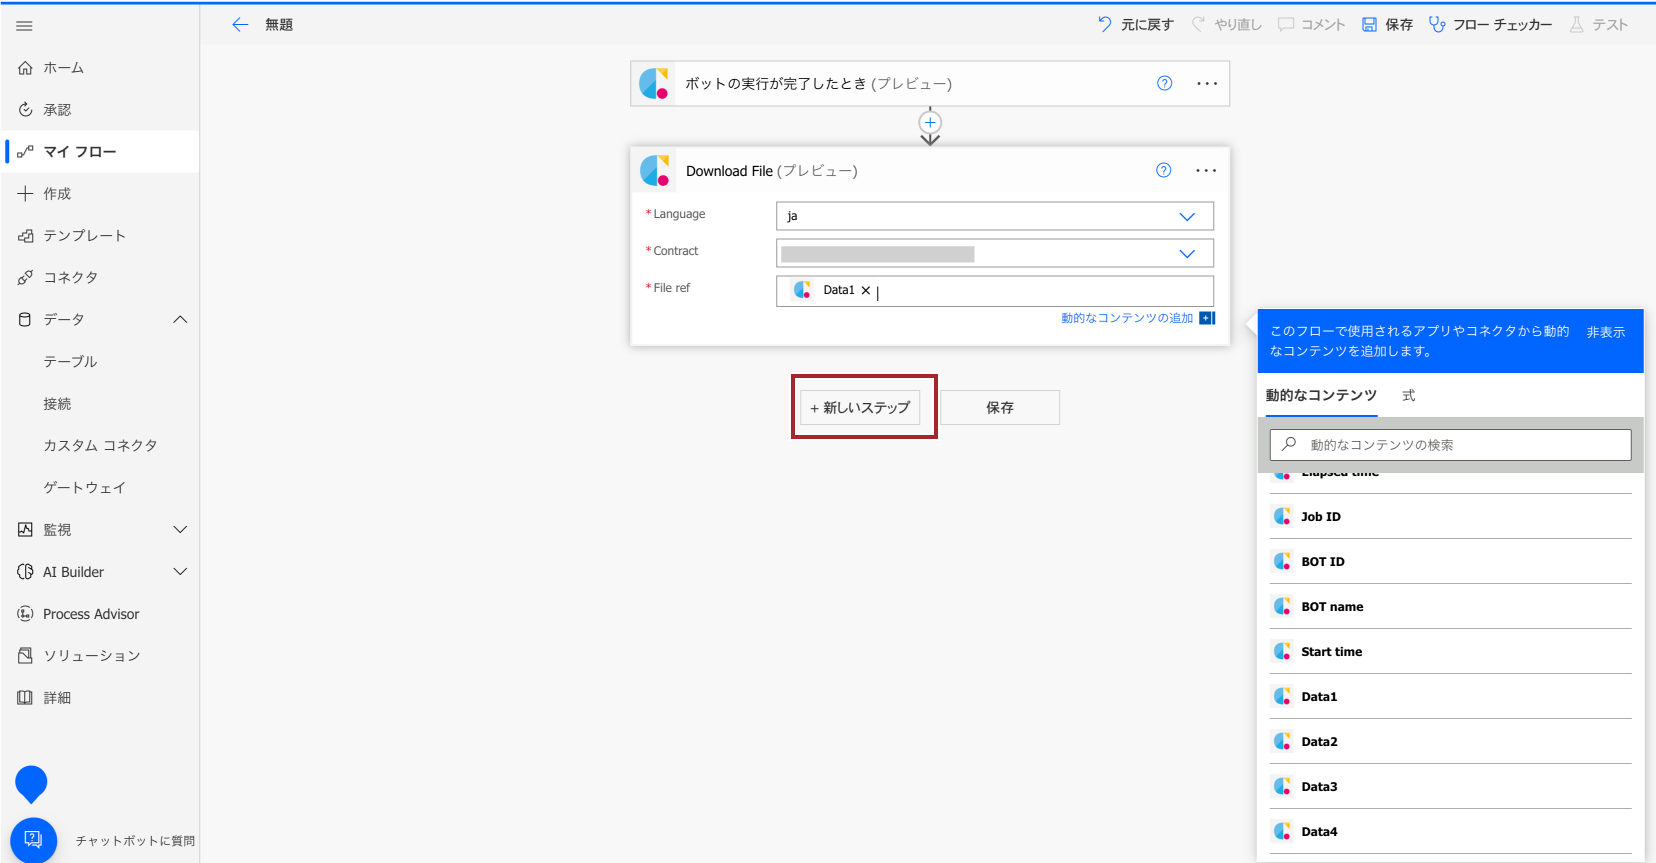
1."新しいステップ"を選択します。
2."Google Drive"と検索し、アイコンをクリックします。
3.アクションから"ファイルの作成"を選択します。
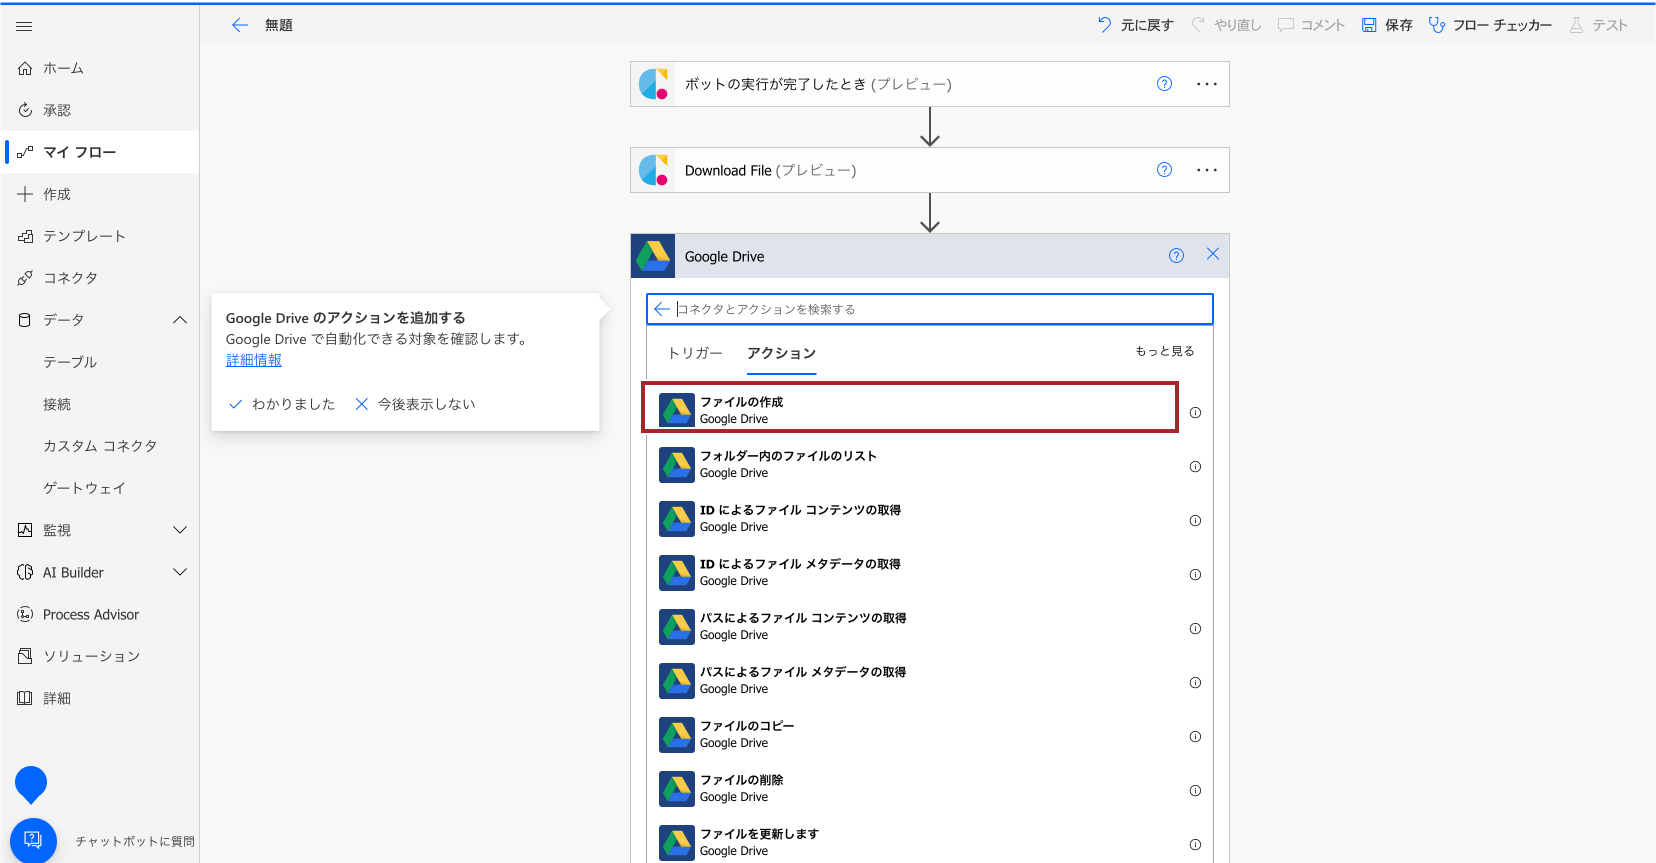
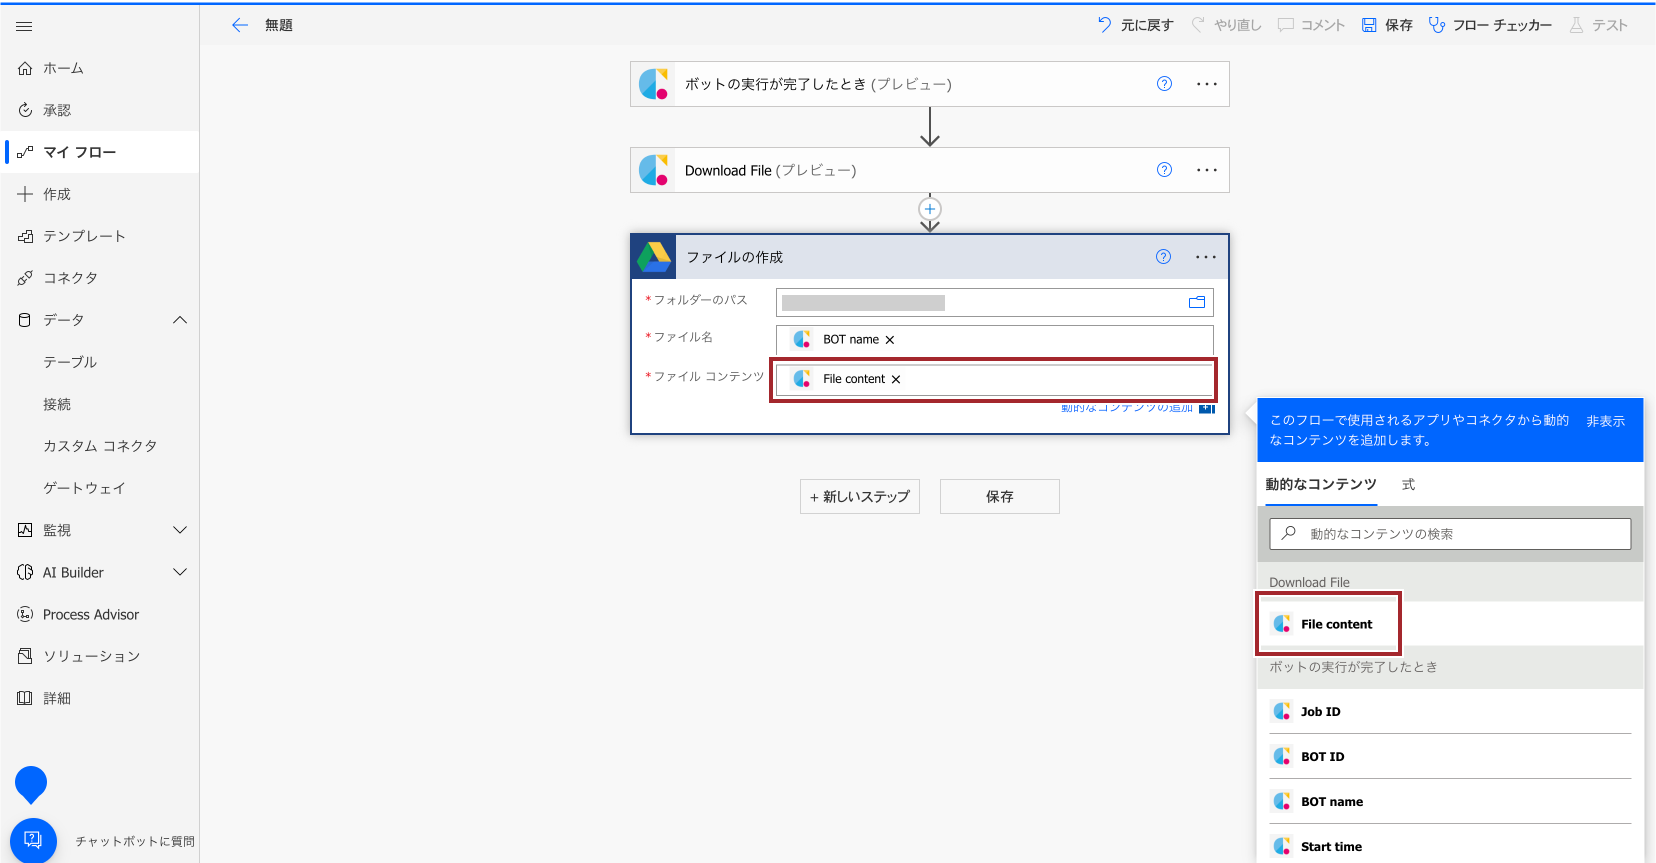
4.アクションの設定をします。"フォルダのパス"、"ファイル名"、前アクション(ファイルのダウンロード / Download File)から得た"ファイルコンテンツ"を指定します。
*接続がない場合は接続を作成します。
フローが作成できました。上部メニュー(画面右上)の"テスト"から動作確認を行います。実行結果が確認できれば設定は完了です。