Google DriveからダウンロードしたファイルをBOTでアップロード

ホーム > 外部サービス連携 > Make > Google DriveからダウンロードしたファイルをBOTでアップロード
シナリオ作成
Google DriveからダウンロードしたファイルをBOT実行でアップロードするシナリオを作成します。
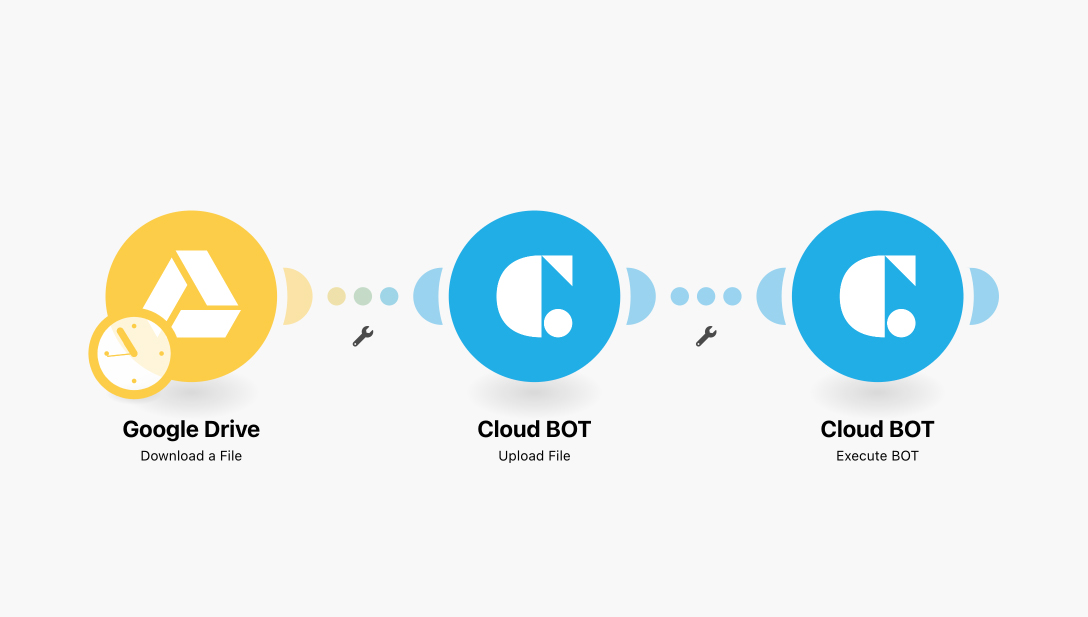
Google Drive(Download a File)
Google Driveからファイルダウンロードします。
Cloud BOT(Upload File)
ファイルデータをクラウドBOTへアップロードします。
Cloud BOT(Execute BOT)
WEBサイトへファイルをアップロードするBOTを実行します。
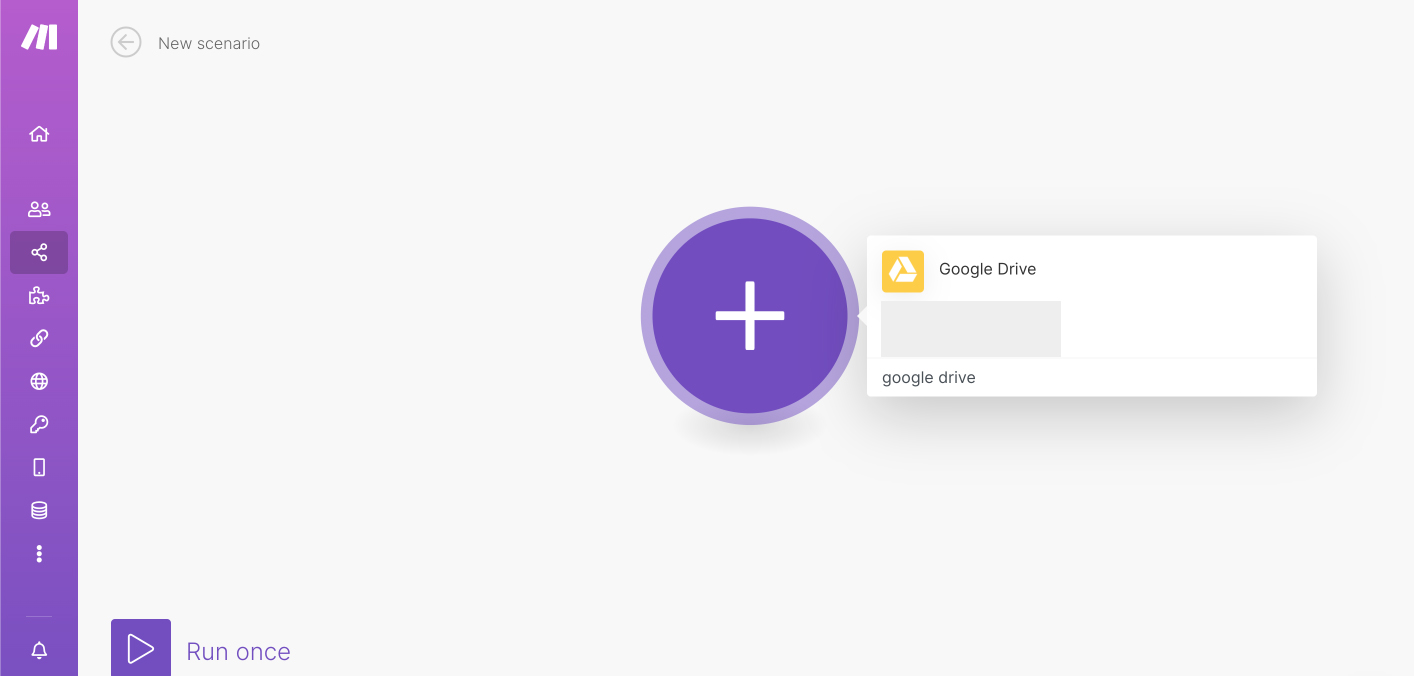
Google Driveを設定する
1. "Create a new scenario"をクリックし、シナリオを作成します。
2. プラスのアイコンを押し、Search欄で"Google Drive"と検索、選択します。
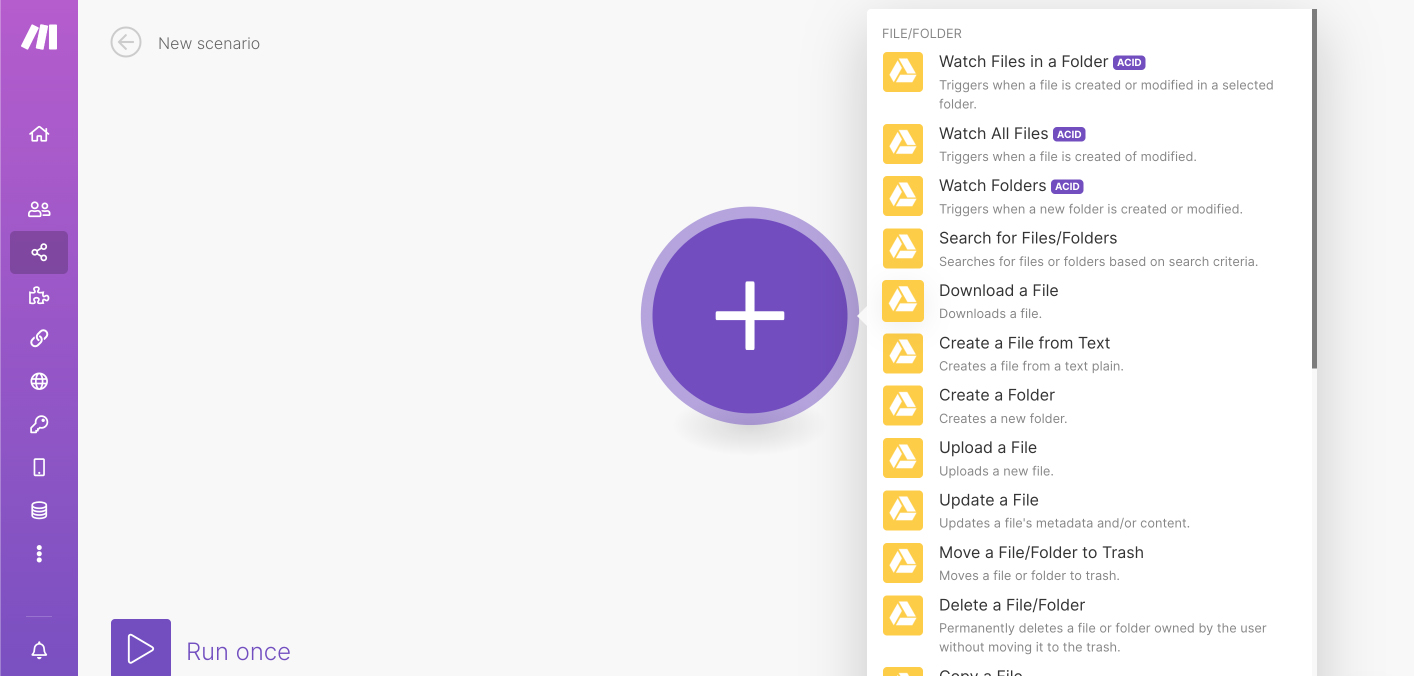
3. "Download a File"を選択します。
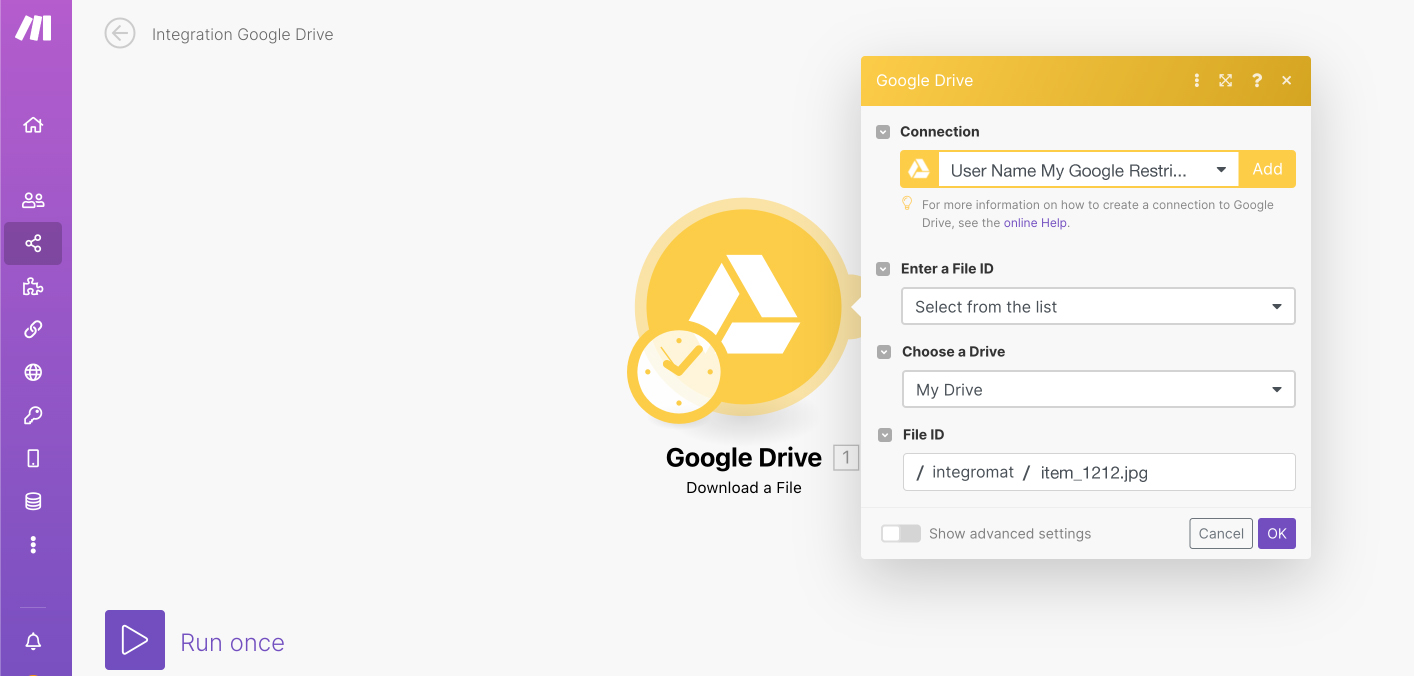
4. モジュールを設定します。Enter a File ID、File IDを設定します。
*Connectionがない場合はConnectionを作成します。
*下記はファイルIDの入力(Enter a File ID)を"Select from the list"にしている場合の入力例です。
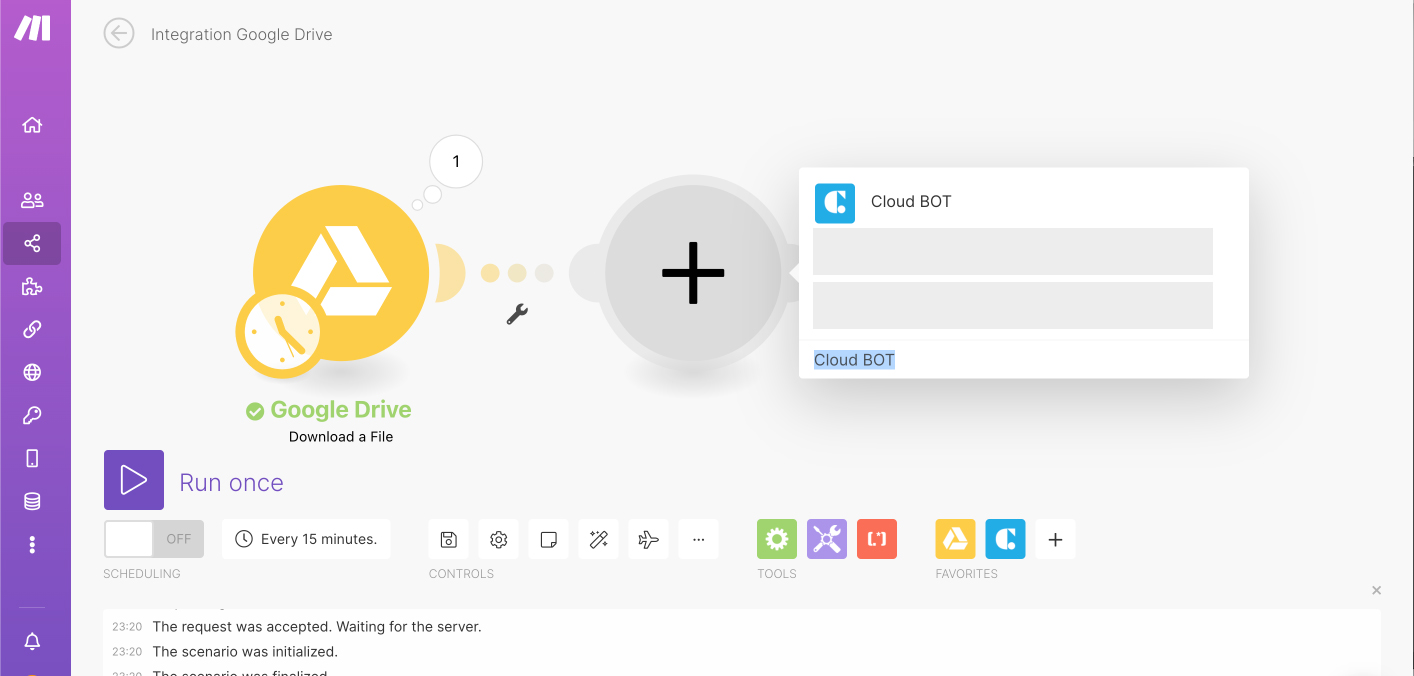
"Run Once"をクリックし、動作確認を行います。実行結果が確認できれば設定は完了です。
Cloud BOT(Upload File)を設定する
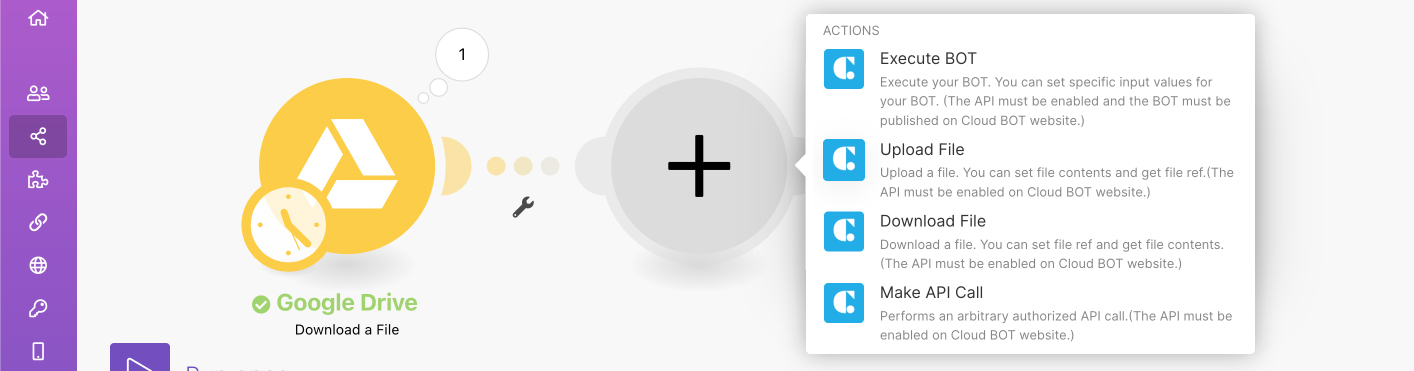
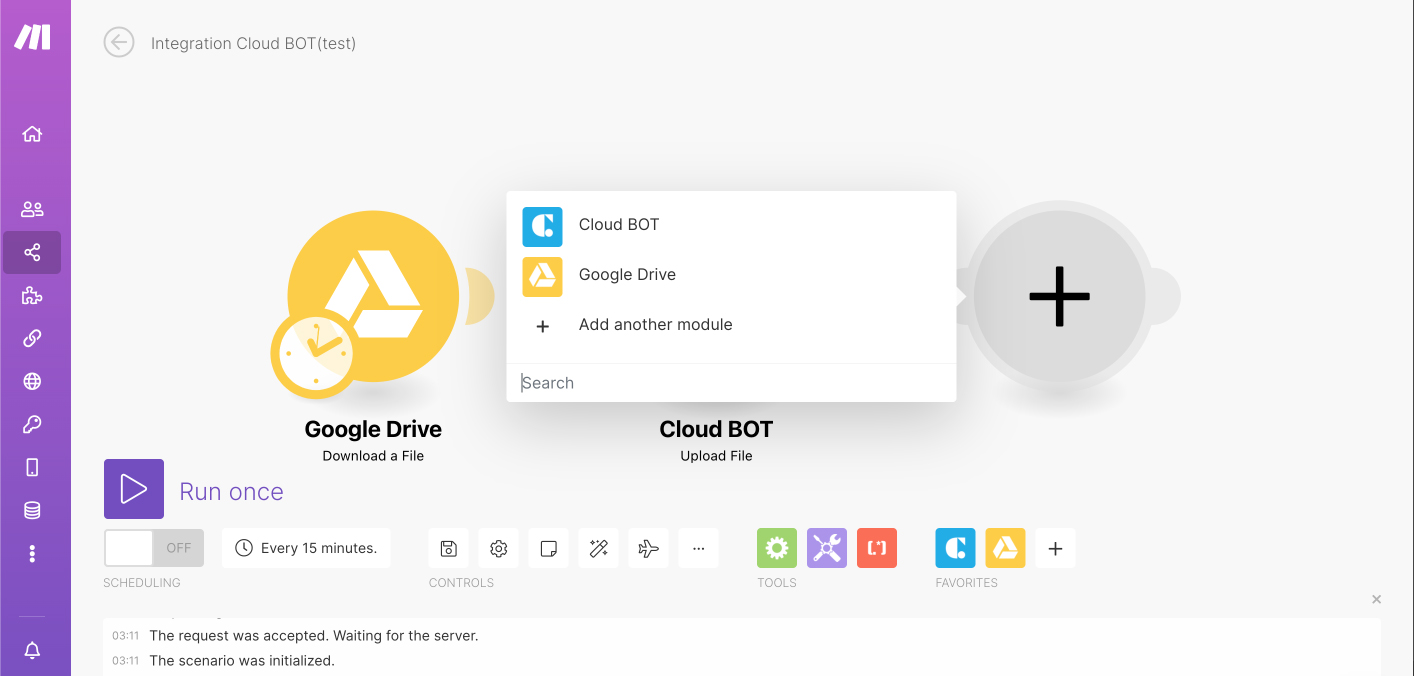
1. アイコン横にマウスオンすると、"Add another module" と表示されます。"Add another module"をクリックすることで新しいモジュールを追加できます。Search欄で"Cloud BOT"と検索、選択します。
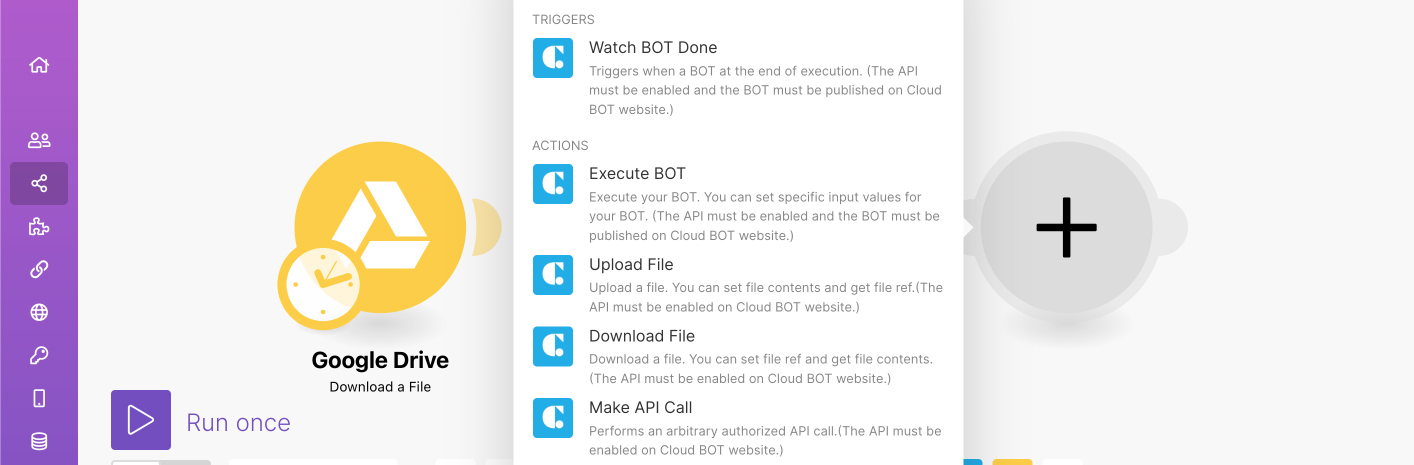
2. "Upload File"を選択します。
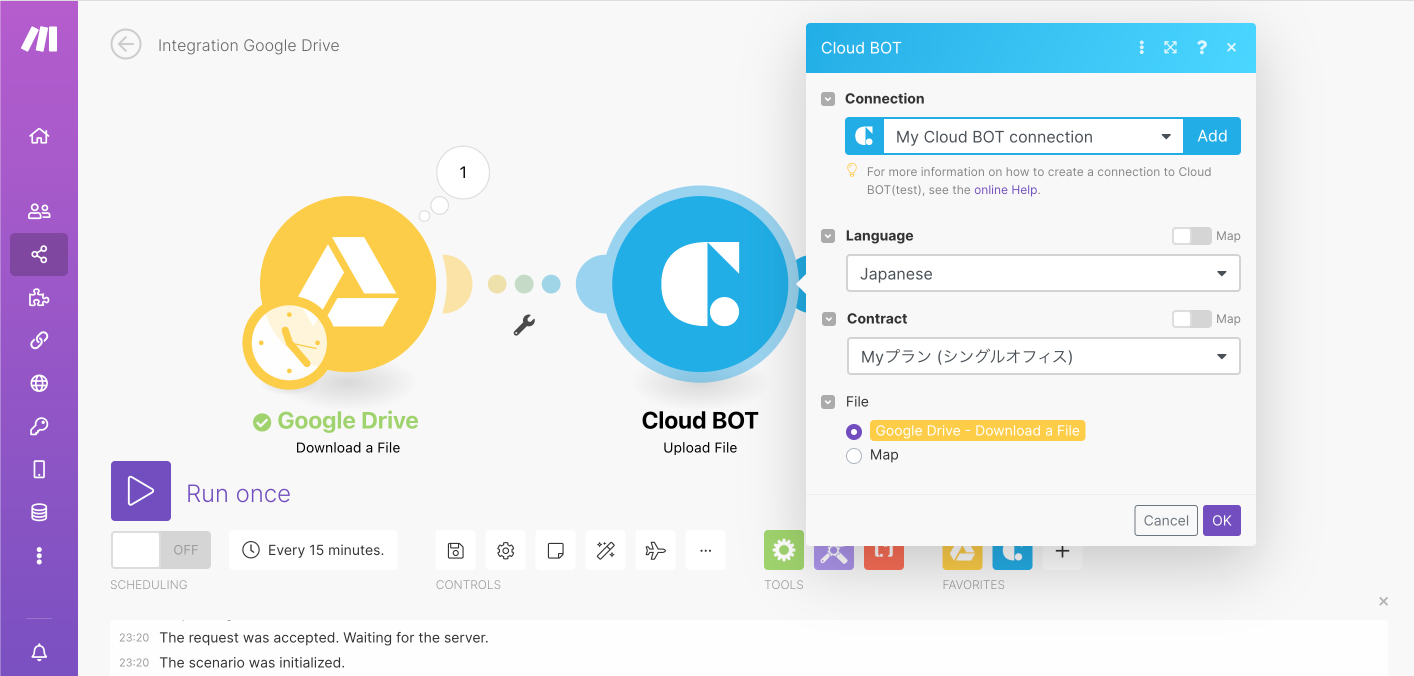
3. モジュールを設定します。設定値についてはこちらをご覧ください。
*Connectionがない場合はConnectionを作成します。Connectionの作成についてはこちら。
*画像の例では、モジュールがGoogle DriveのFileを自動識別しています。
"Run Once"をクリックし、動作確認を行います。実行結果が確認できれば設定は完了です。
Cloud BOT(Execute BOT)を設定する
1. "Add another module"をクリックし、Search欄で"Cloud BOT"と検索、選択します。
2. "Execute BOT"を選択します。
3. モジュールを設定します。設定値についてはこちらをご覧ください。
*Connectionがない場合はConnectionを作成します。Connectionの作成についてはこちら。

Upload Fileモジュールで得たFile refを値に設定できます。

"Run Once"で動作確認を行い、実行結果が確認できたら"Save"をクリックします。これでシナリオの作成は完了です。